
You may already know that with FormAssembly you can display Salesforce data on website forms, but did you also know you can display images from Salesforce? In this blog post, we are going to take a look at how we can import images from Salesforce to display on your form. This will allow you to “prefill” new images directly on your form without going back into the Form Builder every time you need to make an update.
→ Want more tutorials like this? Get your copy of the Salesforce + FormAssembly Tutorial Roundup.
Note: This is a somewhat advanced use of FormAssembly. If you’re not comfortable editing custom code, you might want to build up those skills before attempting this tutorial. Here is some information from our documentation to get you started. Please note that our Success Team does not support custom code help, however we do work with a number of partners who may be able to assist you, please email us at partners@formassemblycom to learn more.
Example Use Case: Zero-Turn Riding Mower Service Request
Let’s examine a very real situation for this how-to blog:
It’s May in southern Indiana and that means that my lawn grass is starting to make up for the last sixth months it spent being dormant. I start to get excited. Afterall, nothing beats waking up early on a hot Sunday morning, mowing the grass for a couple of hours, cracking a cold light lager, and watching some sports.
I get to my garage, take the cover of my trusty Hustler only to find out that it won’t start. After a couple of unsuccessful attempts to find and fix the issue, I succumb to the reality – I need professional help. Time to submit a service request. I’m lucky because my local small engine dealer has a very user-friendly interface with pictures that will help me to submit my requests in minutes.
For the purpose of the tutorial, we’re only going to build out the catalog part of the service request, where all supported models are listed and the user can choose one of them. We want that information to be fed from Salesforce and we want to import the image of the product from Salesforce with the record. Let’s see how we can accomplish that.
Form Setup
The form will not include any input fields – just some labels for the respondents to select the right model.
Add a section to the form and make it repeatable – each model will be shown as its own repetition of this section.
Within the section, add an uneditable text field for the model name – we will make it look like a label later. Add a hidden field for the URL of the image that you’re going to show. Lastly, add a text element and populate it with the HTML code, like this one: <img src=“” alt=“” >

After you’re done, your form should look something like this:

Salesforce Setup
Note: Your Salesforce setup can be completely different from the one I showcase here. My goal is to outline the requirements for this use case to work.
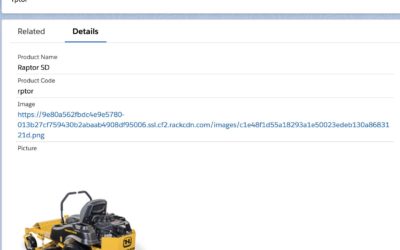
We’ll need 2 fields in Salesforce – one to store a publicly hosted URL of the picture and a formula field to show the image in Salesforce. The formula field has nothing to do with the form, it’s just a visual representation of the link in Salesforce. Since FormAssembly can work with any object, it doesn’t matter which one you use. In this example I am using Product object.
Connector Setup
The connector setup to allow you to display Salesforce data and images on your website is fairly simple. We just need to map the name and the URL of the image to the repeatable section of our form. Make sure to set the lookup to repeat fields if more than one record is found.

Import an Image from Salesforce to the Form Using JavaScript
Here’s the fun part – dynamic images! The idea is to grab the value of the URL field and put it inside of src property of img elements. We’re going to use some JavaScript to achieve that.
<script src="https://ajax.googleapis.com/ajax/libs/jquery/3.6.1/jquery.min.js"></script>
  <script>
  // the script needs to run after all our DOM elements are done rendering
  window.onload = function() {
    // htmlArr with store all img elements
    const htmlArr = $('.htmlContent > img');
    // srcArr with store all URL values for the image. Change tfa_X to the ID of your URL field.
    const srcArr = $('input[id^=tfa_X]');
    for (var i = 0; i < htmlArr.length; i++) {
      // In a loop, we are replacing sec property of img elements with the URL from the corresponding text field
      htmlArr[i].src = srcArr[i].value;
    };
  };
</script>
At this point your form should look something like this:
(Optional) Making Name Field Look Like a Label
In order to not confuse the respondents, let’s make the model name field look like a label for the Salesforce data we display on the website. It will allow us to keep the flexibility of the prefill connector. In order to do this, let’s use some CSS.
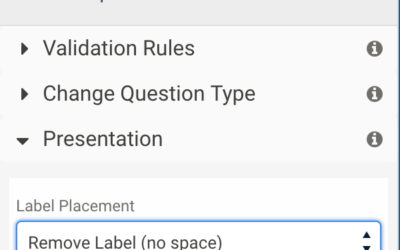
First, let’s remove the actual label.
And add the following in your custom code section:
<style>
   [id^=tfa_X] {
       border: solid #fff 0 !important;
       background-color: white !important;
       box-shadow: none !important;
       padding: 0 !important;
</style>
Replace tfa_X with the id of your Name element. Also, play with CSS properties to get to the style you desire.
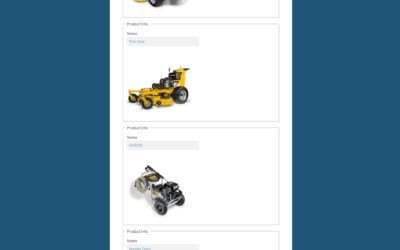
Results

After following these directions to display Salesforce data and images on your website forms, you should end up with a user-friendly list of products like the one above.
The steps outlined in this tutorial could be used in a variety of other applications, including catalogs, applications, surveys, etc. If you want to take this tutorial further, check out our blog on dynamic clickable links to see how you can make these images (or labels) redirect your user to the second form with product information!
Want to see all of our best Salesforce tutorials all in one place? Get your copy of the FormAssembly + Salesforce tutorial roundup here.