FormAssembly already provides secure forms, but there are some situations where you may want an additional level of security to satisfy your customers or internal requirements. For example, when you’re prefilling information from Salesforce into a form, you may want to add an additional verification step before any sensitive information is displayed in a form. FormAssembly uses Salesforce IDs in URLs to prefill information. Because of their complexity, they are safe to use, but if you want additional peace of mind, a two-form process is the way to go.
What you’ll learn: how to create a secure, two-form process
This tutorial will walk you through how to create a two-step process for secure forms featuring an initial landing page that takes basic identifying information and verifies that a person is in Salesforce, and a second form that prefills any needed information and asks the remainder of the questions.
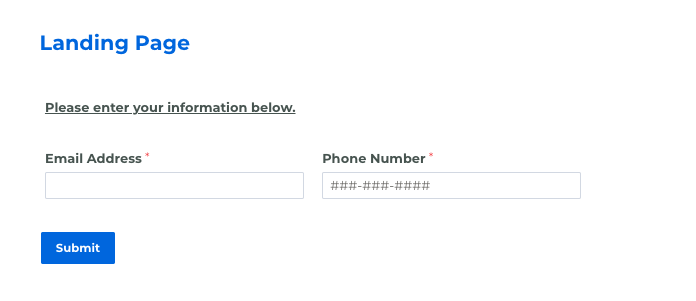
The first form will serve as a landing page where information considered to be unique identifier/s will be collected.
Examples of this are:
- Email address
- A combination of email address and date of birth
- A combination of email address and mobile number
- Employee ID
- Application ID
- Student number
When the first form is submitted, the Submit Connector will query Salesforce using the information provided to check for existing records. We are using the object alias to send over a record ID to the second form. In order for the object alias to work, the step in the connector should be a Create or Update step. Since we are only looking up existing records, we can use an Update step and not map anything.
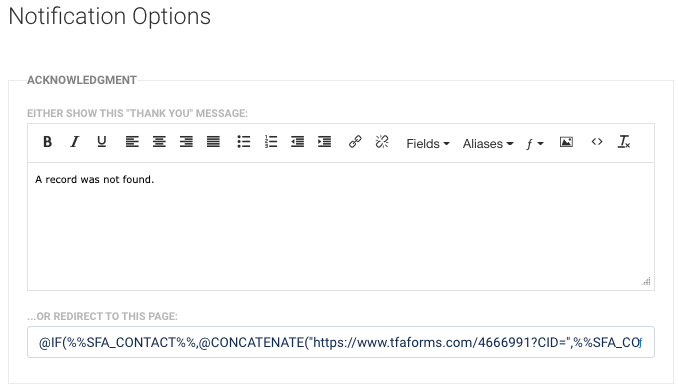
The redirect formula in the notifications page will determine where to send the respondent. If there is an existing contact (an ID exists and gets dropped into the formula), it will redirect to the main form. Otherwise, they can redirect to a custom thank you page where it says a record was not found or display the thank you message instead. Here we are displaying the thank you message if no records are found.
Step-by-step instructions
1. Create the first form and add all necessary form fields.
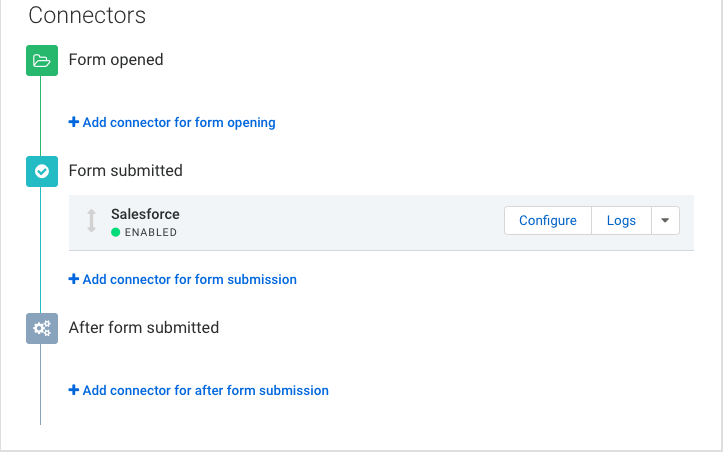
2. Set up the Salesforce connector in the Submit stage of the connector timeline.
3. Add an Update step to look up the Salesforce record.
Ex. Update contact step
Lookup parameters would be email address AND mobile number.
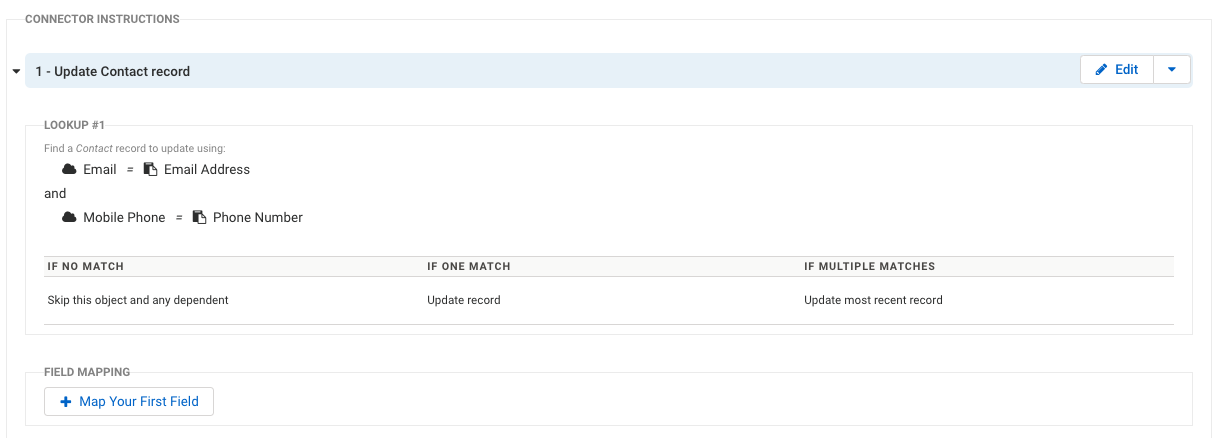
4. For the matching rules:
- If no match, skip
- If one match, update
- If multiple matches, update the most recent record
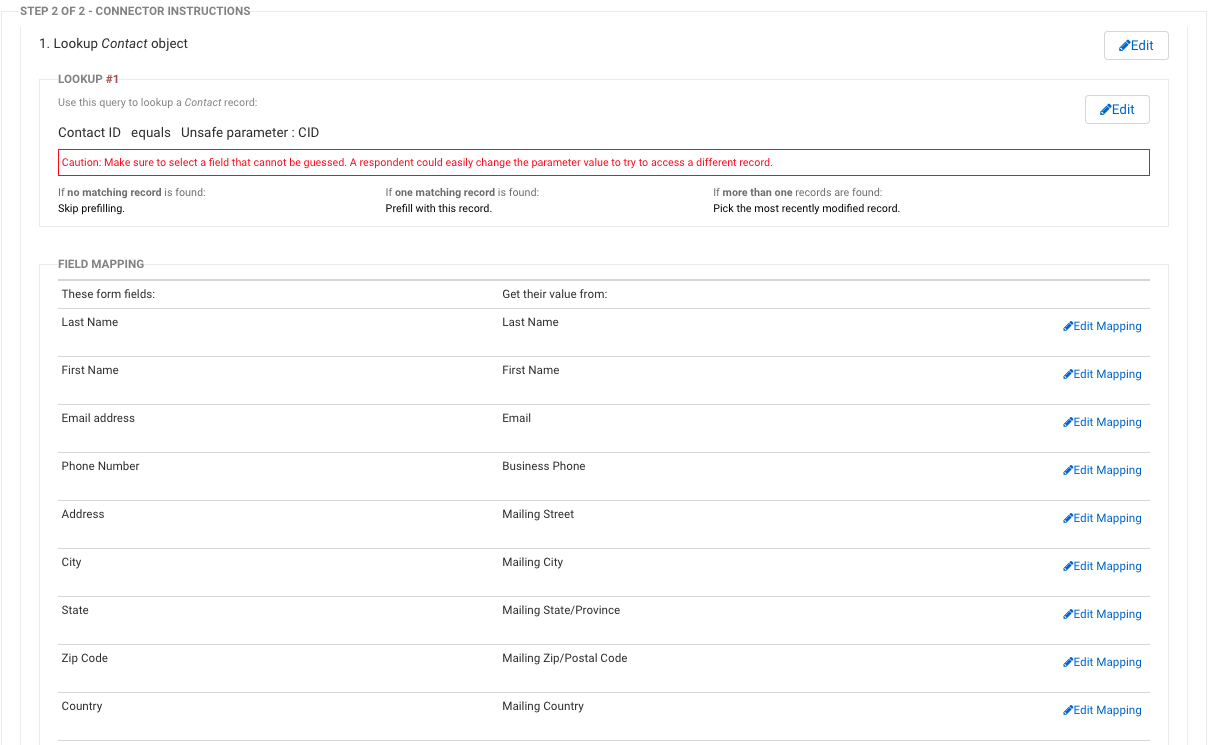
5. Create form two and set up the Prefill Connector
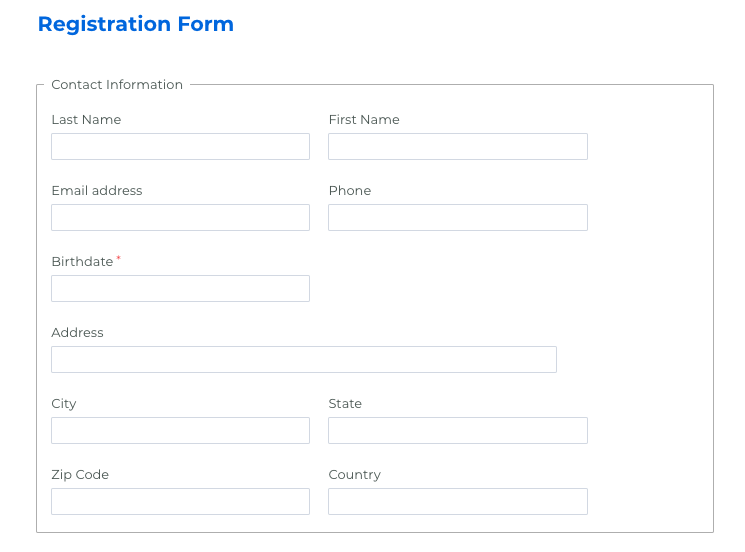
Ex. Lookup contact object using the record ID = unsafe query parameter (CID)
Map the fields if the form needs to be prefilled with the respondent’s information.
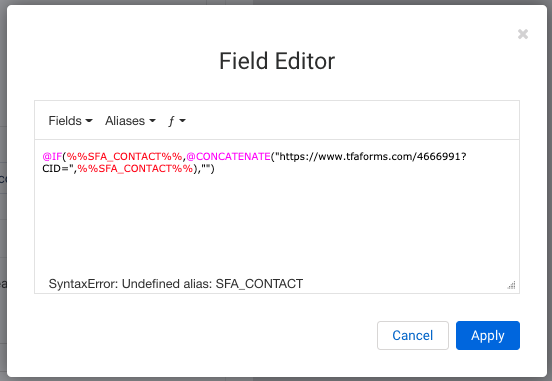
6. Create the redirect formula in the Notifications page of form one. Point to form two and add the query parameter (ex. Contact ID).
- Sample redirect formula: @IF(%%SFA_CONTACT%%,@CONCATENATE(“https://enterprise-demo.tfaforms.net?CID=”,%%SFA_CONTACT%%),””) – make sure the quotation marks are not curly quotes
- CID is the query parameter
- SFA_CONTACT is the object alias
- “” will display the thank you page — make sure these aren’t curly quotes
Test the form!
We hope you enjoyed this tutorial for secure forms. Want more Salesforce tutorials? Click on the link below to get our ebook!
