
How to enroll people into your Salesforce community using a FormAssembly web form
In this blog post, we’re going to show you how to create a Salesforce-integrated FormAssembly form to automate the process of enrolling external customers to your Salesforce Community.
This FormAssembly use case allows more controlled automation of the creation and provisioning of community licenses and lets you fully custom brand the enrollment form and publish it anywhere as opposed to Salesforce’s self-enrollment which takes place only on the community login page.
Using this method, you could engage with new and existing customers through a portal that provides them all account information, manage partner relationships by allowing partners to automatically add new hires or employees to the Salesforce Community, and create a helpdesk-type platform. See how our customer California Quivers is using FormAssembly with Communities here.
Keep reading for a step-by-step explanation of how to execute this in your FormAssembly account.
Form setup
To implement this use case, the first thing you’ll want to do, of course, is set up your form.
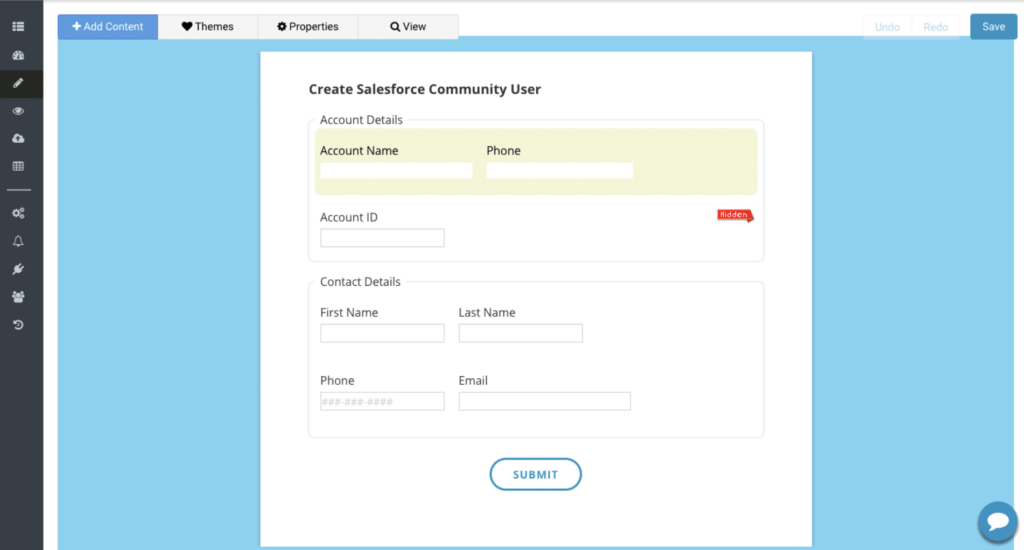
For this example, I’ll use just the required fields and some basic information – First Name, Last Name, Phone, and Email on the Contact record. For the Account information, this will all be prefilled, which we’ll get to in a little bit.
One of the best FormAssembly tricks is using a hidden field for Object IDs. Here, since we know that the Account will already exist in Salesforce, I have added a hidden field for the Account ID so it’s easy to reference when we’re mapping the connectors.
Now that we have all the data points, let’s move on to mapping the connectors.
Connector setup
First, let’s add both the Prefill and Submit Salesforce connectors to our form.
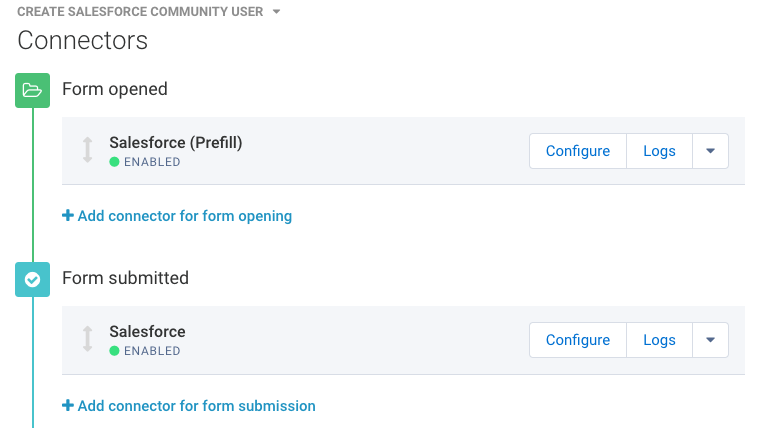
Once we have those in place, we’ll map the Prefill connector and then the Submit connector.
Prefill connector setup
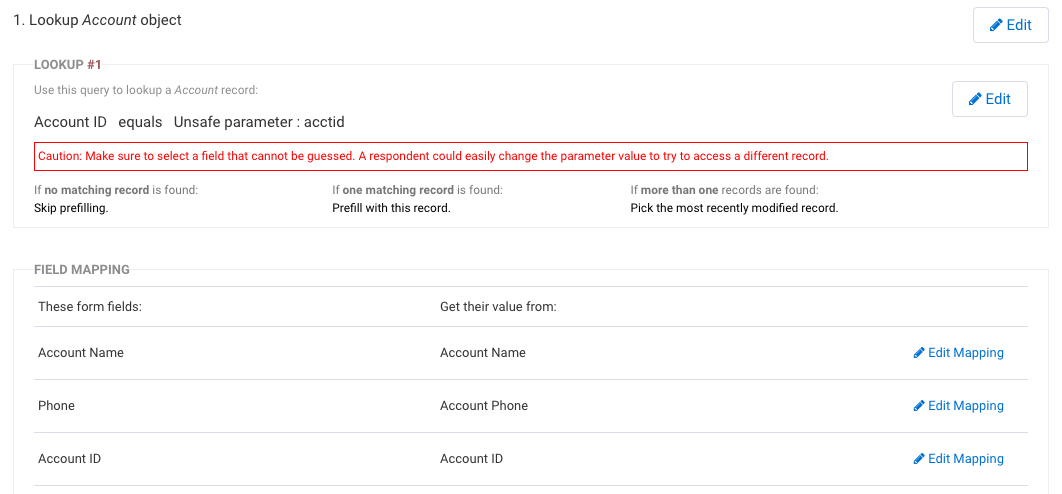
For this example, we’re only going to prefill against an existing Account — any Contact can use this form to enroll. The mapping I have here can be expanded to prefill any Salesforce record, so we could use this form for Contact-specific Communities enrollment.
Submit connector setup
The submit connector is where most of the work will be done.
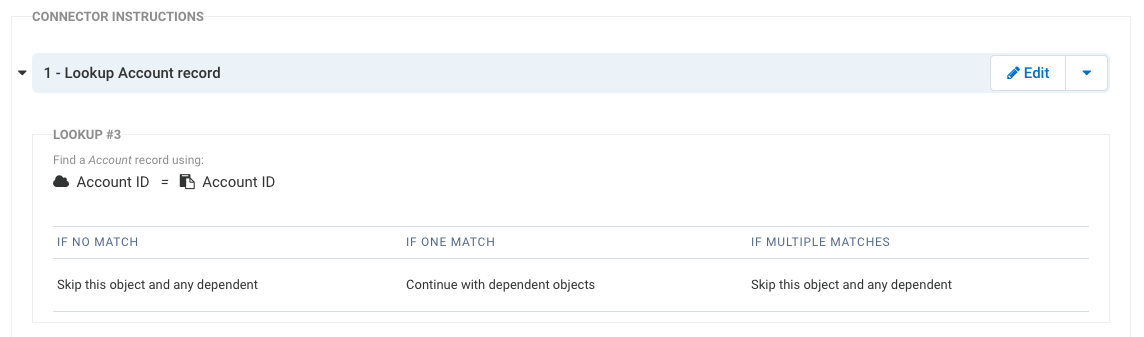
The first thing we’ll want to do is perform a Lookup on the Account record so that we can dynamically assign it to the Contact that is updated or created. Thankfully, with the hidden field that we prefilled, this is pretty simple:
Moving on, we’ll want to Update a Contact in Salesforce. This Update function will allow us to optionally Create the Contact record if he or she does not exist already. To make sure we catch all cases, we’ll want to map “IF NO MATCH” to “Create a new record instead”.
The lookup parameters I’ve set up are Email, First Name, and Last Name, but these can be configured to match whichever parameters your org uses for deduplication.
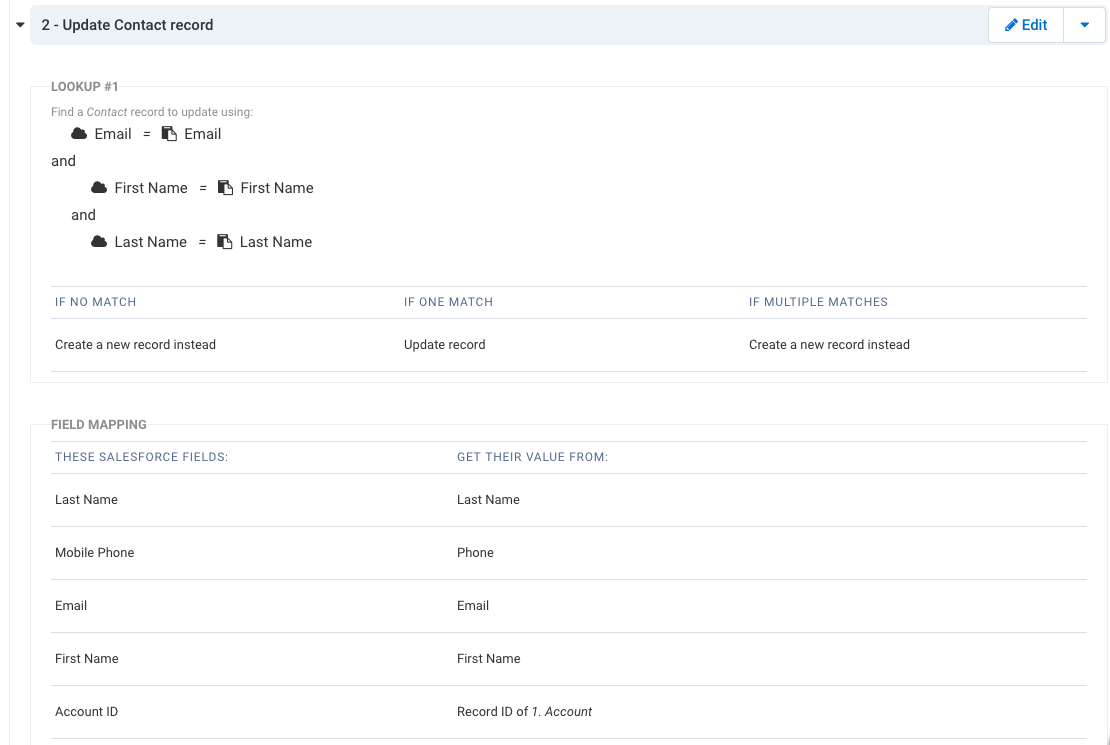
Then, simply map in the fields from the form to Salesforce. You’ll notice that I am dynamically assigning this Contact to the Account we found in step 1. This is done by mapping the Account ID field to “the ID of an object above” and selecting “1. Account”:

Now that we have the Contact record updated or created, we can assign them to the Customer Community. To do so, we’ll want to Create a User:
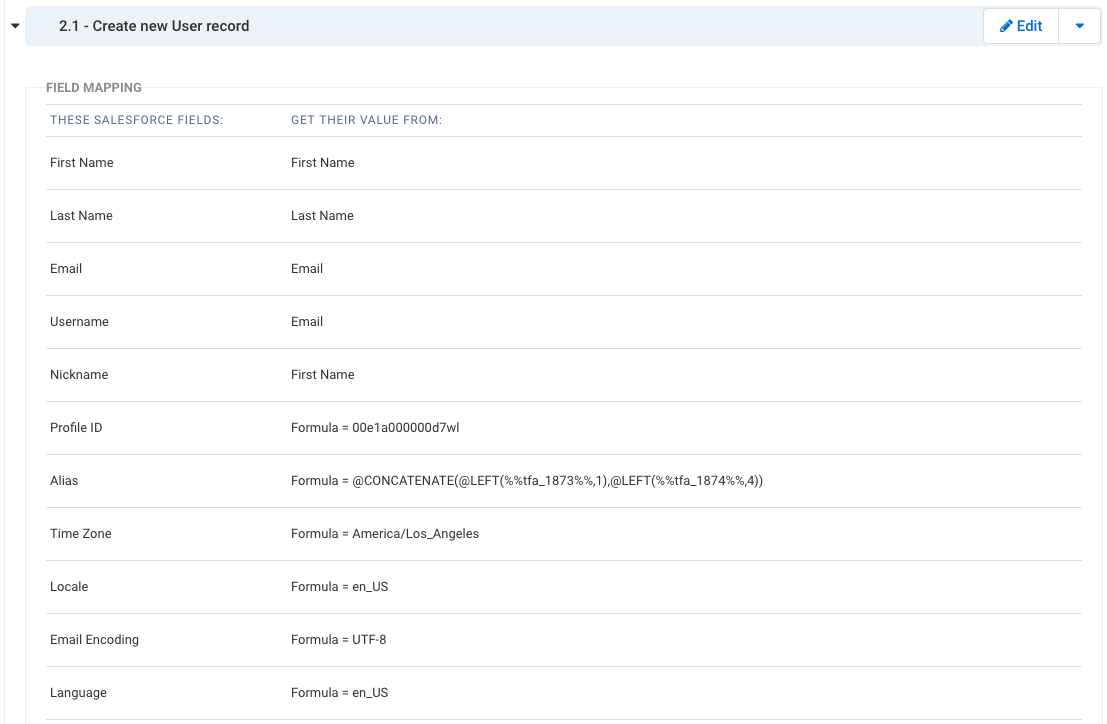
Creating this User object is admittedly a bit fickle — Salesforce likes to push through a ton of fields when you first select the object. The fields above are the only ones you need to map, as there are a good bit of system defaults that will auto-populate on the Salesforce side.
A few fields to point out as extra-important:
- Profile ID: This will be mapped as “formula or text” to the Salesforce ID of the profile that you want to assign. For my demo, I chose Customer Community User.
- Alias: For this field, I’m using their first initial and first 4 letters of their last name. This is done with a quick @CONCATENATE function in the FormAssembly field editor.
- Time Zone: This gave me trouble for the longest time. You’ll need to map in the TIMEZONESIDKEY (a list of all of them is provided by our friend Salesforce Ben here) as a formula or text.
- Locale and Language: Again you’ll need to use the Salesforce local code (full list here) as a formula or text
- Email Encoding: The last ‘code’ required field, has the following options: UTF-8, ISO-8859-1, Shift_JIS, ISO-2022-JP, EUC-JP, ks_c_5601-1987, Big5, GB2312 — all mapped in FormAssembly as formula or text. UTF-8 will capture all possible unicode characters, so I went with that as the default across all users.
Test response
Now let’s test it! If everything goes according to plan, we should be assigning users in no time. To begin, let’s load our prefilled form with a URL parameter:
And then fill in some test (or live) data:
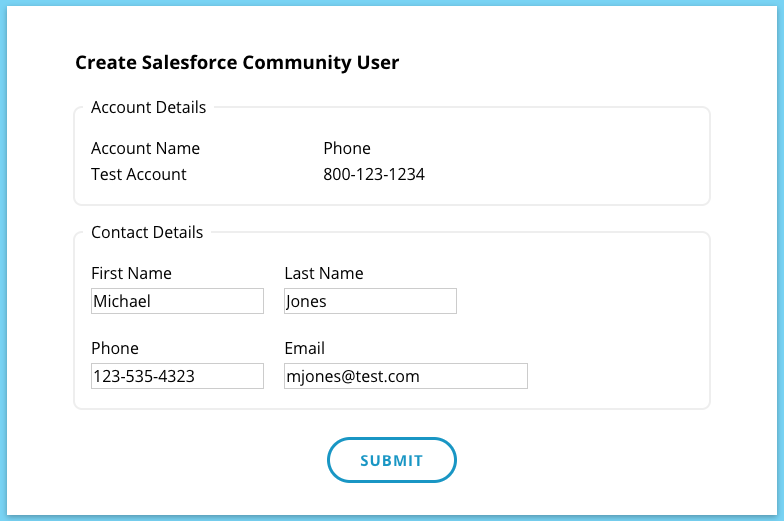
And submit! Nothing else needed to push the data through.
Check the logs
Now that we’ve submitted, let’s make sure everything ran properly by having a look at the logs (this will also expose the Salesforce IDs, easily allowing us to navigate to the proper records). In this case, Michael Jones already existed in our org, so we simply updated his record without creating duplicates!
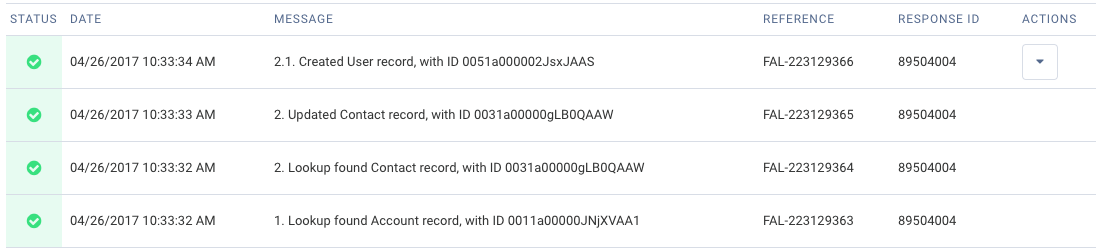
Looks like everything processed properly, so let’s take a look at the impact in Salesforce.
View Salesforce records
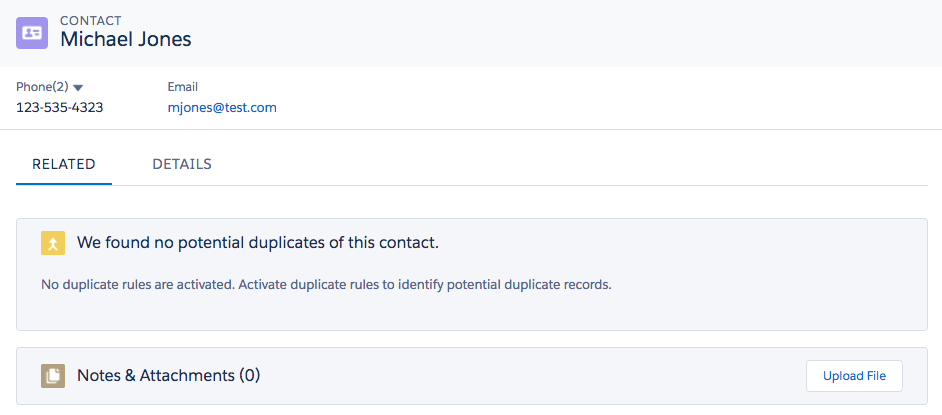
Again, from the logs we can find the Salesforce record IDs, so let’s have a look at the Contact that we updated:
And the associated User record:

And, finally, the User detail to make sure everything set up properly:
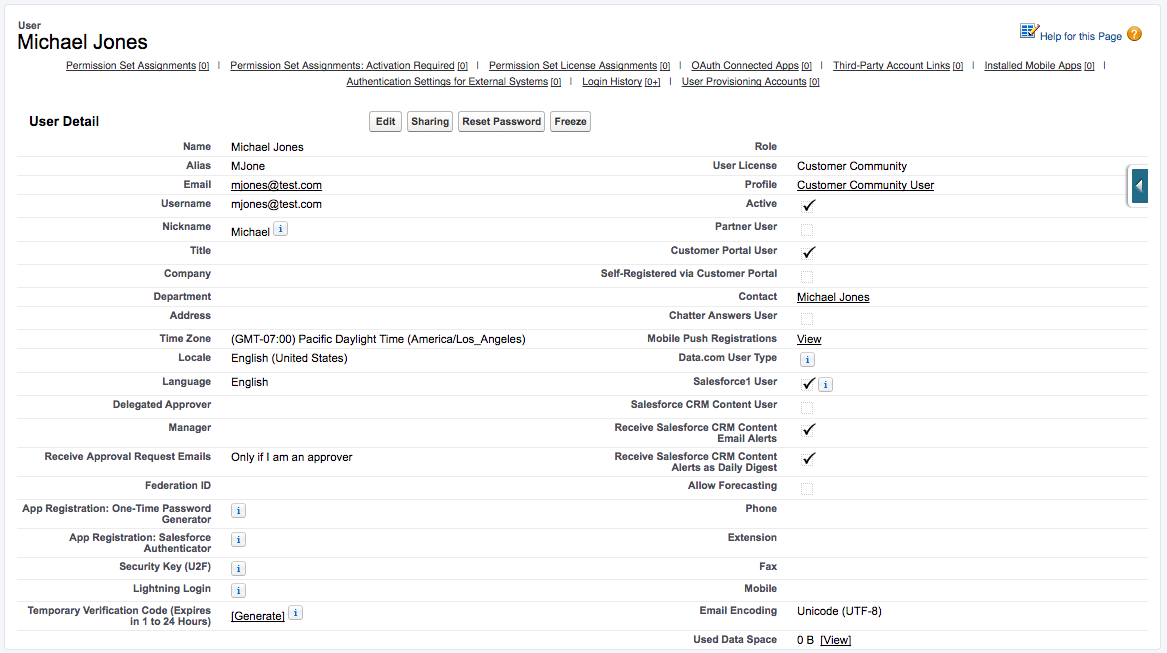
You can see in this screenshot that we mapped the proper profile (Salesforce will automatically match the User License, thankfully!). The User is marked Active, is a Customer Portal User, and has all the proper code fields mapped properly.
Now we have total self-service portal enrollment! You can publish the form on an intranet, public-facing page?, or send out invite emails, however you’ve structured and pitched the Salesforce Community value.
Don’t have a FormAssembly account?


