In this post, we’re going to explain how you can accomplish this with FormAssembly and Salesforce. Salesforce holds the data we want to show and update. Salesforce also provides the email functionality we’ll need.
Summary
Here’s an overview of the process:
- From Salesforce, you send out a customized email, based on a template you define. The email includes a link to your form (Note: While it’s tempting to try to embed the form directly in the email, it’s generally not a good idea. There’s no guarantee that the form will display correctly and be functional in your respondent’s email client. Learn more and get a method to emulate a multiple-choice question in an email that you can use to update Salesforce.)
- The recipient opens the email and clicks on the link to load the form in a web browser.
- The recipient can review any prefilled information before filling out the form and clicking submit.
- FormAssembly processes the data and updates the matching record in Salesforce according to the instructions you defined in the Salesforce connector.
Step-by-step guide
That’s the set-up we’re looking to create in a nutshell. Follow these instructions to put this into practice.
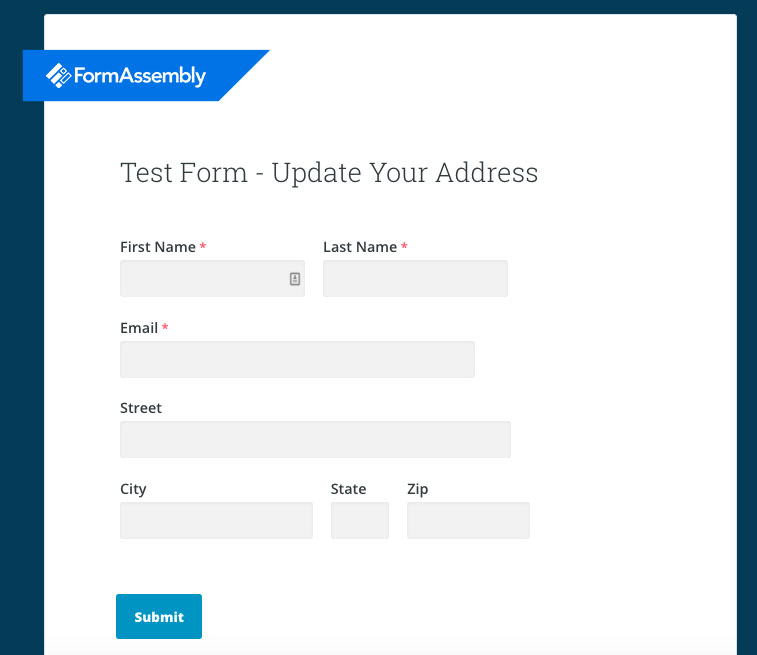
1. Build your form
First, we’re going to build a form in FormAssembly. We won’t go into too much detail here, but if you need a refresher, refer to this video: “Form Building in 8 Minutes.”
For this tutorial, we’ll use a simple form that prefills a person’s information and address and invites them to update their address.
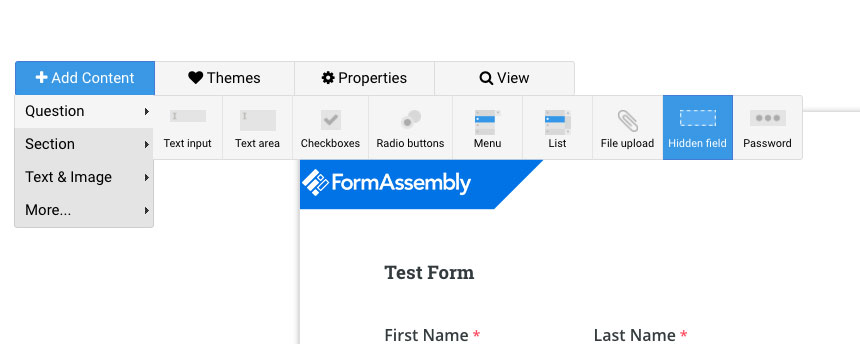
Note that you often need to keep track of some unique identifiers that will let you link the submitted response back to the original record in Salesforce. Sometimes an email address can serve this purpose, but it’s often better to rely on a more unique identifier, like Salesforce’s internal record IDs. Those IDs are long and meaningless to the recipient and don’t need to be visible in the form, so for the form in this tutorial, we’ll add a hidden field to store the Contact ID for the recipient from Salesforce.
2. Configure the Salesforce connector
This is how the form will “close the loop” and update records in Salesforce. The hidden field we defined in Step 1 will store the record’s unique ID, we will configure the connector to look up which record to update based on this field value.
Here’s how the connector setup will look:
Prefill connector setup
After connecting and enabling the connector, set up your first lookup.
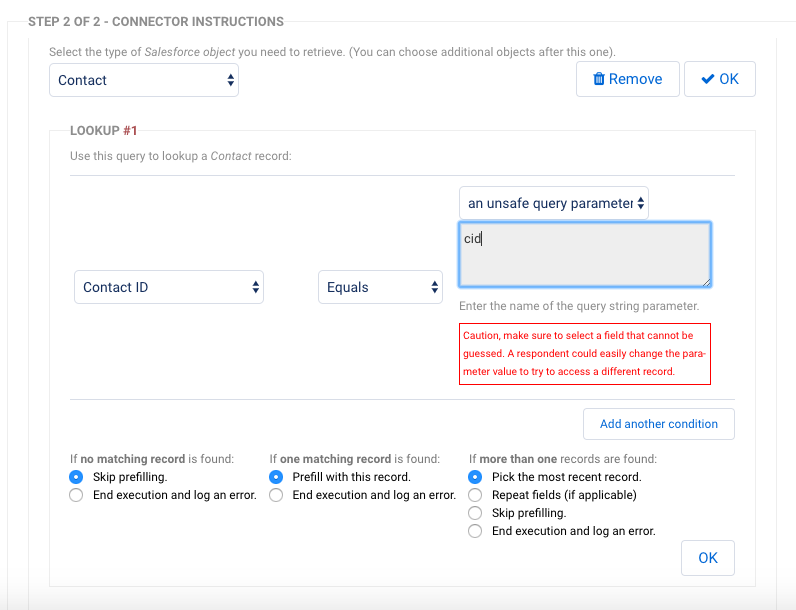
In this screenshot, we’re telling the connector to look up a contact by the contact ID, and then to prefill the form with that contact’s information.
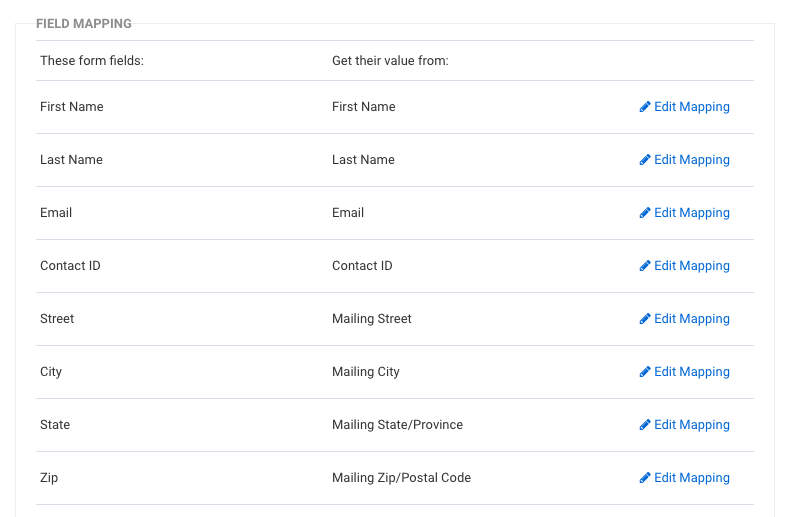
You’ll also need to map fields to specify which Salesforce fields match with which fields in your form.
We’re prefilling some pretty basic information here, but depending on your use case you can also prefill virtually any other information you need from Salesforce. You can also add other fields to gather survey feedback, questions, or other information.
Submit connector setup
When your users submit the form, you want any information they’ve changed to be updated in your Salesforce account.
Here’s how we’ll set that up.
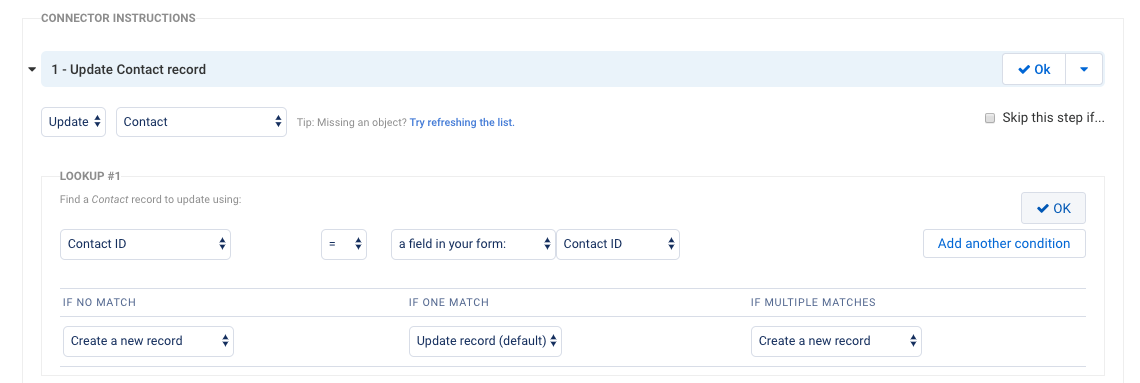
Create an Update Contact step for the contact in question, using the Contact ID that’s been prefilled into the hidden field for your lookup.
Then, map your fields.

3. Send Your prefilled link through Salesforce
Once you have set up your form, you are ready to set up your email template in Salesforce where you can compose your letter using the Salesforce merge fields to customize your template.
To compose your email, you will need to know how to craft the link to your form. For this example, we set an unsafe query parameter in the prefill connector that we can use in the prefill link. This parameter is “cid”. With Salesforce merge fields added to the form link in our email, our prefill link will look like this.
When someone clicks on the link you email them, their information will be prefilled, and they can make any updates to their address that they like. After they hit submit, those changes will be synced with your Salesforce account.
Book a personalized demo of FormAssembly’s Salesforce connector and see it in action for yourself!