
Client onboarding can be a long process of clunky forms and signatures — but it doesn’t have to be! With FormAssembly and Salesforce, this process can be completely automated and online. In this tutorial, we’ll focus on a generic post-sale process — use this as a starting point for your process! This is by no means the only way to be successful with this process, but we’ll highlight a lot of best practices.
For our use case, we’ll be sending this form to the client once a deal has closed. This will allow the client to provide contact information for all key employees so that we know which client we’ll need to contact in the future to support and possibly upsell.
Prerequisites
The only prerequisite for this use case is to have some architecture in Salesforce built to contain this information. This can be done in a number of ways, but we’ll use the Account, Contact, Opportunity, OpportunityLineItem, and OpportunityContactRole objects.
Form setup
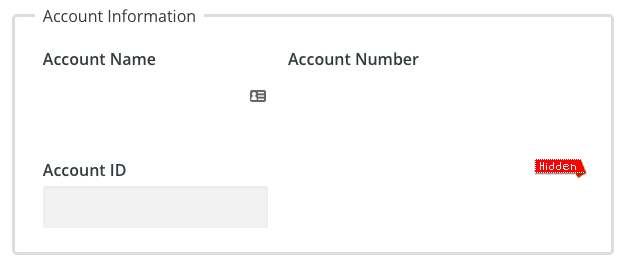
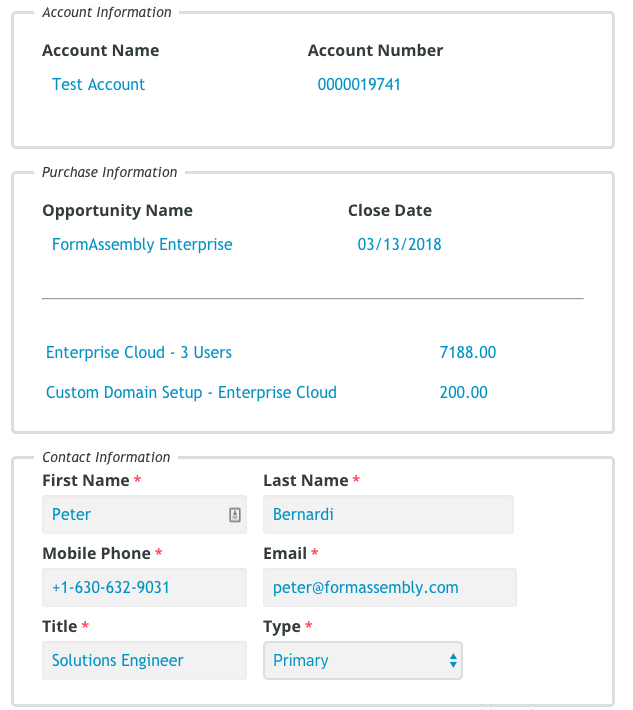
First, we’ll list all relevant Account Information. For us, that’s Account Name and Account Number in addition to a Hidden Field, Account ID.
For the next object, you can include any fields off the Opportunity object. For this demo, we’ll use the Opportunity Name and the Close Date.
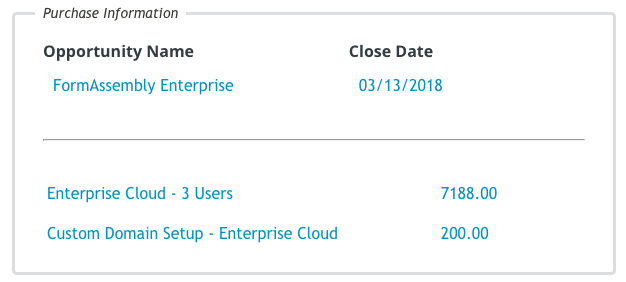
In a Hidden Field, we’ll include the Opportunity ID.
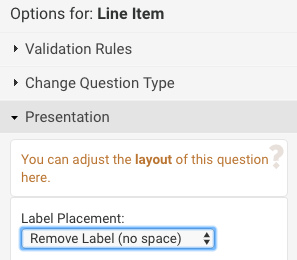
We’ll also list the various products that are on the Opportunity. First, add a fieldset called Product Line Items then Insert two fields, Line Item and Amount, both with hidden labels:
Make sure that the Product Line Items fieldset is repeatable. Optionally, you can hide the border and label.
Moving on to the Contact information, insert a fieldset, make it repeatable and add a few fields. We’ll use First Name, Last Name, Mobile Phone, Email, Title, and Type:

At this point, we’re ready to move on to the Prefill and Submit Connectors!
Prefill connector setup
To begin, add a Salesforce Prefill connector. Once you’ve authenticated, we’ll add our first lookup, Opportunity. For the criteria, we’ll match Opportunity ID as an unsafe query parameter

Map the applicable fields, Opportunity ID, Account ID, Opportunity Name, and Close Date.
Next, we’ll move on to the Account object, dependent to the Opportunity. For the criteria, we’ll match the Account ID to the Account ID found in the Opportunity.
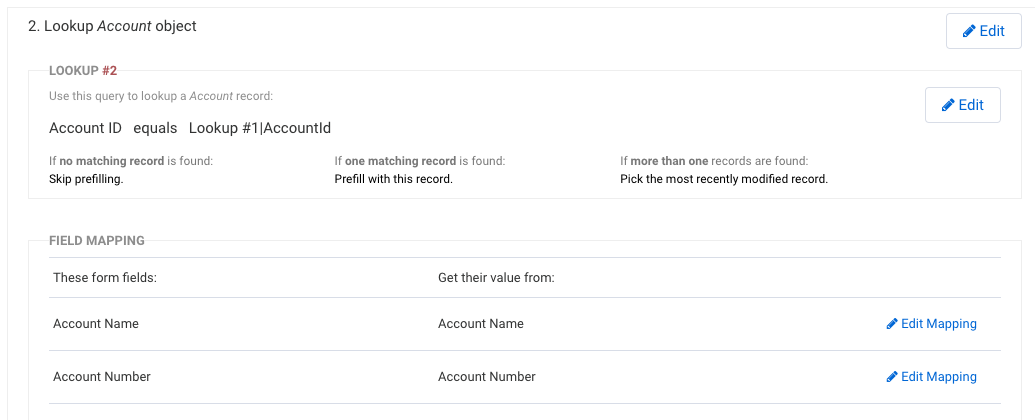
Map in the Account Name and the Account Number fields. We already have the Account ID from the Opportunity.
Now we get into the tricky part — the line items. We’ll start with a lookup dependent on the Opportunity, the OpportunityLineItem object.
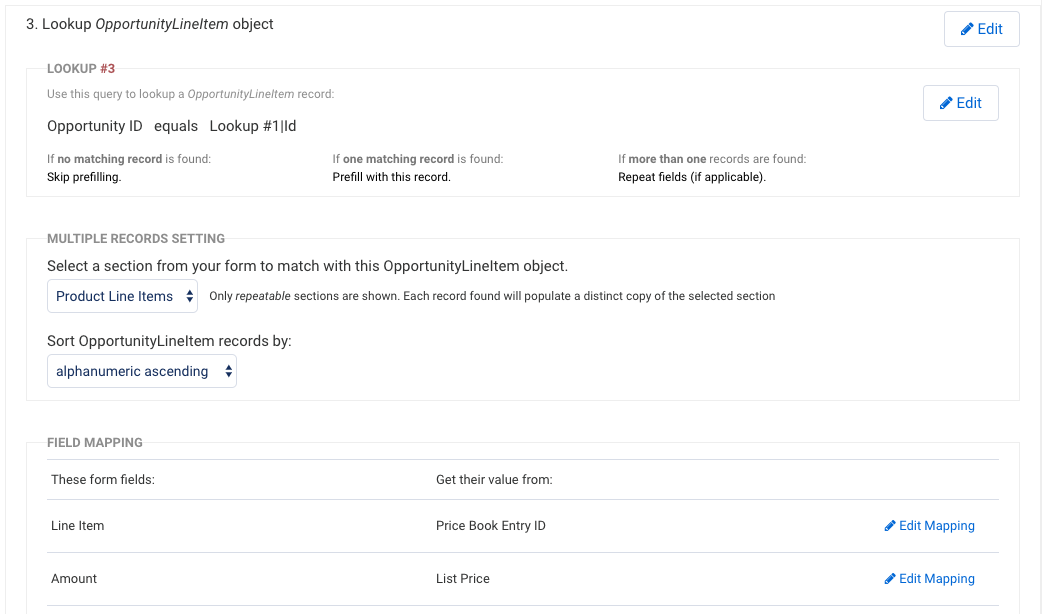
Make sure to select the repeatable group Product Line Items. Map in the List Price to the Amount field and the Price Book Entry ID to the Line Item field. We’re doing this so that we can access this ID in our next step.
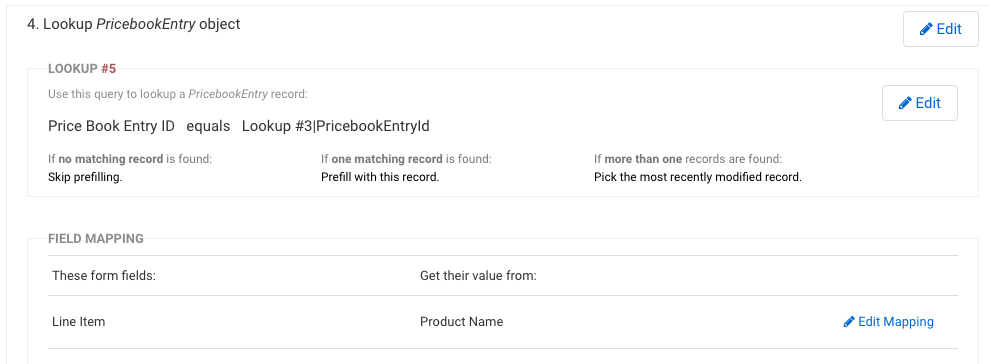
That next step is to lookup the PricebookEntry dependent to the OpportunityLineItem. The criteria is the Price Book Entry ID that we found in the previous step:
We’re ready to test! Give the form a test with any valid Opportunity ID that has products to make sure it’s prefilling properly. To test, set up the URL to prefill data from an existing Opp record ID from your Salesforce org as follows: www.tfaforms.com/12345?oppID=[Insert Your Salesforce Opportunity Record ID Here]
To send the link, the email can be sent from Salesforce using a number of methods, ex: the opp closing triggers the email. Email templates hold the link and the link utilizes a merge field from the Opp ID record when an email is sent from the Opp record.
Submit connector setup
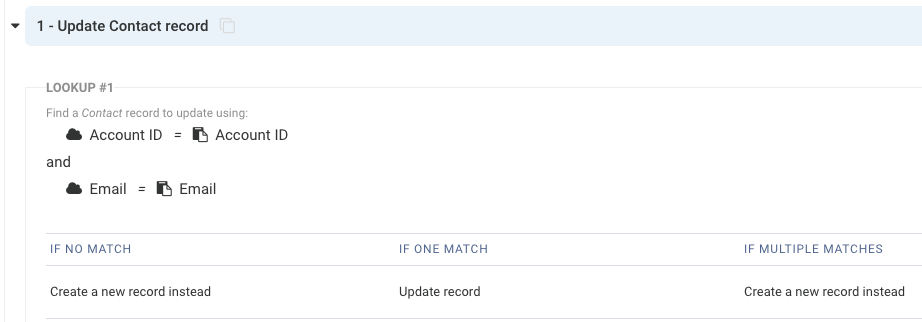
For the submit connector, ensure that the Contact captures and also links that Contact to the existing Opportunity through the OpportunityContactRole.
Let’s start with the Contact — we have the Account ID in a hidden field thanks to our prefill connector so we’ll use that and the Email to match against any existing Contact:
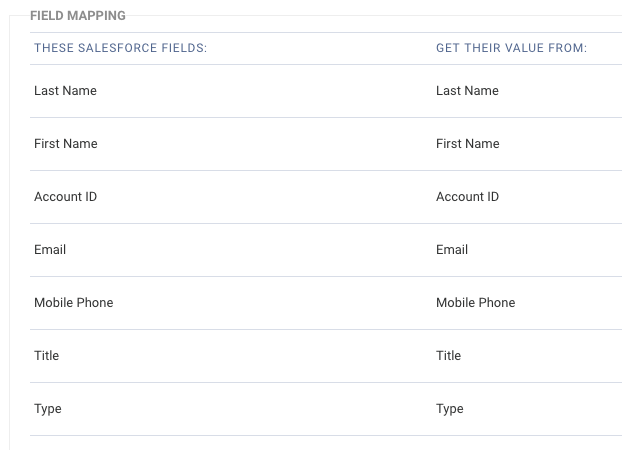
For the field mapping, we’ll simply map in all the fields that we created on the form:
Depending on the Contact, we’ll create an OpportunityContactRole:
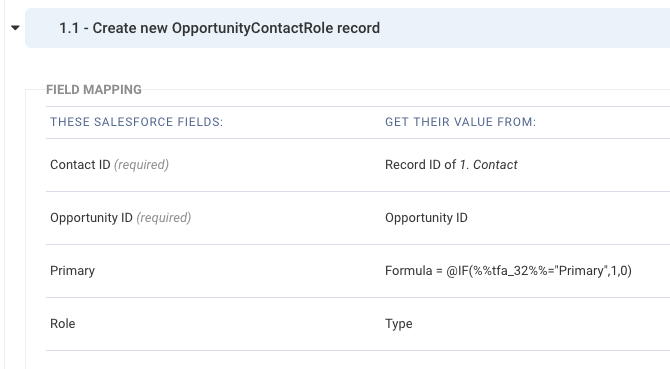
For the Primary checkbox, test against the “Type” and see if it’s chosen as the primary Contact. Check that box if so.
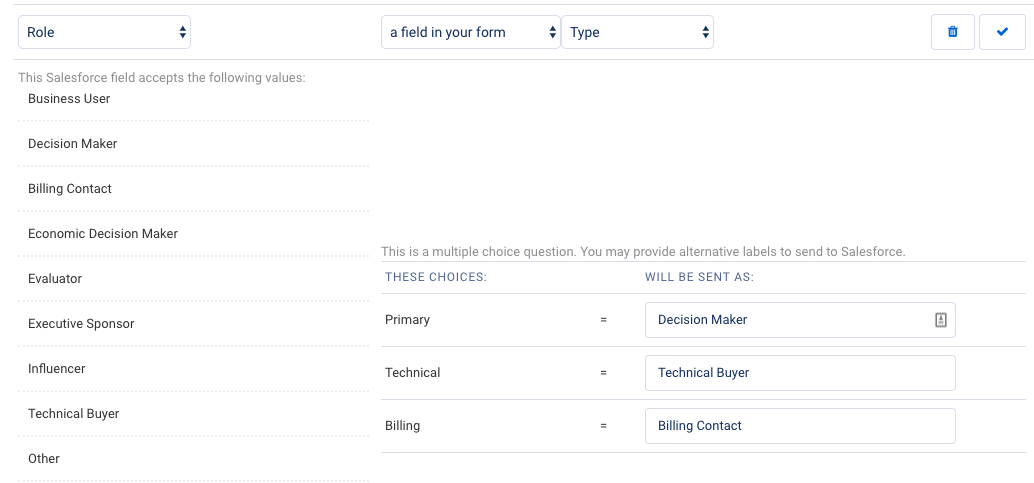
Additionally, for the Role field, we’ll map it to the Type, but control how those Type selections map into Salesforce:
At this point you’re ready to test end-to-end! Prefill in an Opportunity and add some Contact information.
Dive deeper into our Salesforce integration with our Salesforce eBook.


