Set up new accounts, contacts, and opportunities all at once in Salesforce using FormAssembly
In this tutorial, we’re going to show you how to set up new Accounts, Contacts, and Opportunities all at once with FormAssembly and Salesforce, using the example of a product request form. We are bypassing the Lead record all-together and using Contact, because the prospect in this example is displaying a strong buying signal by requesting our product.
With FormAssembly you can use form submissions to set up many different kinds of records in Salesforce for many different uses. Whether it’s web-to-lead or web-to-anything, ex: web-to-MyCustomObject, FormAssembly can handle the complexity you need for the specific way you operate.
In this tutorial, we’re going to show you how to set up new Accounts, Contacts, and Opportunities all at once with FormAssembly and Salesforce, using the example of a product request form. We are bypassing the Lead record all-together and using Contact, because the prospect in this example is displaying a strong buying signal by requesting our product.
Using this set up as a starting point, you can customize your form to automatically streamline your service or order data. This is helpful because teams often set up these records manually. Now we have one form that can have all your records set up for your teams.
Before getting started with this use case and walk-through, you should make sure you’ve set up a FormAssembly form and Salesforce connector before. To catch up, head over to our knowledge base to follow and watch our walk-throughs!
Build your form
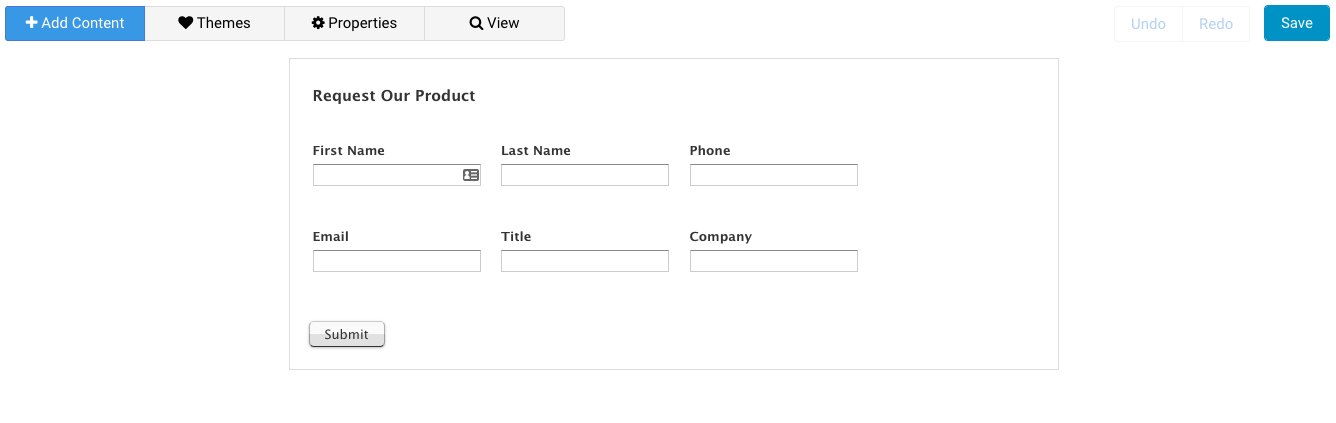
For this tutorial, we’re using a simple contact form that asks for standard fields. Of course, there are lots of additional options like validation and grouping we can put in place if we’d like.
Setting up the connector
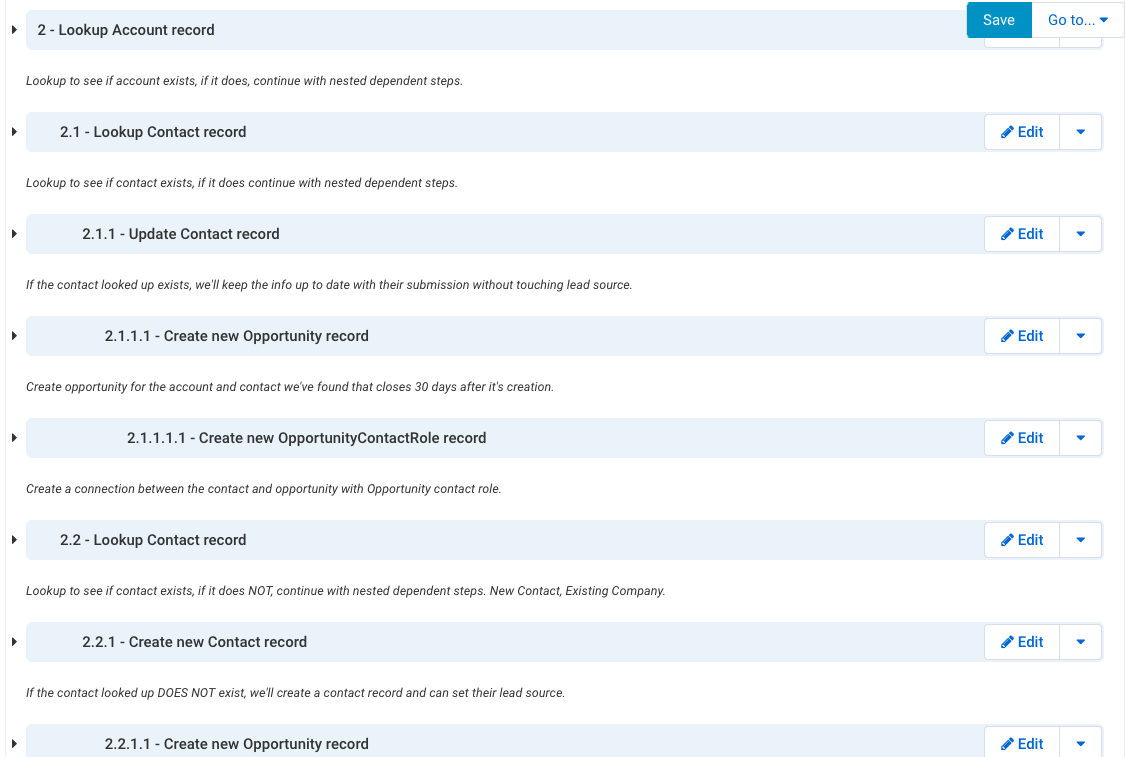
When setting up the FormAssembly and Salesforce connector, it’s important to think about first looking for existing information matching the submission, updating or connecting the information found, then only creating records when lookups have been exhausted. This way we’re able to properly update the information we want and only create information when no duplicates are found.
Follow along with our snapshots and set up the connector to test for yourself!
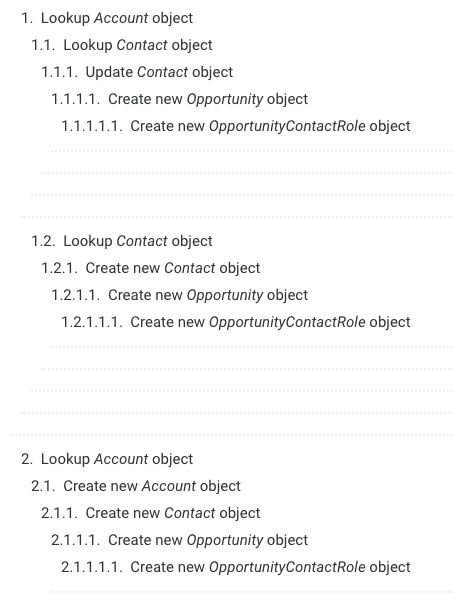
Existing accounts and contacts mapping setup
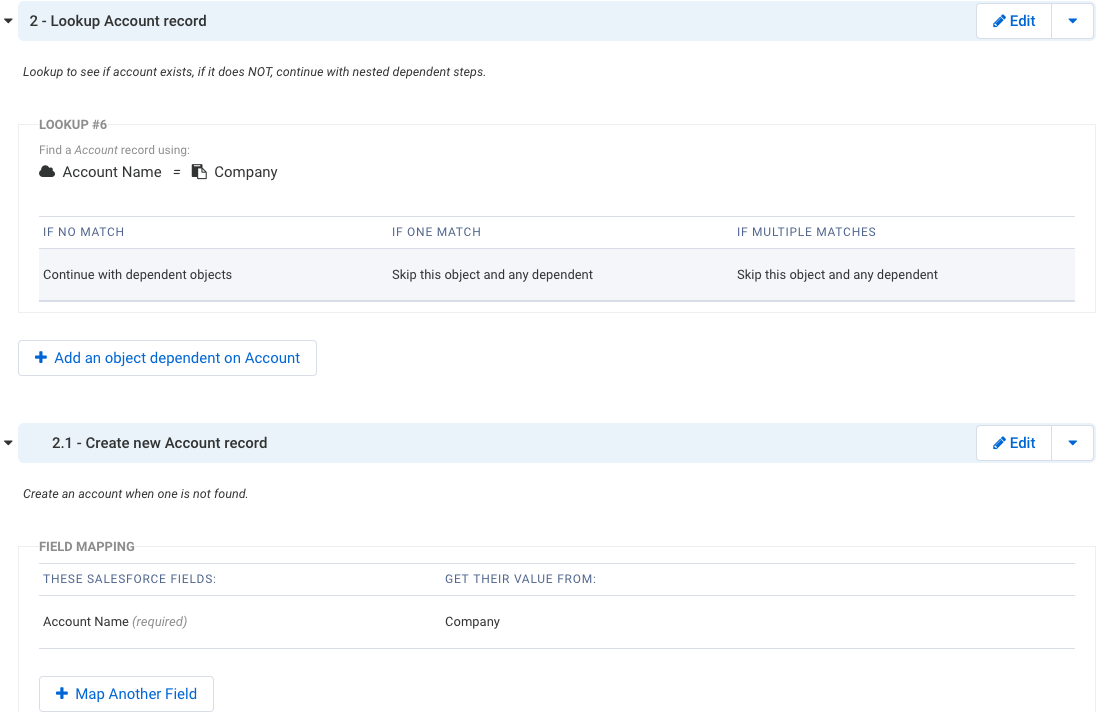
- Set up your first step to look up “Accounts” with names matching your forms entry.
- Skip all steps after this if no account is found.
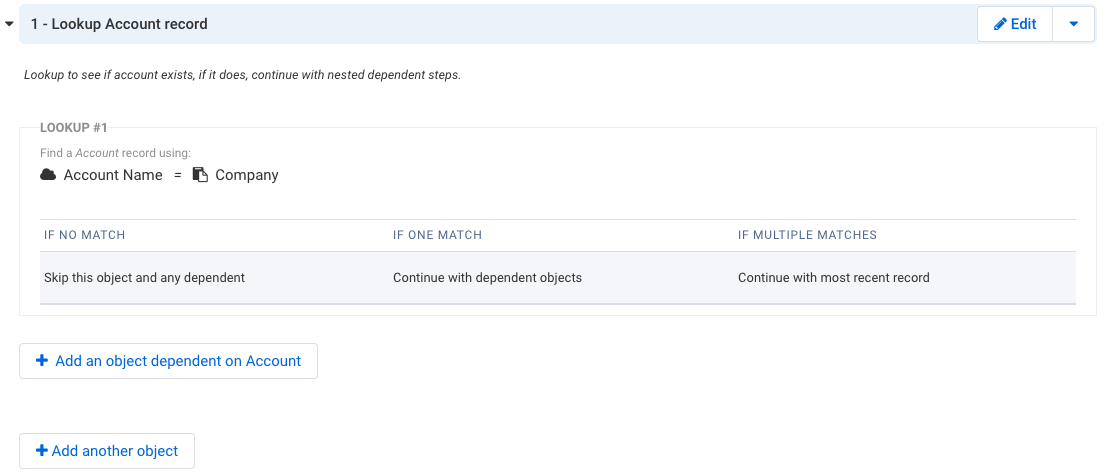
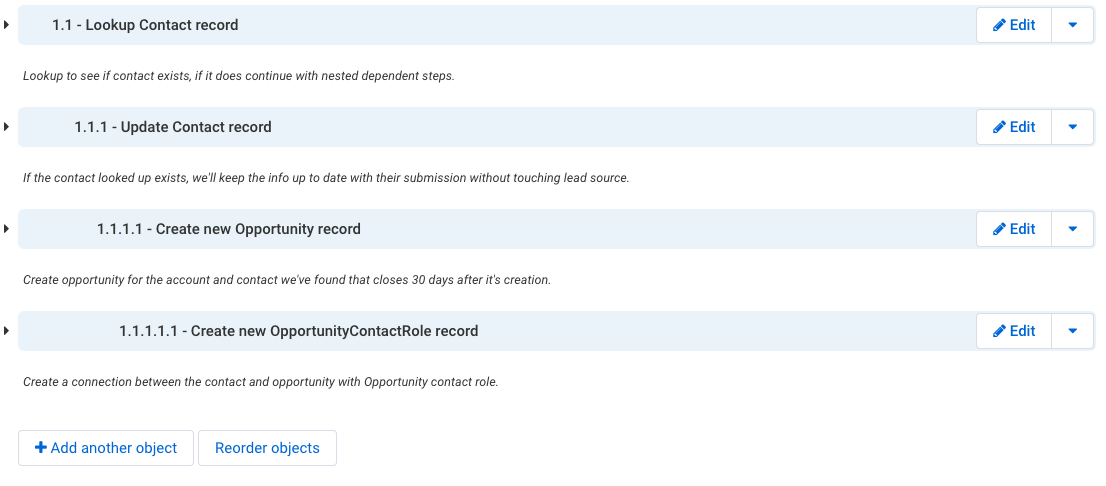
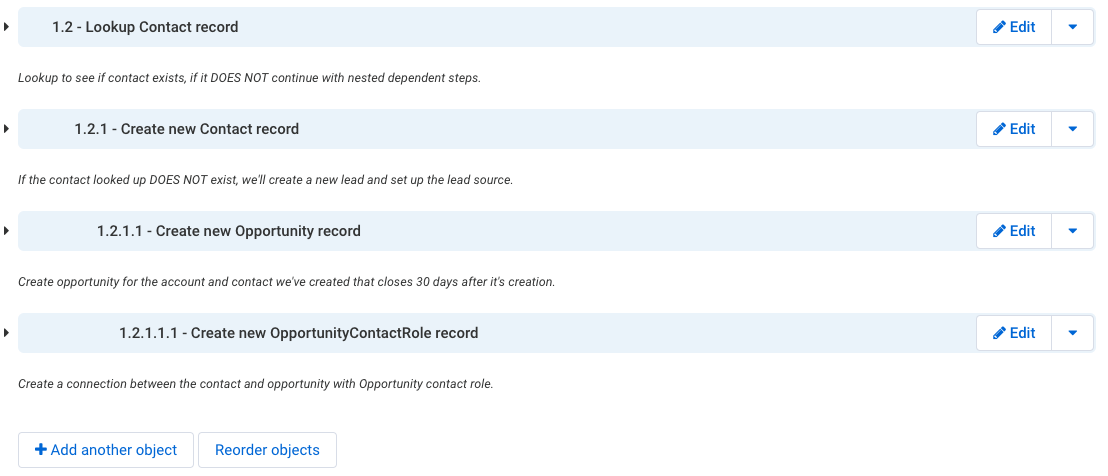
- Set up your next step by adding an object dependent on “Account.” This will look up and help us update or create a new contact.
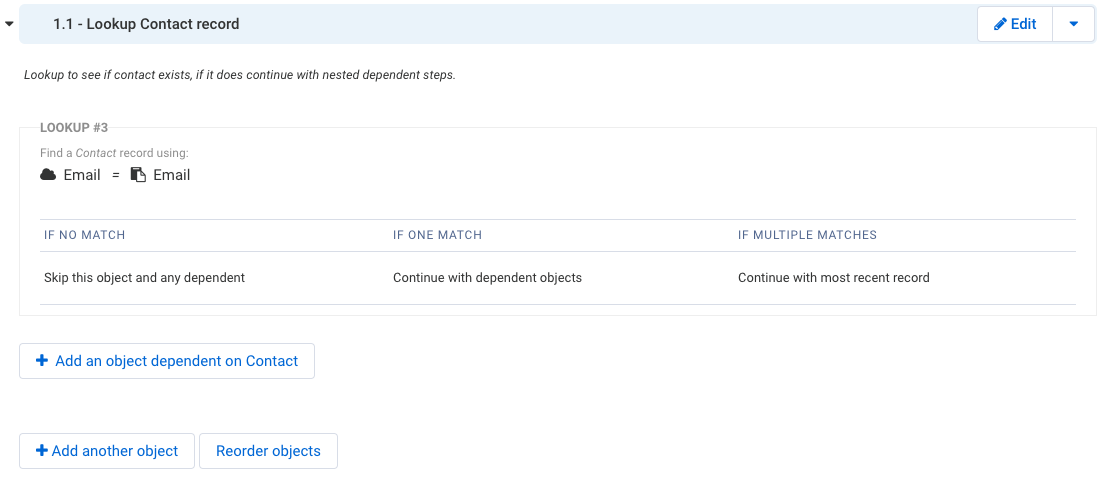
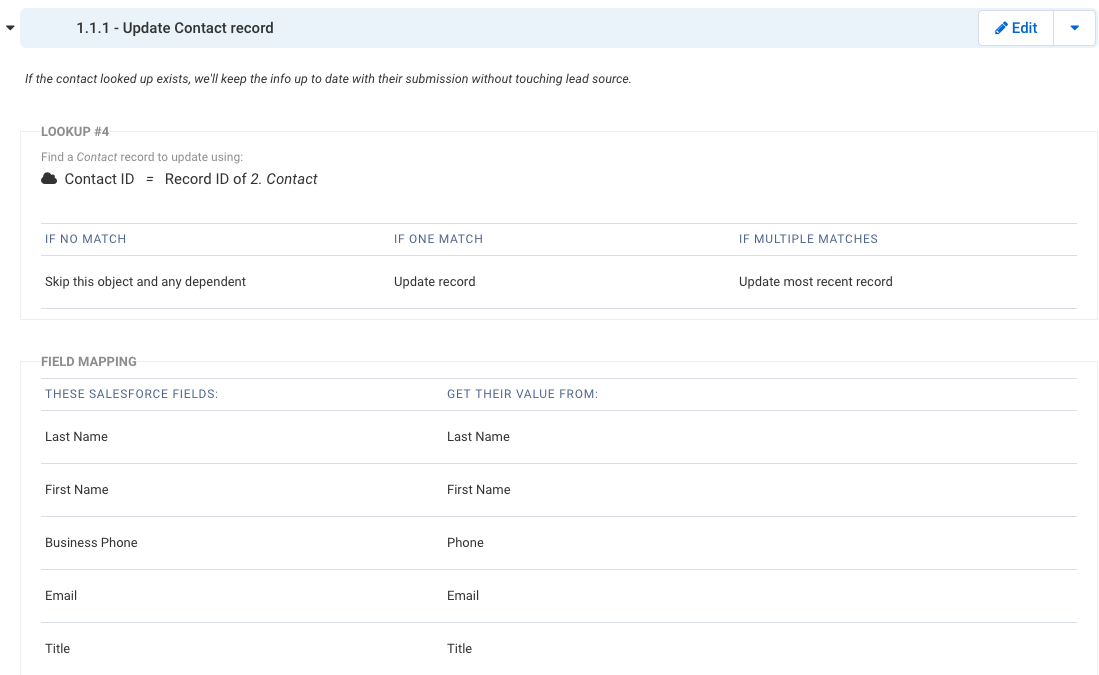
- Set up another step dependent on the “Contact” lookup to update the contact if found.
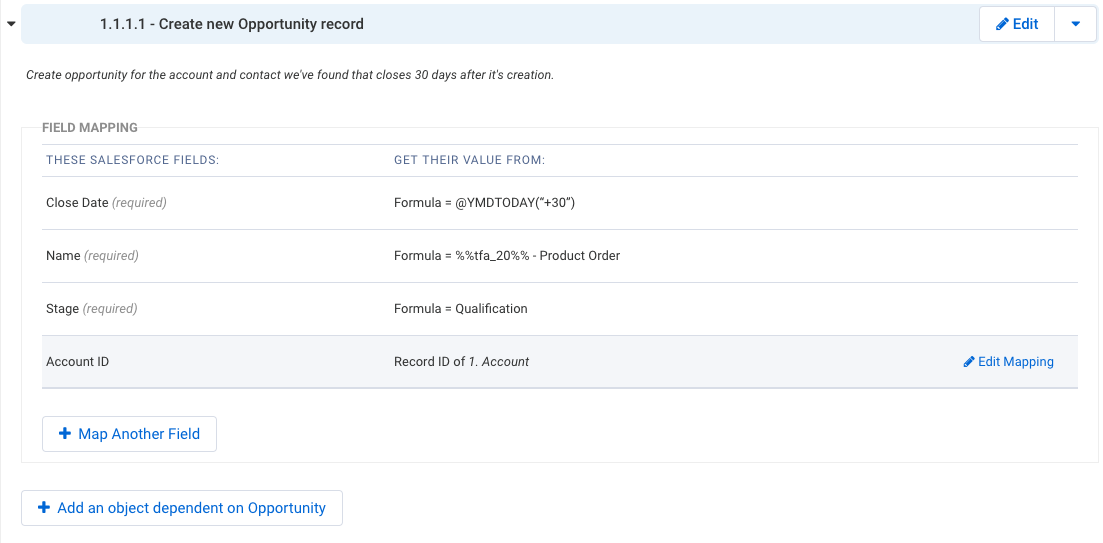
- Set up a step dependent on the previous “Contact” update step to create a new opportunity.
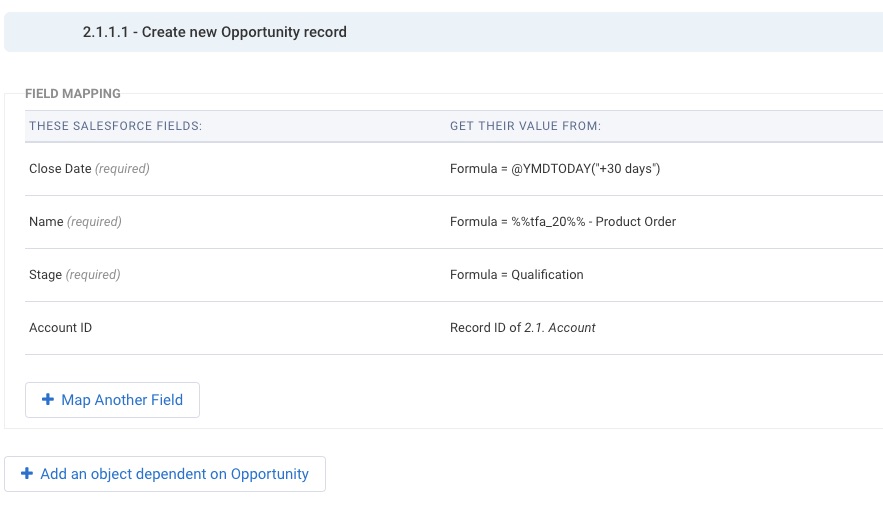
- We will need to map a few minimum fields for our Opportunities
- For our close date, we set up a formula to always be a date 30 days from the day the submission was made
- For the name of the “Opportunity,” select Formula for ‘Get their value from’ and use a combination of our form field alias for their “Company” and the text ‘- product order’
- We are required to set the “Account ID” and “Stage” for this object when it is created, so pick any standard value for “Stage,” or if you have custom picklist values use those too. Our “Account ID” will map from the “Account” object step above just like our “Contact” step.
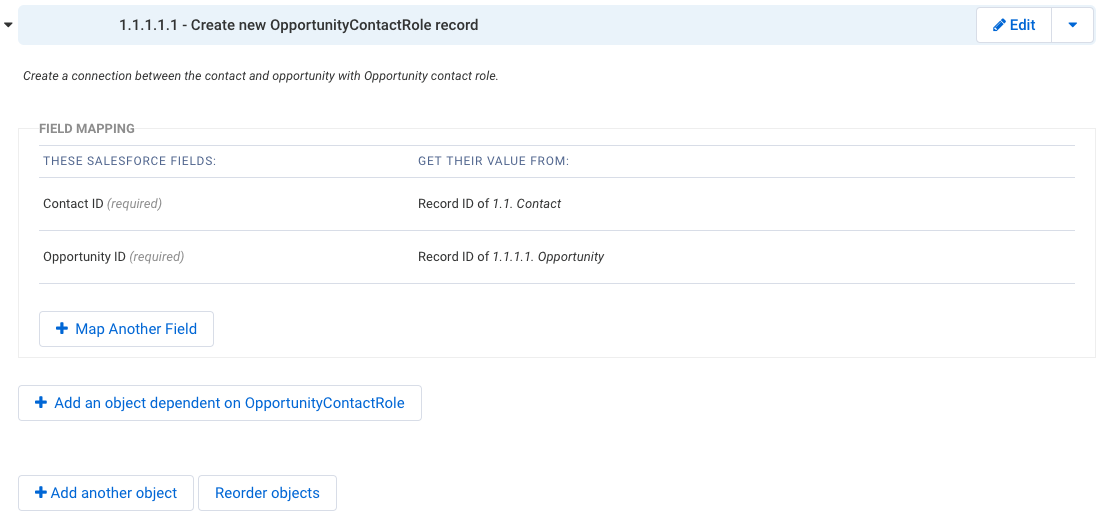
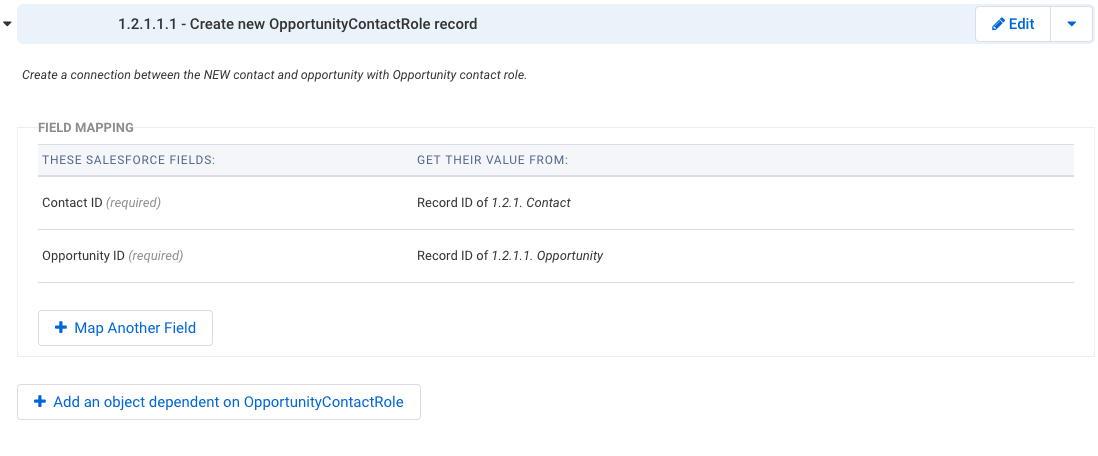
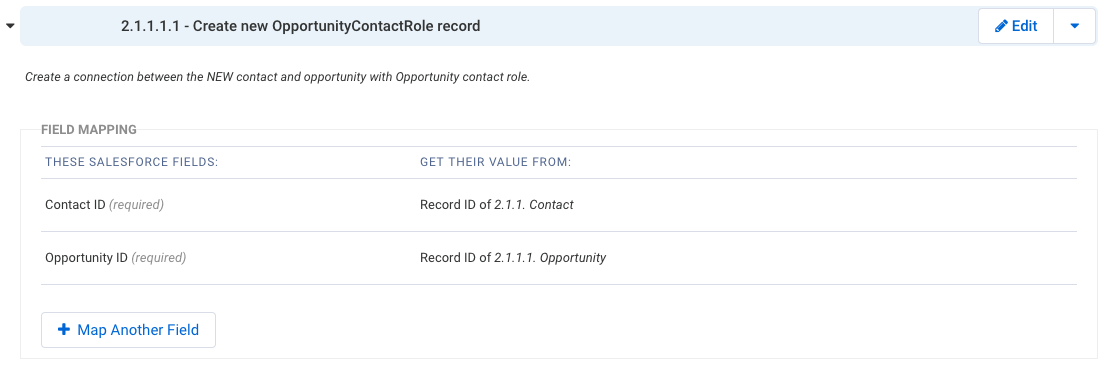
- Set up a step dependent on the create “Opportunity” step to create a new “Contact” role. (This will link our “Contact” to our “Opportunity”.)
Copy and modify our existing mapping setup
With the main structure we’ve just built for existing accounts and contacts we can easily copy and modify steps to create a new contact if one is not found, then tie it to the existing account in this first part of the setup. Remember, we’re still on the steps that work only if an existing account is found.
- Copy the first “Contact” lookup steps shown below.
- Click the down arrow next to “Edit” on step 1.1 and select copy.
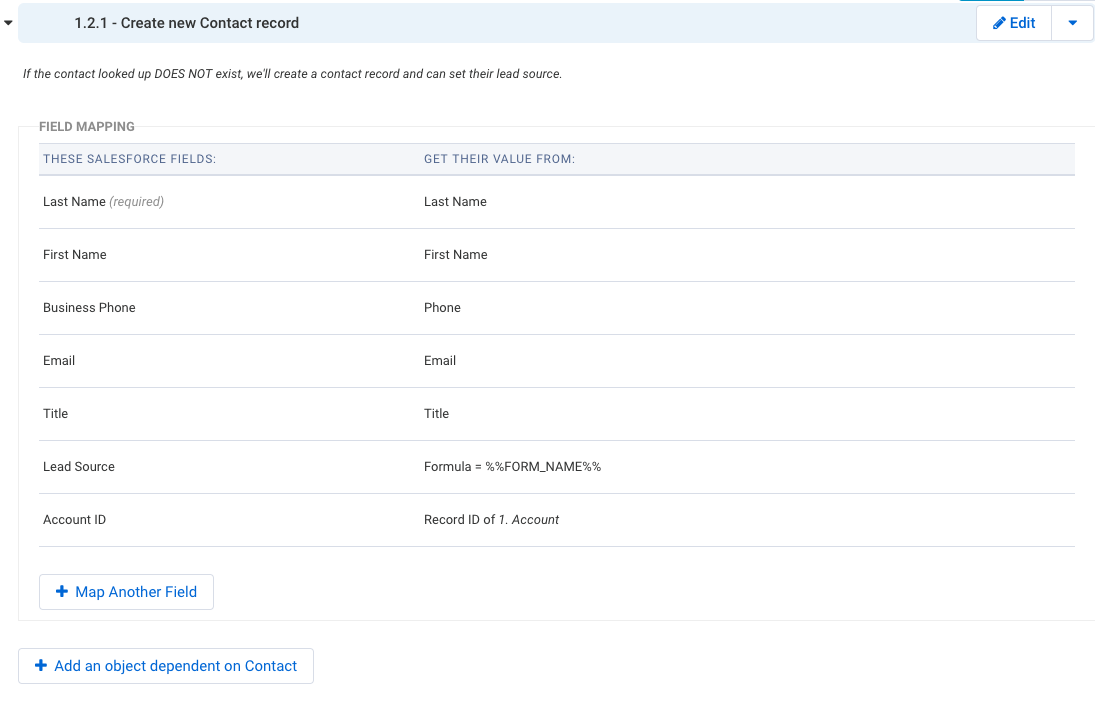
- Update the notes for steps nested through 1.2 for new “Contacts”.
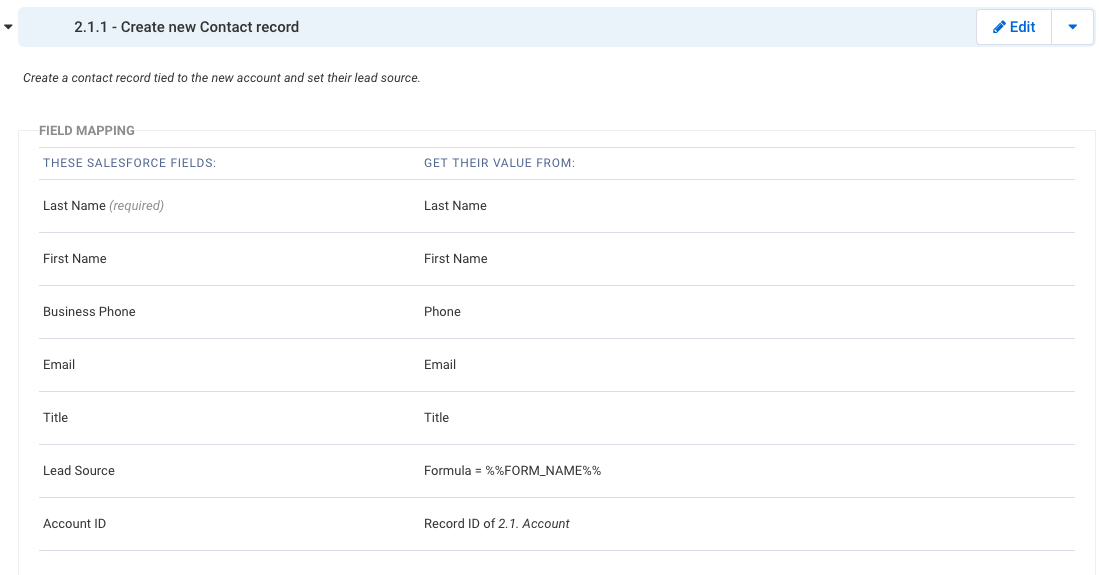
- Change the “Update Contact” step to “Create” and set up “Account ID” and “Lead Source” for new contact.
- Update record mapping on “Opportunity Contact Role” step.
We now have the first part of the connector set up! We have the form able to handle entries for existing accounts and both existing and new contacts for existing accounts. Next, we’ll set up new steps in the connector to handle new accounts and new contacts for opportunities we want to set up through this form.
- Copy step 1 in the connector to replicate our main lookup structure.
- Our copied structure will look the same only will now be step 2.
- Update the logic in step 2 to continue if no match is found and skip if any matches are found. (We’ve already looked for matches!)
- Create a new step to “Create” an “Account “from the “Company Name” field and nest it under step 2 as shown below.
- Reorder and nest the “Contact” steps under this new step as well.
- Update the copied “Contact” step 2.1.1 to “Create” a new “Contact” instead of “Update”.
- Be sure to map “Account ID” for the “Account” created in step 2.1 and “Lead Source.”
- Update “Opportunity” step to the new “Account” created in step 2.1.
- Update the “Opportunity Role Contact” step to the new “Contact” created in step 2.1.1 and new “Opportunity”.
There we have it, that is the last step in setting up our connector. Now let’s review what our Salesforce Connector is set up to do.
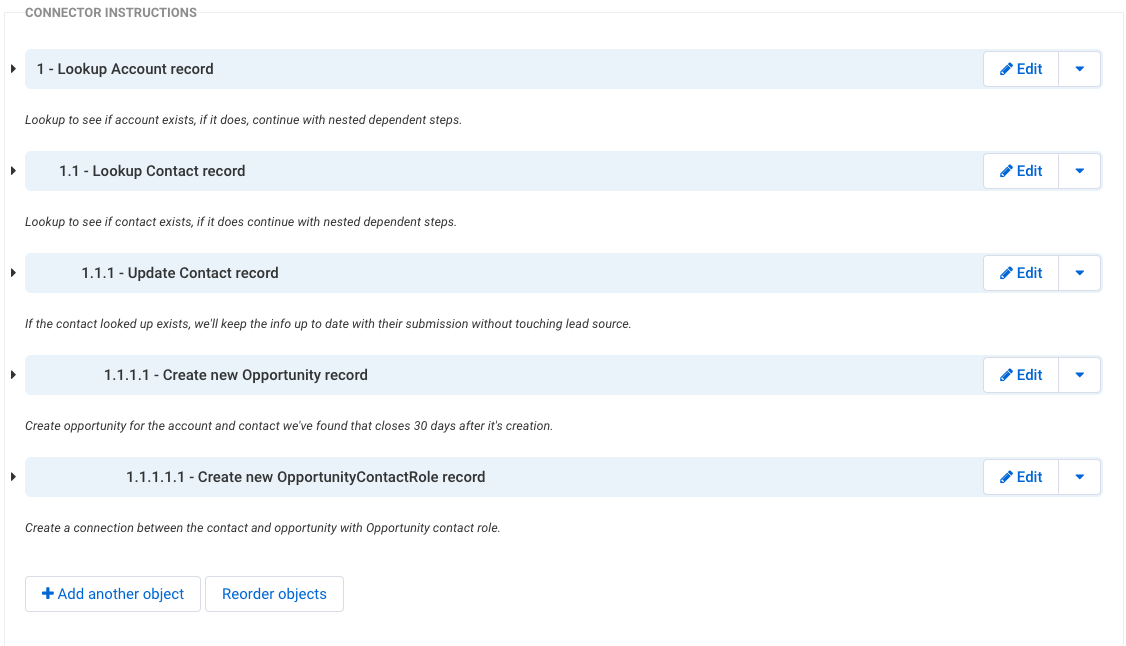
- Look for existing accounts in Salesforce and set up or update any contact information, whether new, or existing for that account if found. Then create an opportunity for both the account and contact.
- If no account is found in Salesforce, create a new account and set up a new contact for that account. Then create an opportunity for both the account and contact.
This is just a start. You can get even more complex with your FormAssembly and Salesforce connector and go into products, quotes, custom objects, and more. Exploring what you can do will only help further the set up of the data your teams need to operate efficiently and execute organizational goals.
Want more tutorials like this one? See all our top FormAssembly and Salesforce tutorials in the eBook linked below.