
You want to make the form-filling experience as seamless as possible for your audience. Prefilling forms with existing data is a great way to make the process fast and easy. But you don’t want to run the risk of this sensitive data being compromised if the wrong person gains access. To ensure a greater level of security as you prefill Salesforce forms, you can create a two-step verification process with a simple workflow.
Step-by-step tutorial
Building a two-step verification process with forms is an effective way to enhance the security of your Salesforce data. This process allows you to first confirm the identity of an individual before they gain access to a prefilled web form displaying potentially sensitive data.
You’ll need to build two forms within your workflow. The first form will authenticate a user by one or more unique identifiers. The second form will pull the corresponding data from the Salesforce record. Examples of unique identifiers include:
- Email address and date of birth or mobile number
- Identification number (employee, application, student, etc.)
Follow these instructions to set up two-step verification for your Salesforce forms.
1. Create the first landing page (verification) form and add at least two unique identifier fields. In this example, we will use Email Address and Phone Number.

2. Create form two, the main form that will prefill a user’s data from Salesforce. In this case, we built a contact registration form.

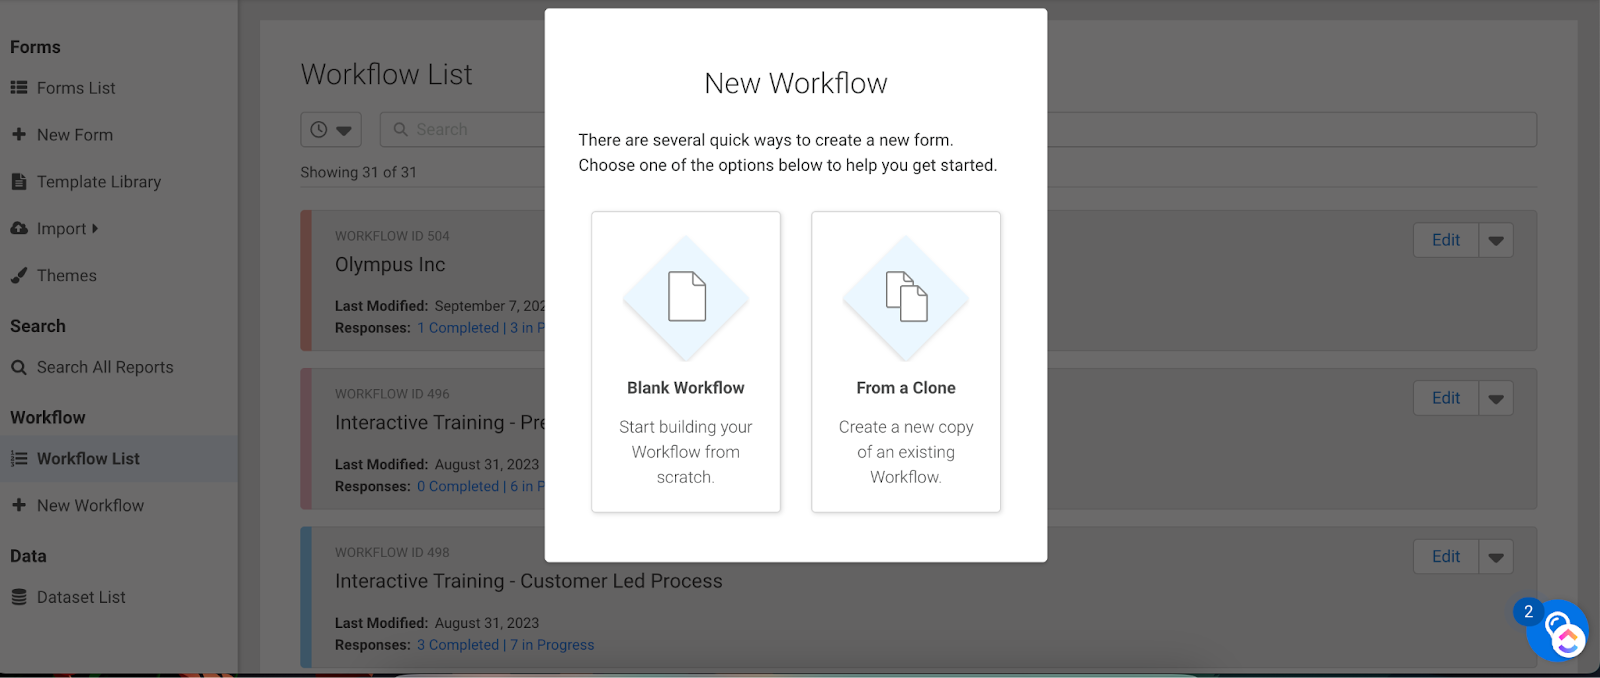
3. Create a New Workflow.
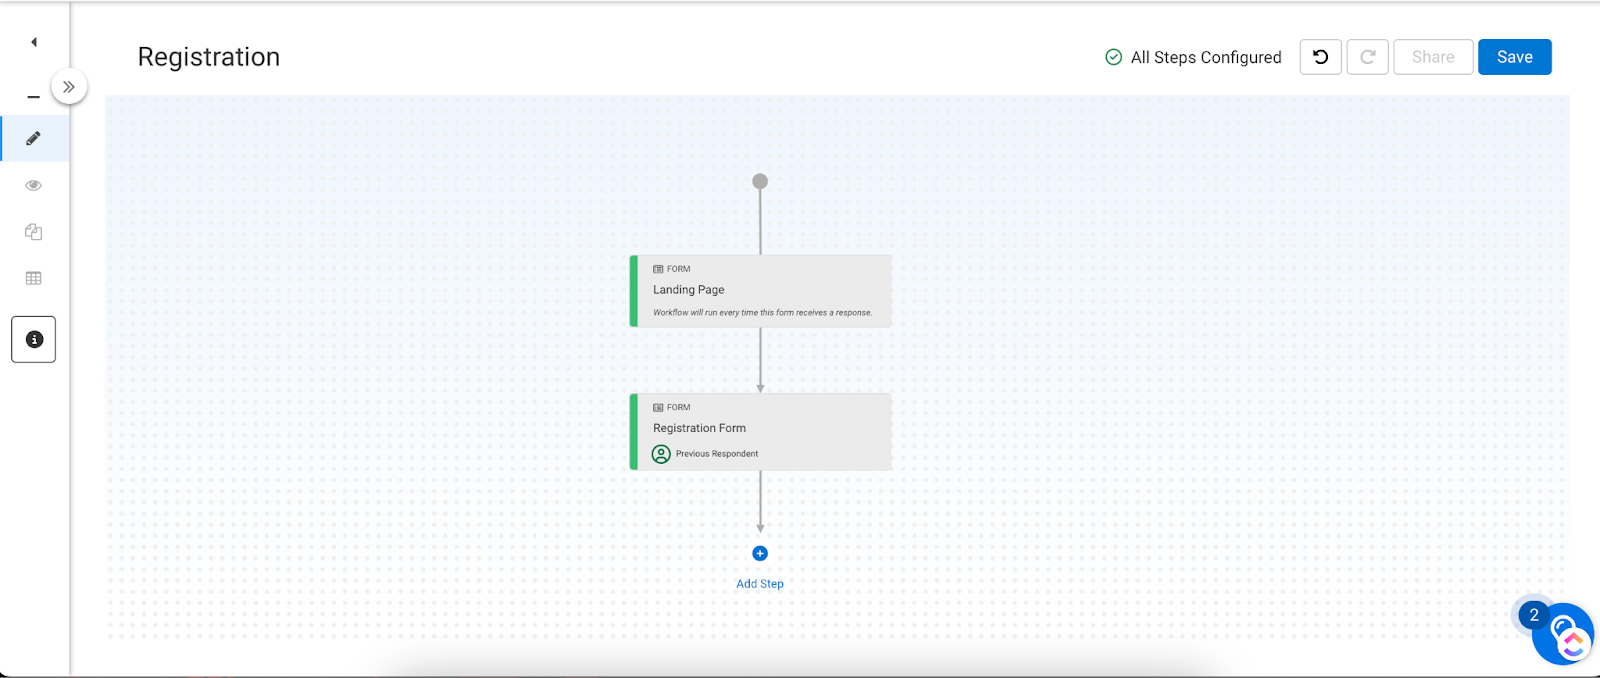
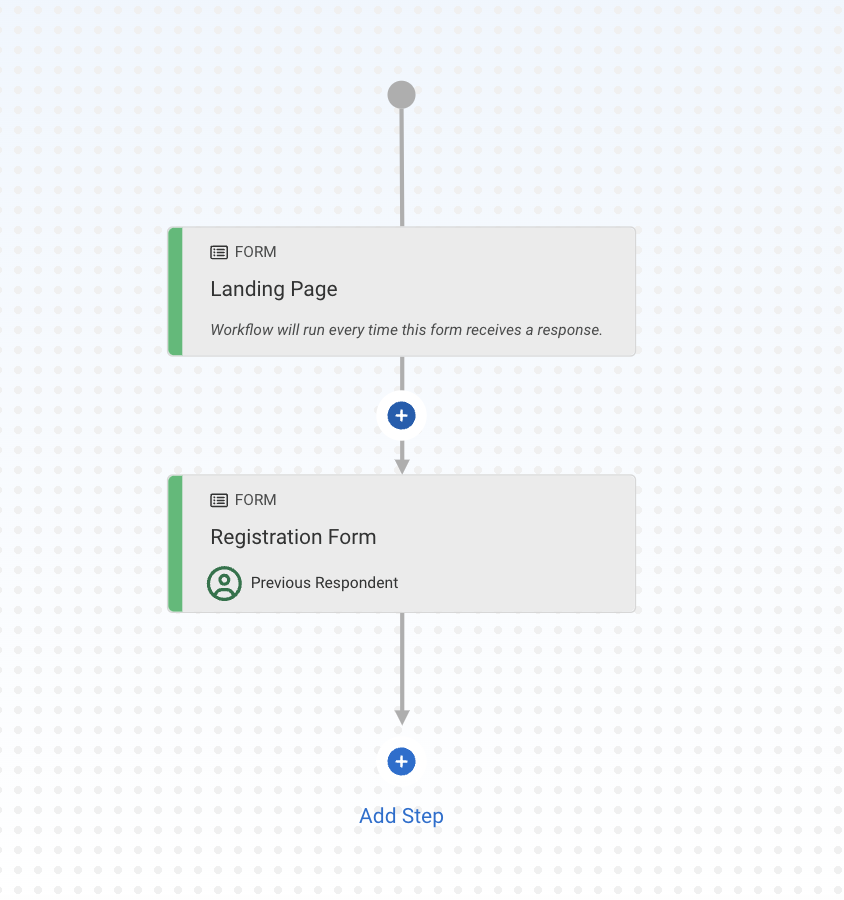
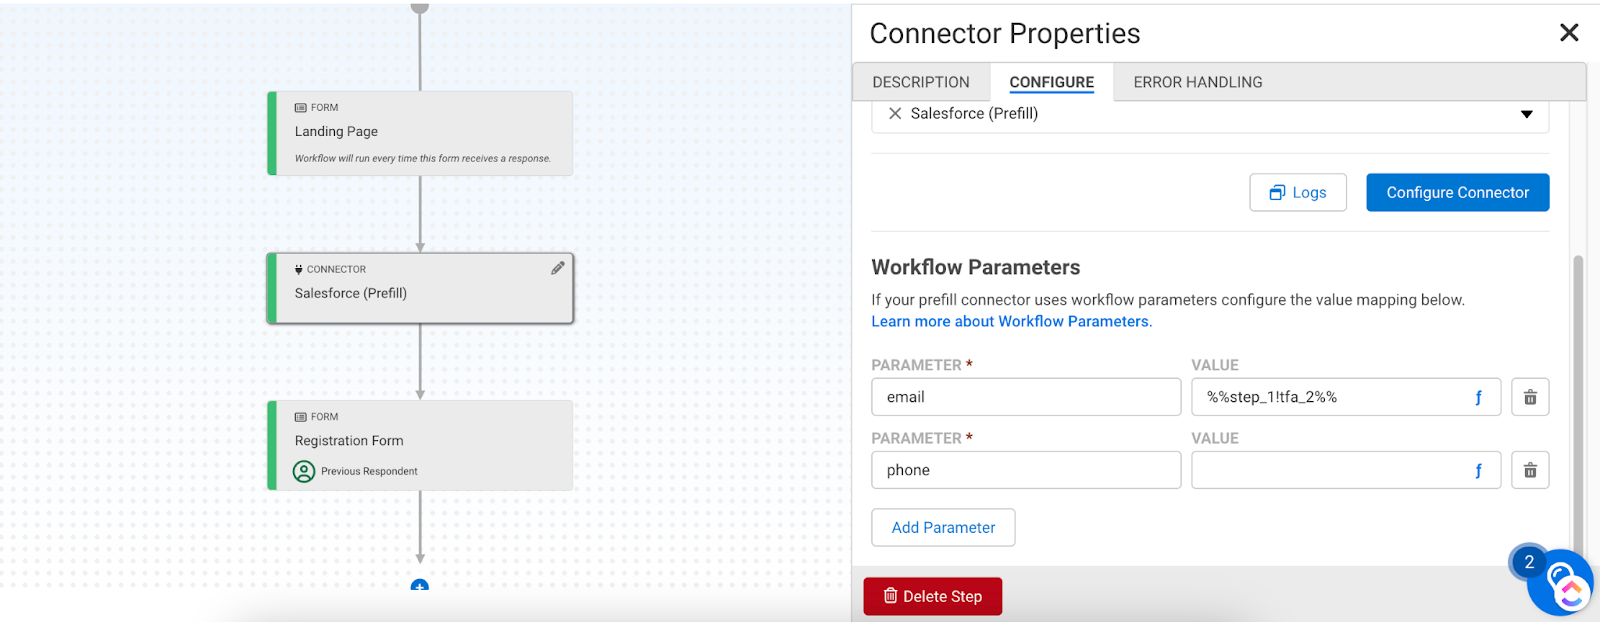
4. Add the landing page form and the registration form to the workflow.
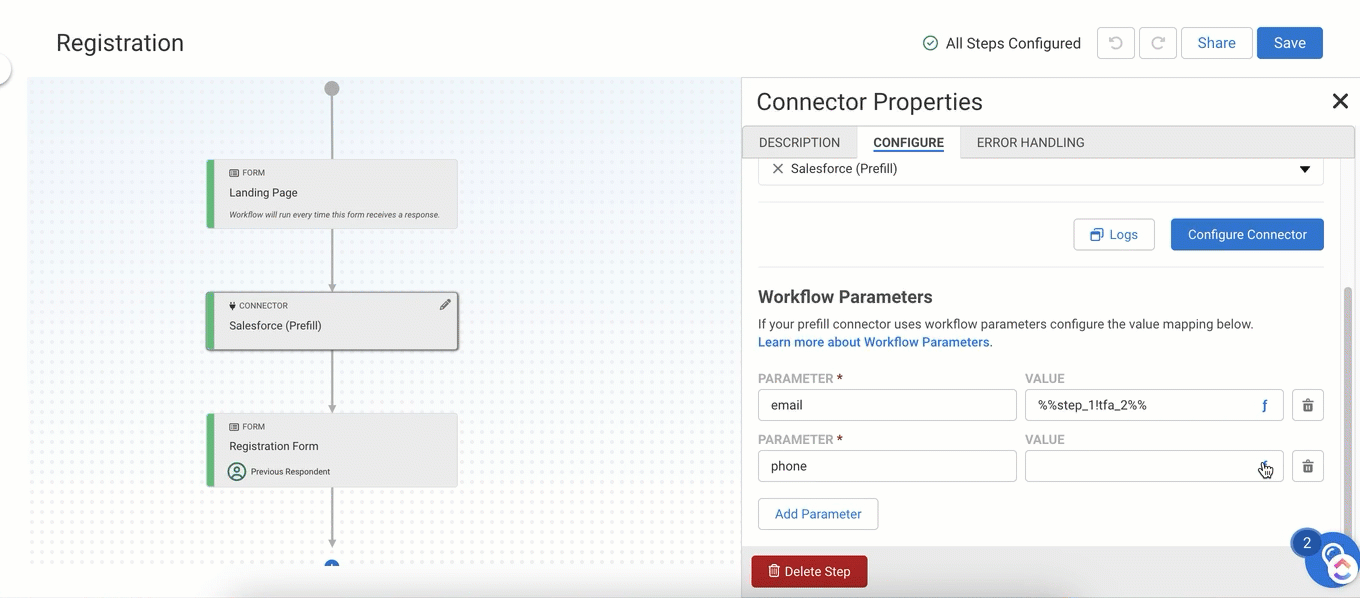
5. Add the Salesforce Prefill Connector between the two forms by clicking the blue “+” symbol.
6. Set up the Prefill Connector by clicking on “Configure Connector” from the Salesforce Prefill Connector Properties Panel.
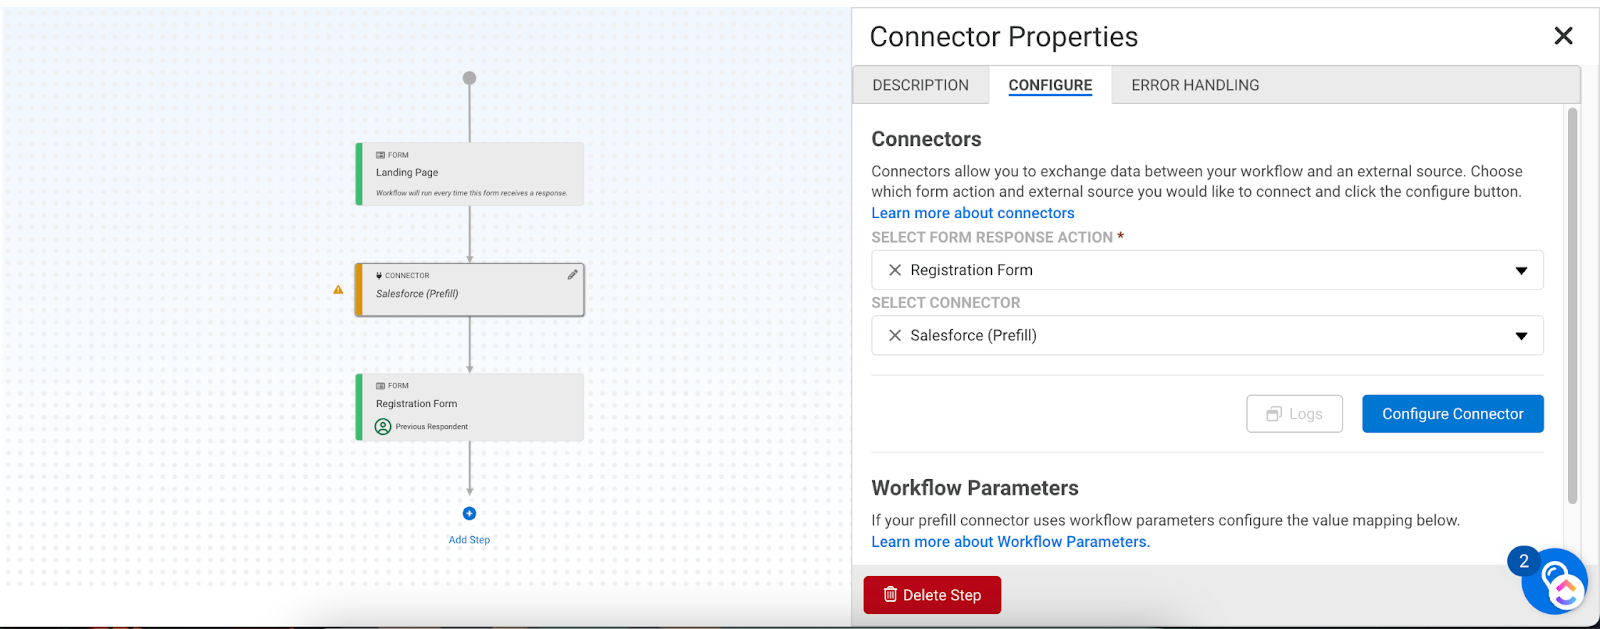
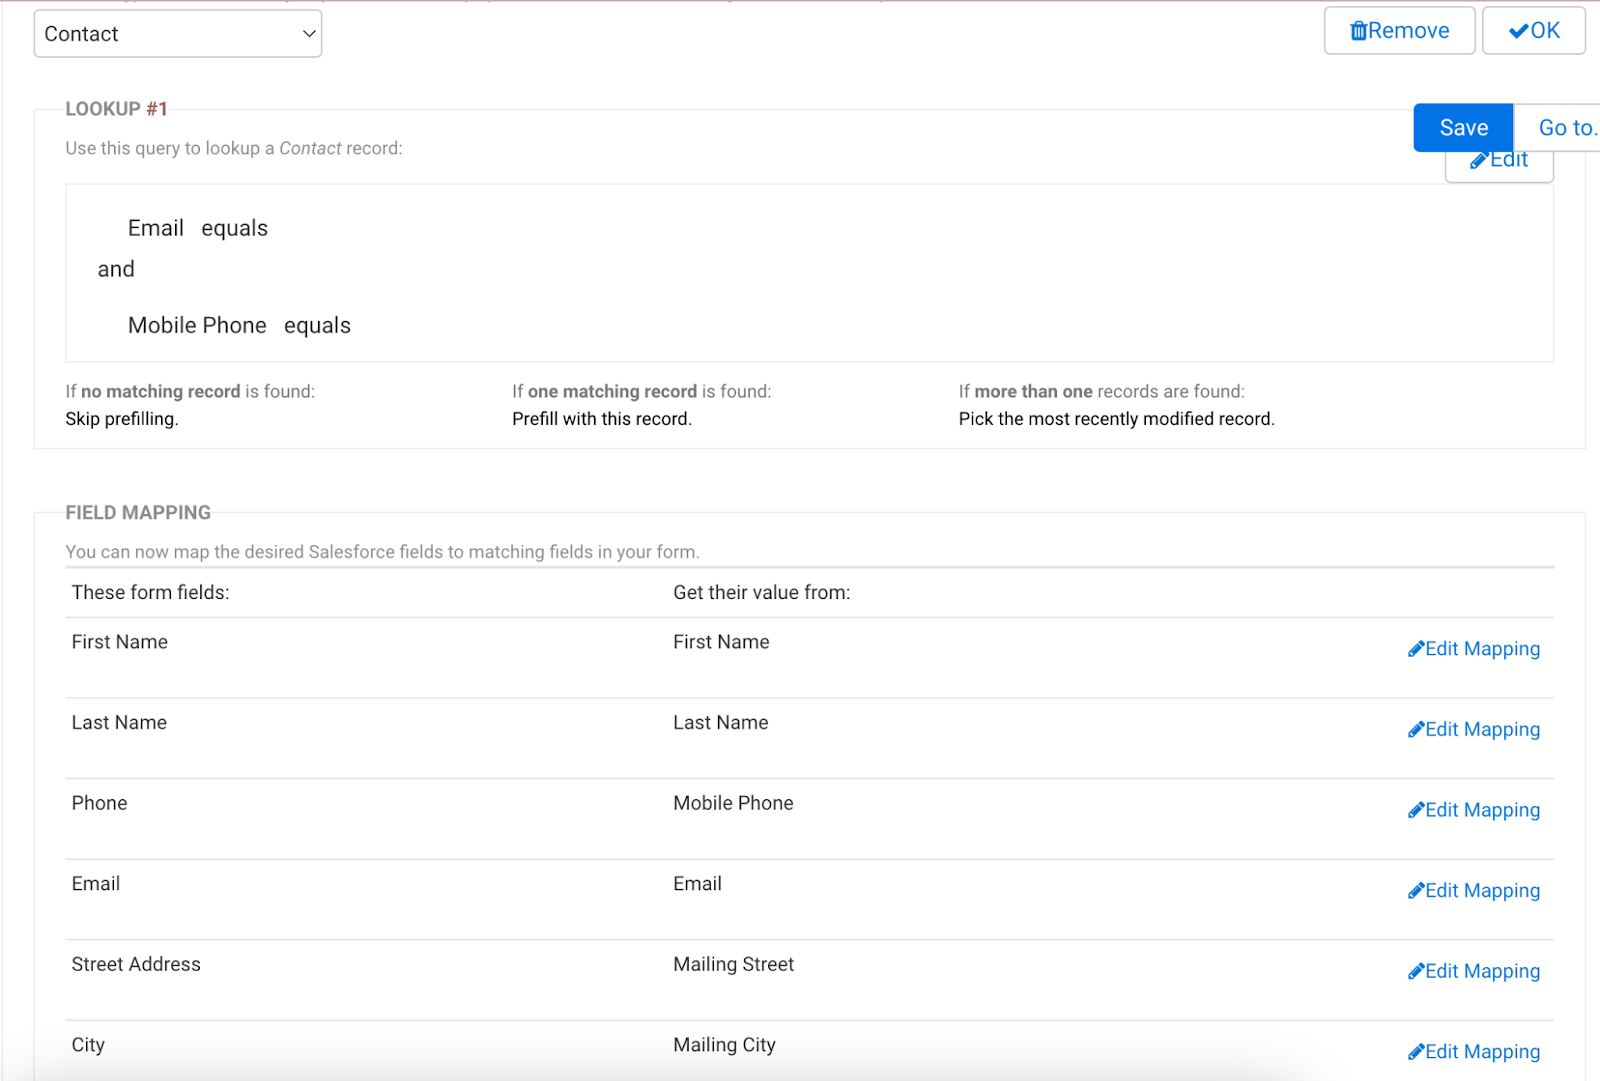
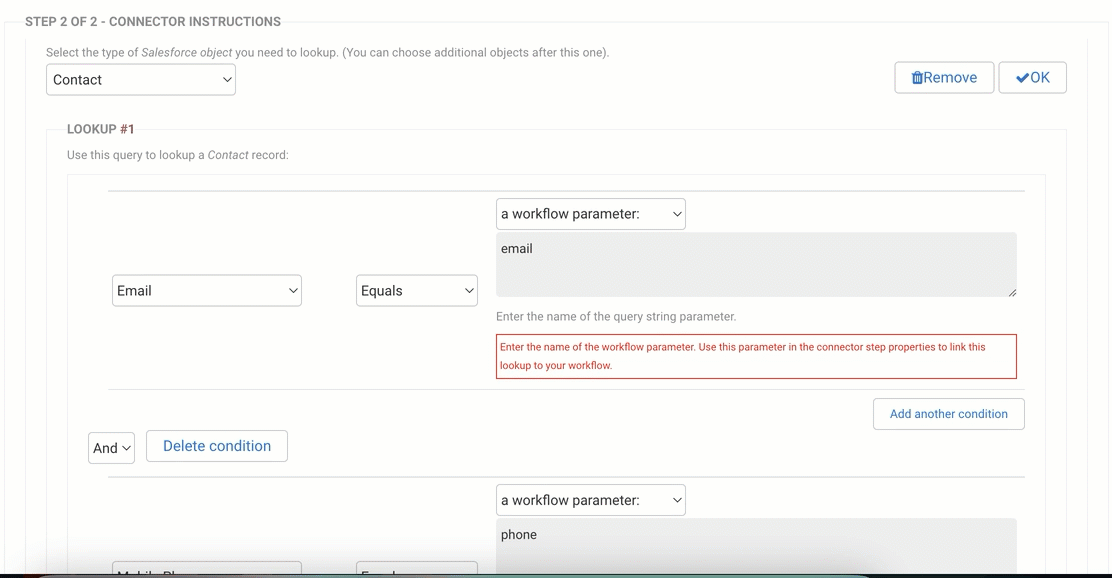
7. Lookup the contact object using the record ID = Workflow Parameter (email) and Workflow Parameter (phone).
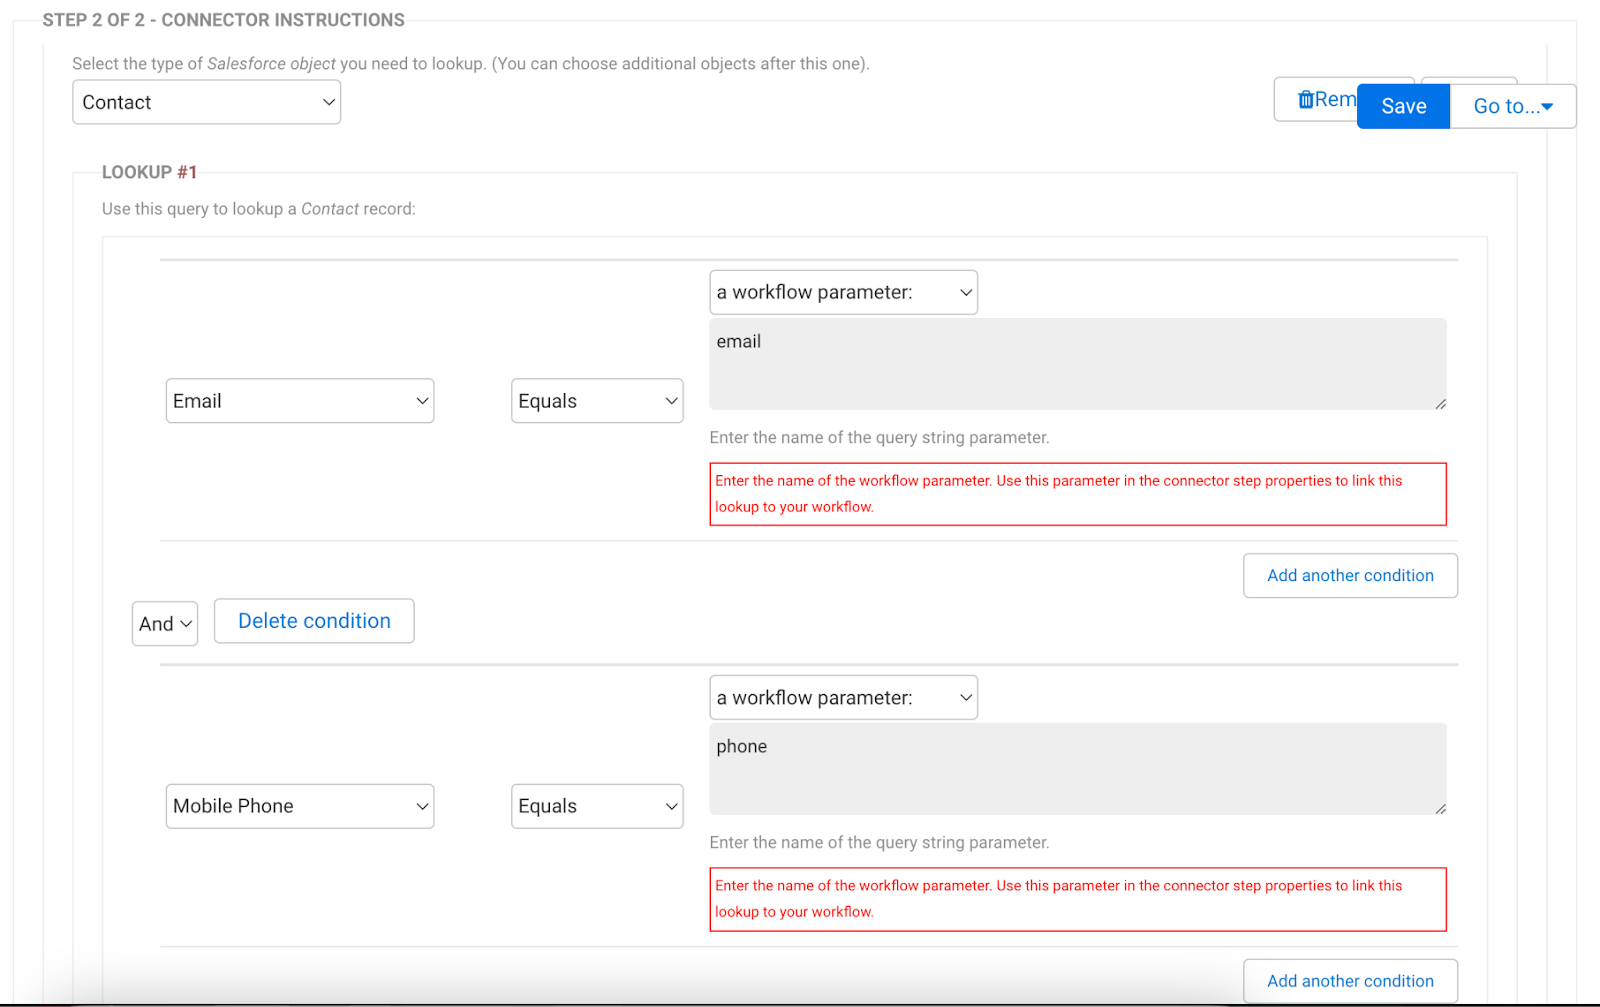
8. Map the fields if the form needs to be prefilled with the respondent’s information.
9. From the Salesforce Prefill Connector Properties Panel, set the Workflow parameters to be pulled from the first form.
10. Test the form!
See two-step verification in action
Want to put this tutorial on how to prefill Salesforce forms to work for you? Reach out for a personalized demo with one of our experts today!


