If you’re a Pardot user and you create landing pages for marketing on a regular basis, then I don’t need to waste your time explaining the importance of capturing leads via web form.
Chances are, you already know that it’s vital — and that it’s actually one of the easiest ways to collect leads online. And if you’re using a smart form that goes beyond basic capabilities, all the better, right?
Let me give you an example that you might find useful. Let’s say you wanted to add a web form to a landing page with your company’s professional branding, then push that data you gather from respondents to Salesforce.
Well, let me share something with you: it’s ridiculously easy to do.
Here on the blog, we like to share tips, tricks, and new and unique ways you can use FormAssembly with other cool existing tools. Which is why today we’re showing how you can use Pardot and FormAssembly together in the most amazing of ways!
If you’re a FormAssembly user but you love Pardot, the good news is that you can use both of them together to create a powerful marketing engine. (Note: You’ll need a FormAssembly account and a Pardot account for this to work.)
Here are some features you will be able to enjoy:
- Sync with Salesforce formula fields
- Lookup option for Salesforce
- Geolocation features
Recently, we created a landing page for an upcoming event in Pardot and then built and customized a form using FormAssembly, which allowed us to then push that data to Salesforce. We thought it was pretty useful, and for others out there who want to do something similar, here’s how you can do that:
1. Create an awesome landing page in Pardot
Use Pardot’s landing page builder to create a beautiful, high-converting landing page. Not only is this a major time-saver, but you can drag and drop to your heart’s desire!
If you don’t have time to code yourself, or you’re managing a team that needs to be able to produce landing pages in a timely manner, then a landing page builder might be the answer for you (and the ultimate time-saver).That way, you can build landing pages without writing even a line of code.
But don’t forget to keep landing page best practices in mind. For example, Jignesh Gohel from Usability Geek says that landing pages shouldn’t have too many opt-in forms. While opt-in forms are definitely necessary, your landing page shouldn’t be filled with multiple forms because it will only confuse visitors.
2. Build and customize your form
If you’re looking for a form that connects to Salesforce and can be customized beautifully with your company’s branding, then try creating your form in FormAssembly’s Form Builder. There, you will be able to upload your logo, customize the color scheme, and drag-and-drop any text or fields you want.
If you don’t want to deal with creating landing pages from scratch with code, no worries — you can use one of Pardot’s pre-made landing page templates and customize it to suit your needs.
Your forms will be able to go beyond web-to-lead — you’ll be able to create web-to-any-Salesforce-object forms.
3. Enable the Salesforce Connector
In order to create customized forms and push respondent’s data to Salesforce, you should first enable the Salesforce connector in FormAssembly. To do this, go to “Edit ➜ Configure” and then click “Connectors.” Find the Salesforce section and hit “Configure.”
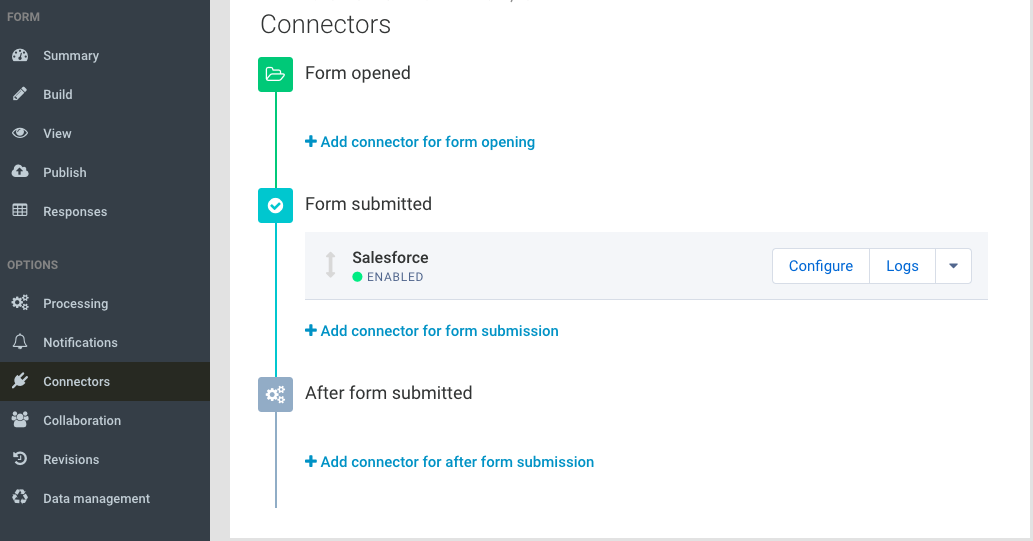
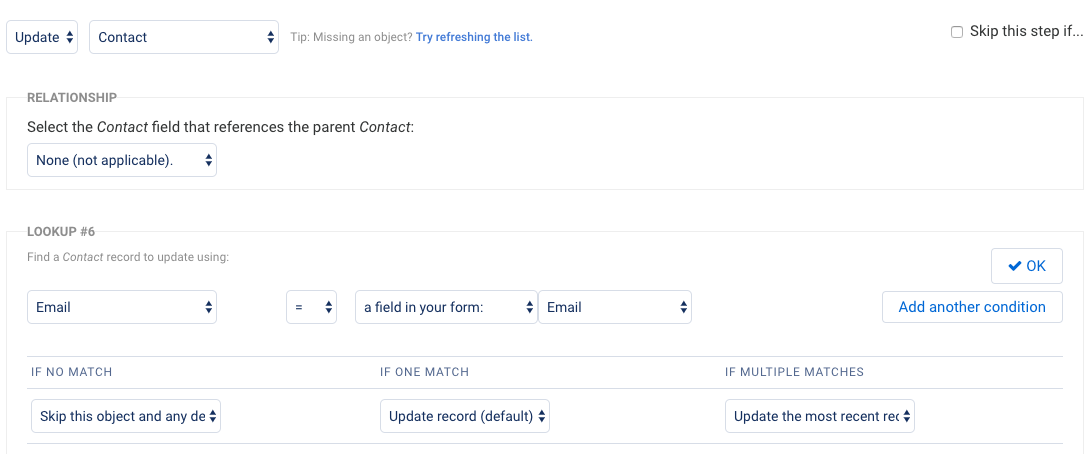
You will then be able to create new records, map multiple standard or custom objects, and even implement other cool things like advanced prefilling. For a complete and more detailed walk-through, view the full documentation.
4. Embed the form code snippet in Pardot
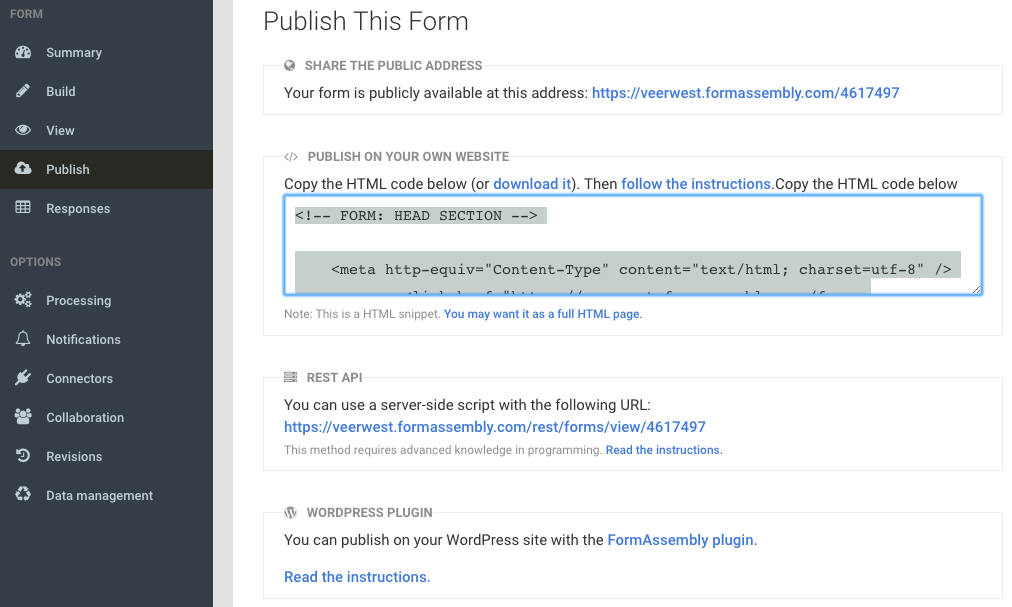
Once you’re finished building your form, find the code snippet (it’s generated automatically for you) and paste it in your Pardot landing page.
You can find this in the FormAssembly dashboard after clicking the name of your form. After finding your form, click “Edit –> Publish” and find the code snippet. Oh, and don’t let the jumble of code worry you. You won’t have to mess with the code, and all you will have to do is copy and paste.
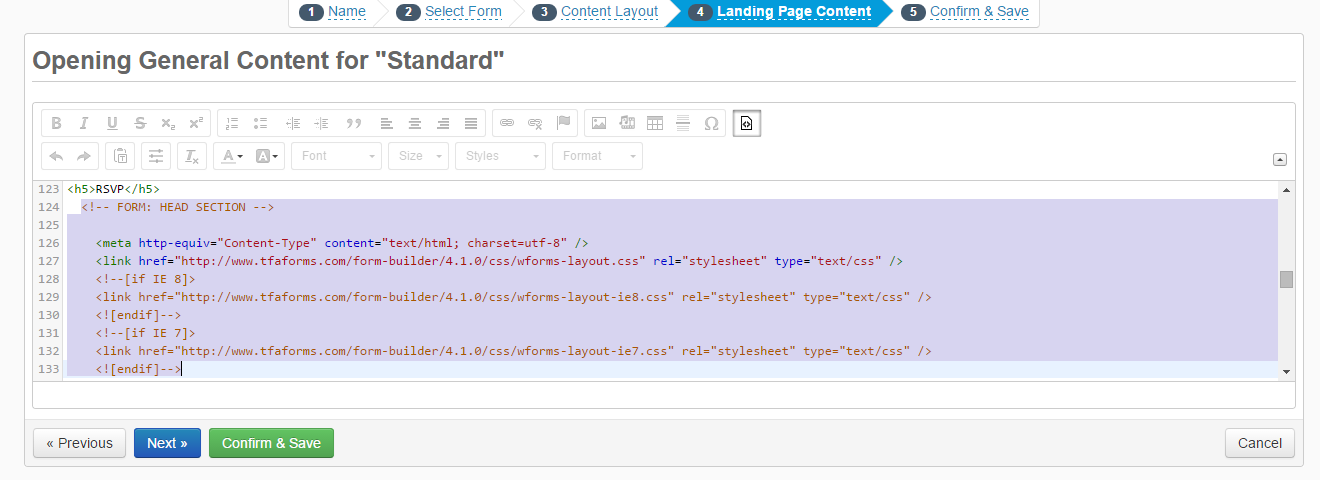
After that, head on back over to the landing page editor in Pardot and click the custom code symbol (as shown in the screenshot below).
Now, decide where you want the form to appear on the page. Once you think of a location, paste the form code snippet (the one you just grabbed) wherever you would like it to go. Now, view the updated version and your form will appear. You can move it wherever you want on the page, so feel free to re-arrange as needed until you find the perfect place for it.
And that’s it! In case you’re curious, here’s a picture example of a form in action on a landing page hosted by Pardot. This is a landing page that was created specifically for an event, and it was built with a custom landing page along with custom form integration with FormAssembly’s Salesforce connector:

Well, you’ve finished the guide! Congratulations: Now you’re ready to start collecting leads like a pro. You won’t even know what to do with all those incredible leads.
Conclusion
Over to you: Have you tried creating custom web forms and embedding them in your Pardot landing pages? We’d love to hear from you and see some examples of the cool stuff you’ve created!
Feel free to share your thoughts and examples with us in the comments here, or tweet with us @FormAssembly.
Learn more about creating Pardot forms in our eBook!


