This post was written by Steven Watkins, FormAssembly’s Email Marketing Analyst.
Would you find it useful to backup full form submissions into Salesforce Notes? By backing up responses into a note and relating it to its proper object, you’ll be keeping Salesforce and information organized for all of your teams involved. Check on form submissions within Salesforce without having to grant access or retrieve a submission directly from FormAssembly. This could save you on FormAssembly licenses, and unnecessary access sharing, and help maintain the proper access control and security for all of your users between both Salesforce and FormAssembly.
Before proceeding with this use case, you should have some previous knowledge of form building and the Salesforce Connector. Check out the linked Knowledge Base walkthroughs for a quick refresher before starting!
Prep your connector
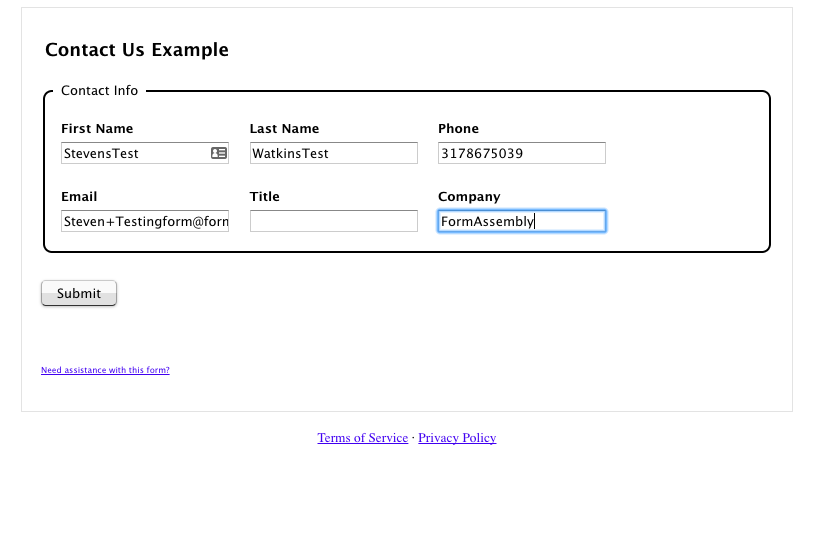
We’ll get started with this use case using a simple contact form setup with a Salesforce connector to create a lead record in Salesforce and update an existing lead record if one already exists. (View this tutorial on how to “Create a New Salesforce Record” for more information on getting your connector ready for this use case).
Set up a new connector step for notes object
When you’ve prepped your Salesforce Submit Connector, locate the final step in the Connector. In our example here, it is the first step of updating a lead.
We will set up a new object dependent on this step. This will be our Notes object. It’s important to nest this into the last step as a dependent object or this Note object will be created out of order.
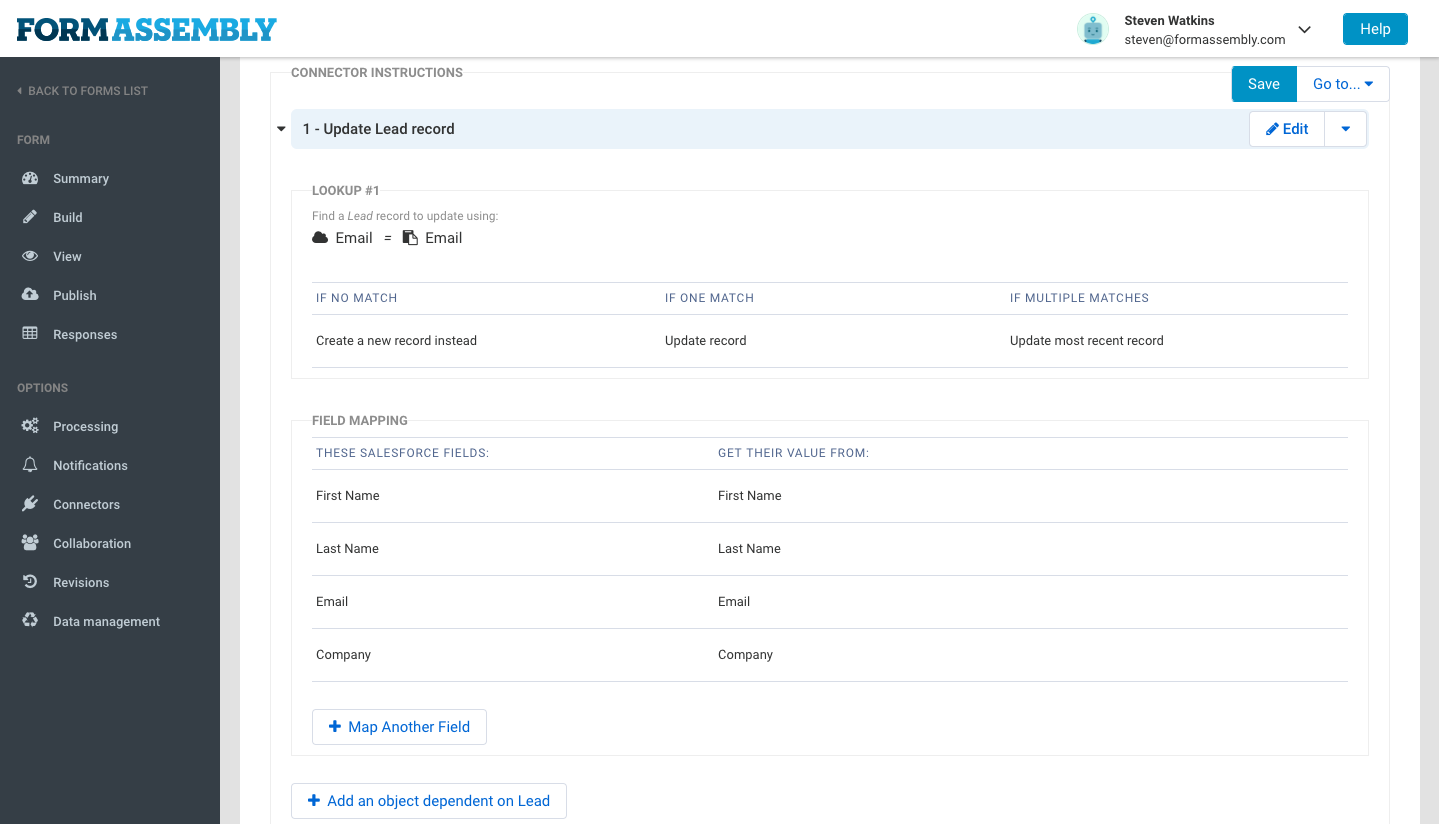
After selecting “Create object dependent on last step,” select Note in the drop-down menu of Salesforce objects.
Set up logic for creating or updating existing note records
Next we set the step to create a note every time or we can set it to lookup the note to see if it’s existing and update it by changing the drop-down for the Note object. Here we have it set to create every time so there is no need for a lookup or update type step. This step largely depends on how you map and name your Note record fields in future steps.
After setting the logic for this Note object, we’ll ignore the relationship box; we can map this directly.
Map fields from generic FormAssembly aliases to your Salesforce note
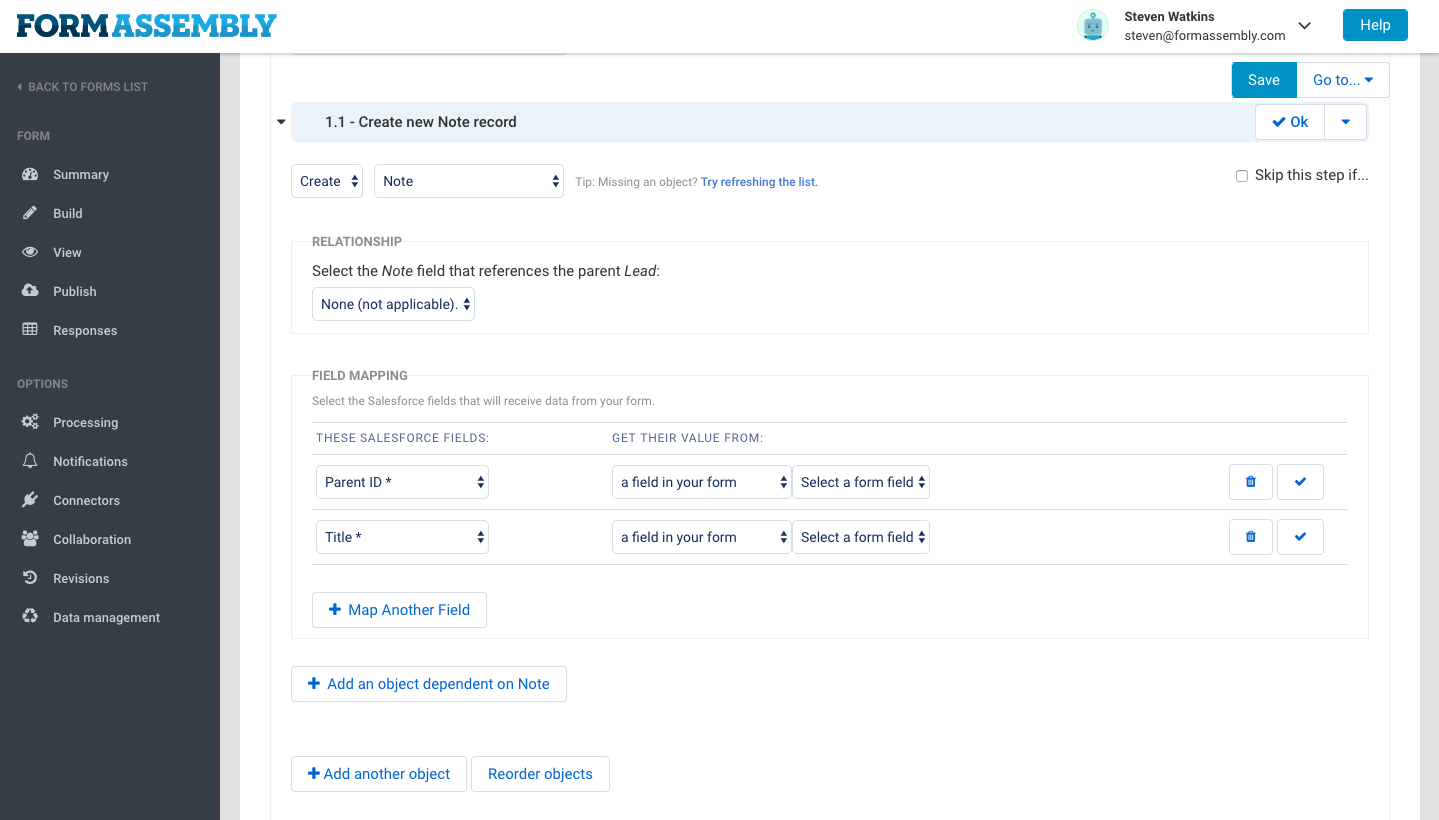
Next, we’ll start mapping our fields. Two fields, Parent ID and Title, are required. Parent ID will be the lead ID from which we setup this object. Select “The ID of an object above” under “gets their value from” and set it to the Lead ID of the step you’re setting this note up for.

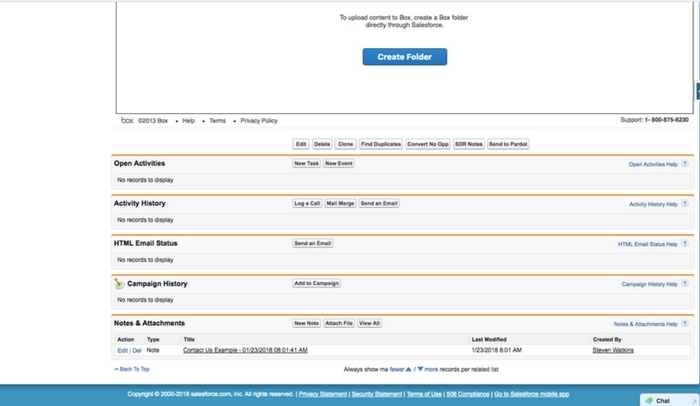
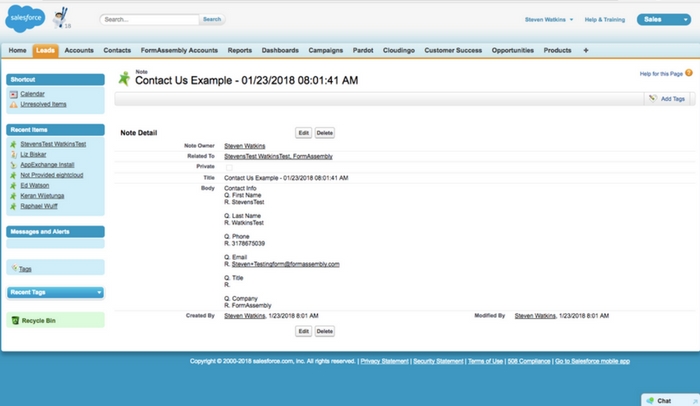
Title is where we can set our Note up to be found and updated, if you wish to do this you may just make it a standard name. Otherwise, it’s typically a good practice to set the title up to match your form name with the Submission Time/Date appended to it. For example, “Website Contact Form – %%Submitted_Date%%.” This will setup your notes to be easily readable on the Lead record level, as pictured below.
Our next field that we must set up is the “Body” field. Add a field to map and select it from the drop-down menu.
In this field we’re going to set its value to be taken from a “Formula or text field.” Next, we’ll set the field to be mapped with the alias %%Response%%.
This is the alias that will pull the entire response and the general form data such as submission time, form name, etc. Full list of aliases can be found here.
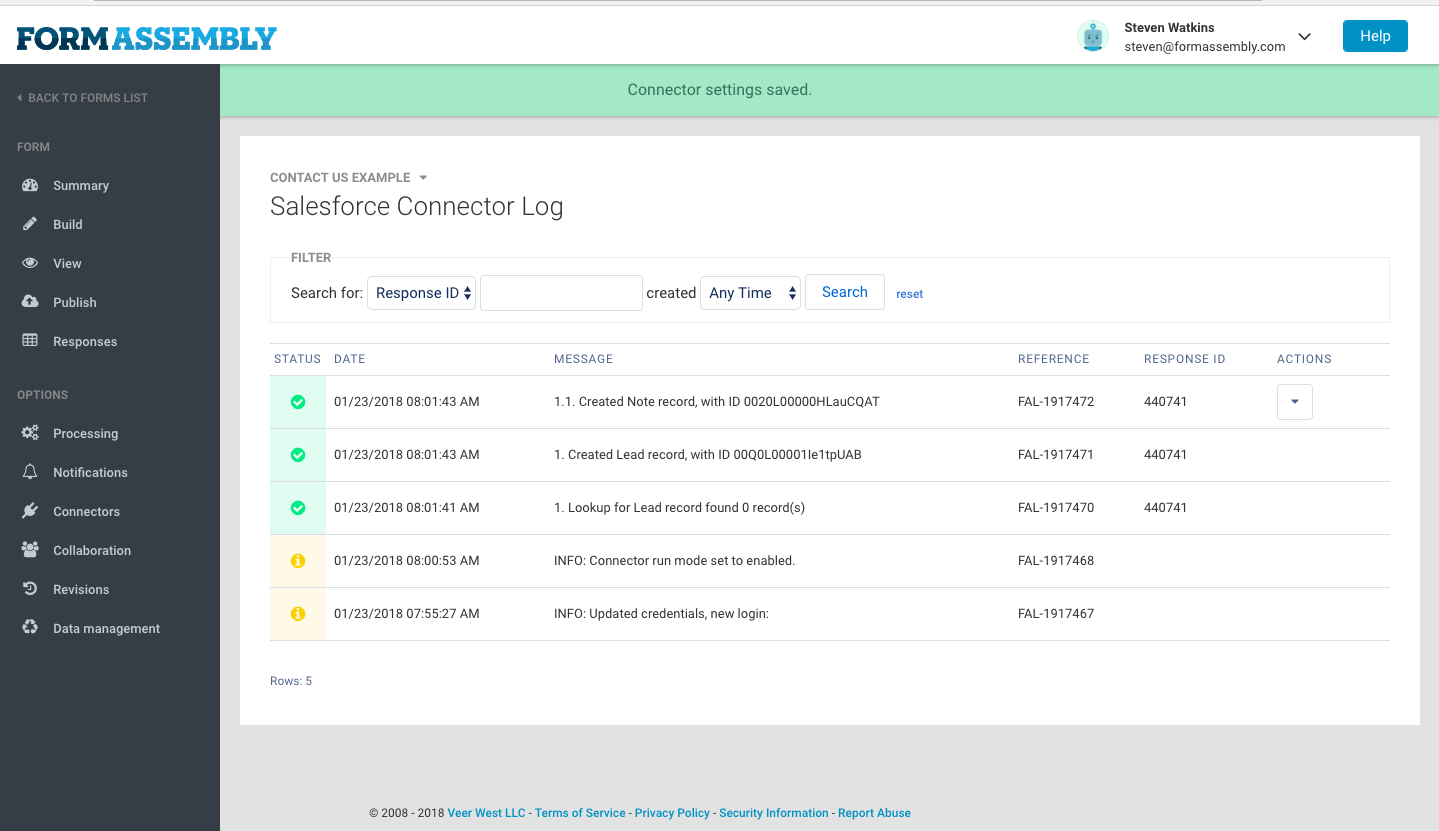
We’ve now got our Salesforce Connector set up to create a note with the full response of our form and attach it to the lead record that is created when it is submitted.
Test and preview Salesforce records
Here we can review the entire process from form fill to Salesforce record setup in a test. Always test your forms thoroughly before publishing to your website or other locations.
Explore and customize
Explore other fields and aliases in the Note object to further refine how your data is setup into that record when it’s created from submissions. You could customize the body of the note by picking and choosing your aliases if you don’t want to capture the full response every time.
Let us know on Twitter if you have ideas or a use case of your own like this that you would like to share! Liked this post? Read what the Salesforce-FormAssembly How-To Series all about, and keep an eye out for our next tutorial in two weeks!
Dive deeper into our Salesforce integration with our Salesforce eBook.