Note: This is a somewhat advanced use of FormAssembly. If you’re not comfortable editing custom code, you might want to build up those skills before attempting this tutorial. Here is some information from our documentation to get you started. Please note that our Success Team does not support custom code help, however, we do work with a number of partners who may be able to assist you. Please email us at partners@formassemblycom to learn more.
Do you have localization needs? FormAssembly offers built-in form language options to translate your forms into another language. However you may have a situation where you need one form to be translated into multiple languages to accommodate different users. With some custom code and setup work, you can accomplish this, either based on a user selection or dynamically based on browser language detection.
Translate your form into multiple languages
Whether you’re a Javascript expert or a novice form builder, we have two options so you can choose which one fits your experience level.
Method 1 will show you how to add Google Translate functionality to your forms so users can pick a language and have the form’s content translated based on their selection. This option is quick and easy, though the translations might not always be 100% accurate.
Method 2 will show you a highly customized way to create custom translations using Javascript that will activate based on your user’s browser settings. Your users won’t know it, but on the backend, your form will be triggered to automatically display their language and it’ll be accurate because you have the ability to define each translation.
Ready to jump into the tutorial? You’ll need a FormAssembly account (any plan) and, ideally, a little Javascript experience—though our goal is to make this tutorial accessible for anyone with any level of expertise.
Method 1: Google Translate Integration (Simpler, but Less Customizable)
1. Set Up Your Form
First, create or select the form you want to use. We’ll use a simple contact form for this tutorial.
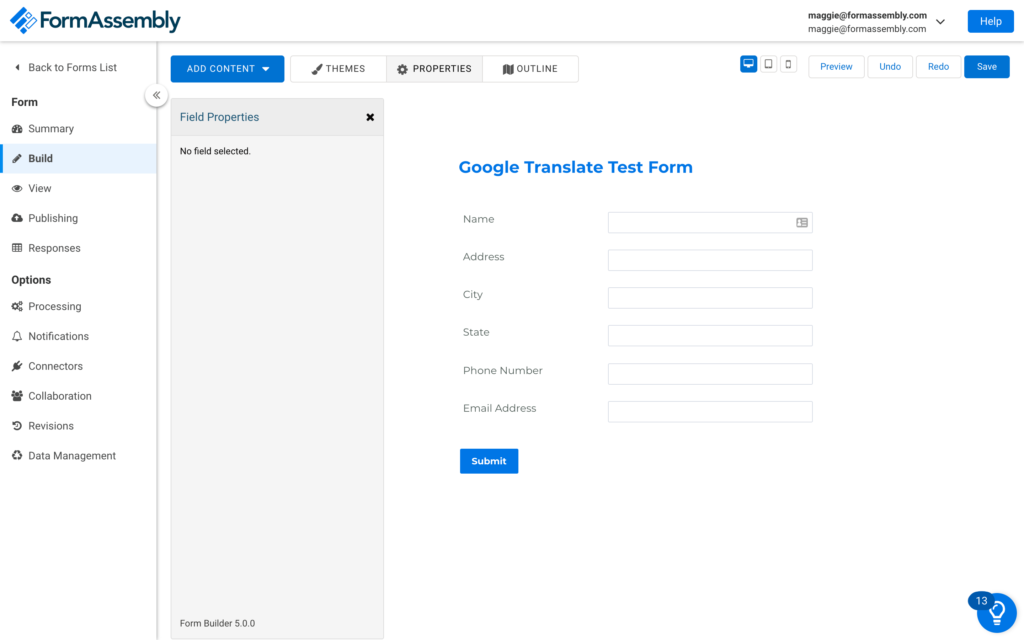
Sample Google Translate form.
2. Add an HTML Field
At the top of your form, add a text field and insert the following content into the HTML option:
Please select your language.<div id="google_translate_element">You can swap out “Please select your language.” for any kind of instructional text you like, or simply “Google Translate.”
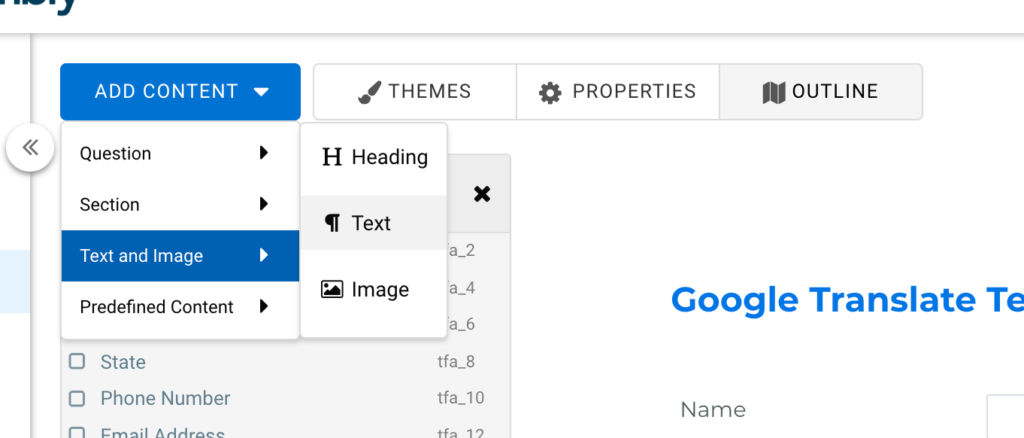
Select text.

Select HTML option.
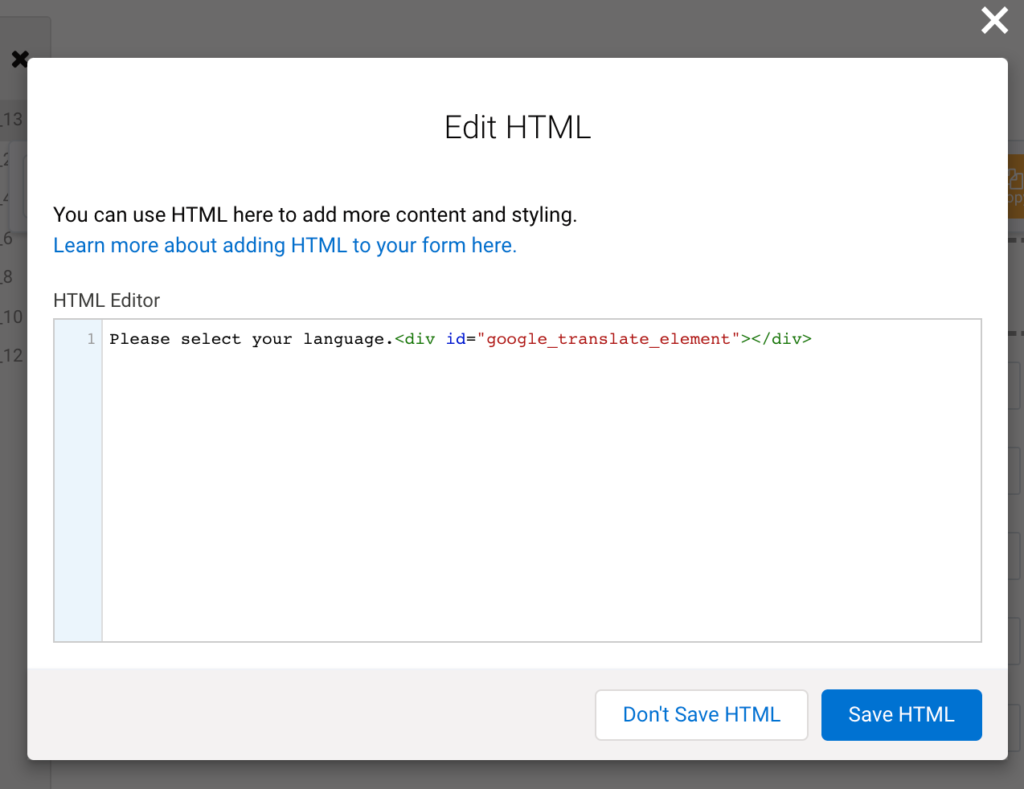
Add HTML.
3. Add Javascript
Next, you’ll add the following Javascript code into the “Custom Code” window under the “Properties” tab.
<script type="text/javascript">
function googleTranslateElementInit() {
new google.translate.TranslateElement({pageLanguage: 'en'}, 'google_translate_element');
}
</script>
<script src="//translate.google.com/translate_a/element.js?cb=googleTranslateElementInit" type="text/javascript"></script>
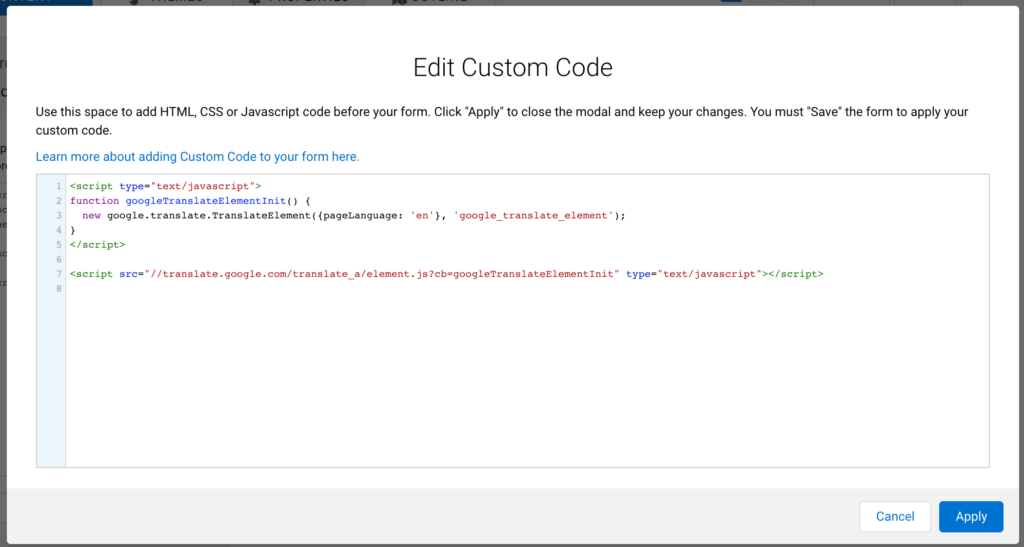
Add custom code.
4. Save & Test
That’s it! After saving your form, hit “View” to see it live and test it.
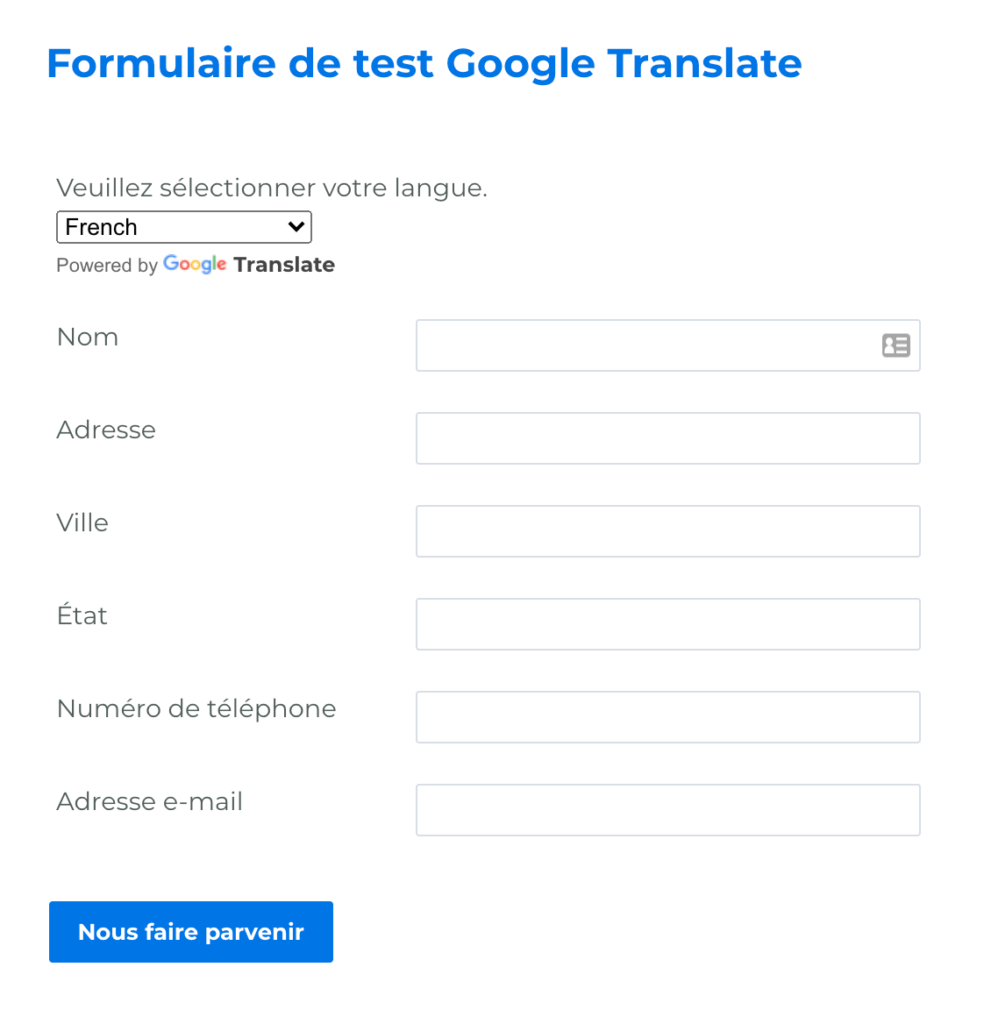
French translation.
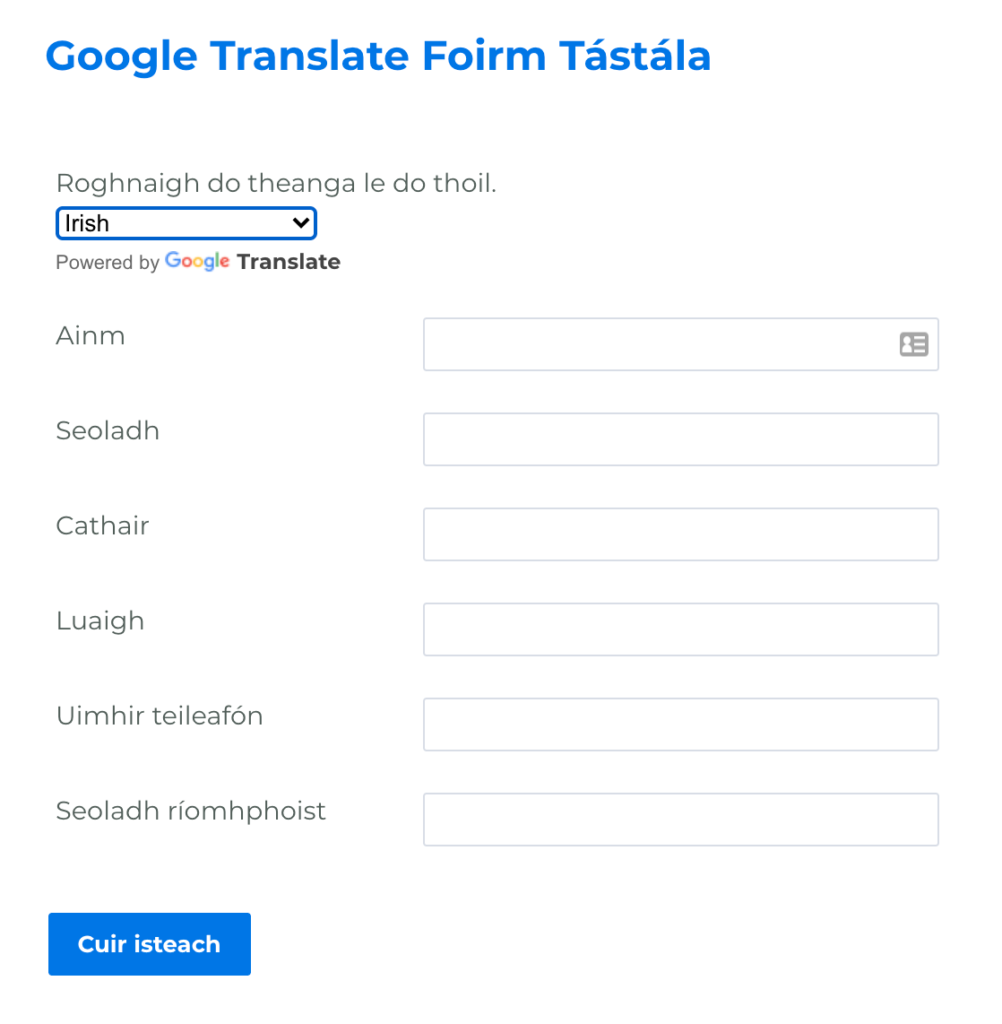
Irish translation.
Method 2: Custom Javascript Translation (Dynamic and Personalized, but More Setup Required)
If you thought that was easy, be prepared for more complexity in this next tutorial. This tutorial will show you how to build a form that modifies the form’s content based on the user’s browser language settings.
We’ll use an example code that supports English, Spanish, French, and German browser settings, but with additional work you can add translations for other languages as well.
1. Set Up Your Form
Just as in the previous tutorial, you’ll need to choose or build a form to test this Javascript code on. We’re using another simple contact form since it’s a common use case and they’re quick to create, but you can apply this to any type of form.
2. Add Your Javascript
Next, you need to add and update your Javascript. The segment of code pasted here is the simplest example of the code you’ll need to add to your form. It will work as long as you only use text fields in your form. For more complex forms with different field types, you’ll need to make some adjustments that we’ll go over later.
First, let’s talk about what you’ll need to update within this code.
<script type="text/javascript">
//
window.addEventListener("load", function() {
//
// Extract the value of the language the browser is set to:
const getLang = navigator.language;
console.log("getLang = ", getLang);
//
var valueFormTitle = document.getElementsByClassName("wFormTitle")[0];
var valueSubmitButton = document.querySelector("#submit_button");
//
var textInput_01 = document.getElementById("tfa_1-L"); // First name
var textInput_02 = document.getElementById("tfa_2-L"); // Last name
var textInput_03 = document.getElementById("tfa_3-L"); // Email
var textInput_04 = document.getElementById("tfa_4-L"); // Company
//
// US English:
if (getLang.startsWith("en")) {
console.log("Processing en-US");
//
document.title = "English-language title.";
valueFormTitle.innerHTML = "Form Title: English";
valueSubmitButton.defaultValue = "Submit: English";
//
textInput_01.innerHTML = "First Name English Test";
textInput_02.innerHTML = "Last Name English Test";
textInput_03.innerHTML = "Email English Test";
textInput_04.innerHTML = "Company English Test";
}
//
// Spanish:
else if (getLang.startsWith("es")) {
console.log("Processing es-ES");
//
document.title = "Spanish-language title.";
valueFormTitle.innerHTML = "Formulario de Contacto";
valueSubmitButton.defaultValue = "Enviar"
//
textInput_01.innerHTML = "Nombre(s)";
textInput_02.innerHTML = "Apellido(s)";
textInput_03.innerHTML = "Email";
textInput_04.innerHTML = "Empresa";
}
//
// French:
else if (getLang.startsWith("fr")) {
console.log("Processing fr");
//
document.title = "French-language title.";
valueFormTitle.innerHTML = "Formulaire de Contact";
valueSubmitButton.defaultValue = "Soumettre";
//
textInput_01.innerHTML = "Prénom";
textInput_02.innerHTML = "Nom de Famille";
textInput_03.innerHTML = "E-mail";
textInput_04.innerHTML = "Enteprise";
}
//
// German:
else if (getLang.startsWith("de")) {
console.log("Processing de");
//
document.title = "German-language title.";
valueFormTitle.innerHTML = "Kontakt Formular";
valueSubmitButton.defaultValue = "Senden";
//
textInput_01.innerHTML = "Vorname";
textInput_02.innerHTML = "Nachname";
textInput_03.innerHTML = "Email";
textInput_04.innerHTML = "Firma";
}
//
else {
console.log("Processing ** unknown **")
//
document.title = "** unknown **-language title.";
valueFormTitle.innerHTML = "Form Title: ** unknown **";
valueSubmitButton.defaultValue = "Submit: ** unknown **";
//
textInput_01.innerHTML = "First Name ** unknown ** Test";
textInput_02.innerHTML = "Last Name ** unknown ** Test";
textInput_03.innerHTML = "Email ** unknown ** Test";
textInput_04.innerHTML = "Company ** unknown ** Test";
};
});
</script>- Update field aliases: First, you’ll need to update each of the field aliases with the correct alias of the corresponding field in your form. Notice that sometimes we will add a “-L” at the end of aliases, and in the code below, a “-T.” We use these additions to accurately interact with field labels and page titles as FormAssembly renders them.
- Add additional text fields as needed: To account for other fields on your form, you will need to copy and edit the code at the beginning where the variables are being defined and also within each language section to add a translation.
- Revise the translations and add additional languages: We’ve included basic translations here, but if you want to vary up the question wording, you’ll need to add your own versions so the form knows what to display when a browser is set to Spanish, French, and so on. If you want to add additional languages, you will need to copy and add a new language section based on one of the existing ones.
This code will allow you to update text fields, the form title, and the submit button of your form, but if you want to work with more field types, you’ll need to add those in yourself. Here are some examples of the variable assignment lines and action lines of Javascript you’ll need to add for different form field types.
Radio Buttons
//Add these at the top of your Javascript to establish the IDs assigned to each radio button label or option.
var radioButton_01_Label = document.getElementById("tfa_XX-L");
var radioButton_01_OptionA = document.getElementById("tfa_XX-L");
var radioButton_01_OptionB = document.getElementById("tfa_XX-L");
var radioButton_01_OptionC = document.getElementById("tfa_XX-L");
//Add these to determine the translations for each element of your form (Copy for each language)
radioButton_01_Label.innerText = "radioButton_01_Label Spanish";
radioButton_01_OptionA.innerText = "radioButton_01_OptionA Spanish";
radioButton_01_OptionB.innerText = "radioButton_01_OptionB Spanish";
radioButton_01_OptionC.innerText = "radioButton_01_OptionC Spanish";
Page Names
//Add these at the top of your Javascript to establish the IDs assigned to each page.
var page_01_Label = document.getElementById("tfa_XX-T");
var page_02_Label = document.getElementById("tfa_XX-T");
//Add these to determine the translations for each element of your form (Copy for each language)
page_01_Label.innerText = "page_01_Label Spanish";
page_02_Label.innerText = "page_02_Label Spanish";
Drop-Down Menus
//Add these at the top of your Javascript to establish the IDs assigned to each drop-down menu label and option.
var dropDown_01_Label = document.getElementById("tfa_XX-L");
var dropDown_01_OptionA = document.getElementById("tfa_XX");
var dropDown_01_OptionB = document.getElementById("tfa_XX");
var dropDown_01_OptionC = document.getElementById("tfa_XX");
//Add these to determine the translations for each element of your form (Copy for each language)
dropDown_01_Label.innerText = "dropDown_01_Label Spanish";
dropDown_01_OptionA.innerText = "dropDown_01_OptionA Spanish";
dropDown_01_OptionB.innerText = "dropDown_01_OptionB Spanish";
dropDown_01_OptionC.innerText = "dropDown_01_OptionC Spanish";
Checkboxes
//Add these at the top of your Javascript to establish the IDs assigned to each checkbox label and option.
var checkBox_01_Label = document.getElementById("tfa_XX-L");
var checkBox_01_OptionA = document.getElementById("tfa_XX-L");
var checkBox_01_OptionB = document.getElementById("tfa_XX-L");
var checkBox_01_OptionC = document.getElementById("tfa_XX-L");
//Add these to determine the translations for each element of your form (Copy for each language)
checkBox_01_Label.innerText = "checkBox_01_Label Spanish";
checkBox_01_OptionA.innerText = "checkBox_01_OptionA Spanish";
checkBox_01_OptionB.innerText = "checkBox_01_OptionB Spanish";
checkBox_01_OptionC.innerText = "checkBox_01_OptionC Spanish";
Pro Tip: Don’t see the alias of a question choice on the Form Alias Reference page? Open the question in the form builder and you’ll see the alias next to each option.
Once you’ve completed your code and translations, follow the instructions linked below to change your browser language and test the form’s functionality.
- Chrome
- Safari (To test on Safari, you’ll have to change the language of your Mac altogether.)
- Firefox (Note that in addition to choosing the language to display notifications, menus, and messages, you’ll also need to select a preferred language for displaying pages.)

Loved this tutorial? There’s more where that came from. Download our top Salesforce-FormAssembly tutorials today.

