Intro
In this blog post, we are going to expand upon a previous tutorial to look at how to implement a multiple-criteria search of Salesforce records using FormAssembly. Implementing this search functionality makes locating the right record in Salesforce a much easier task for form respondents, and creates cleaner and better-flowing forms.
In the example below, we’ll be working with the Opportunity object. Our two search criteria are the Opportunity name and its amount.
Note: this is somewhat advanced use of FormAssembly. If you’re not comfortable editing custom code, you might want to build up those skills before attempting this tutorial. Here is some information from our documentation to get you started. Please note that our Success Team does not support custom code help, however, we do work with a number of partners who may be able to assist you, please email us at partners@formassemblycom.
Prerequisites
Before we start, we need to create three forms and give them names. For simplicity purposes, the forms in this tutorial are called “Multiple-Criteria Search – Part 1/2/3”. Note: You’ll need to use the URL for form three in the setup for form two.
First form setup
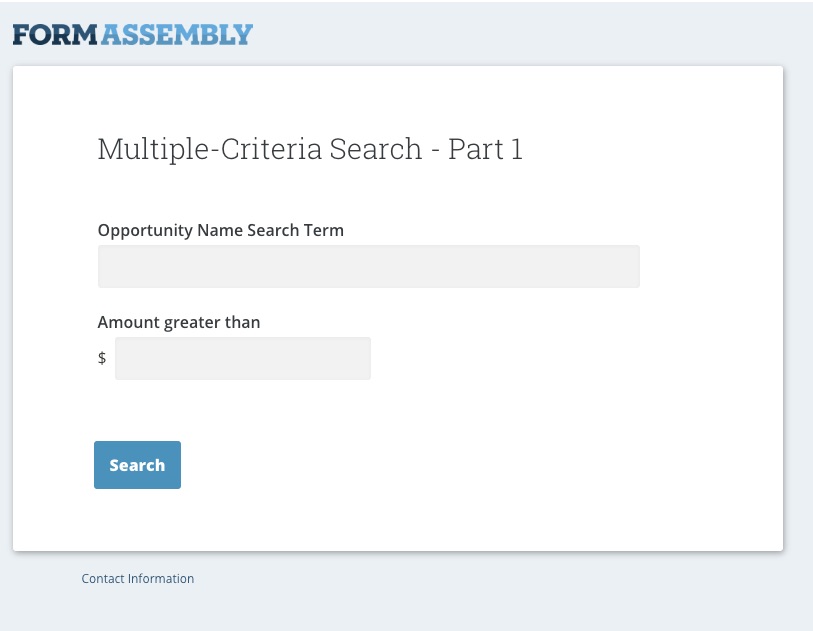
The first form is just an interface to enter the criteria for our search. Go ahead and add two fields to the form as shown in the screenshot below:
Second form setup
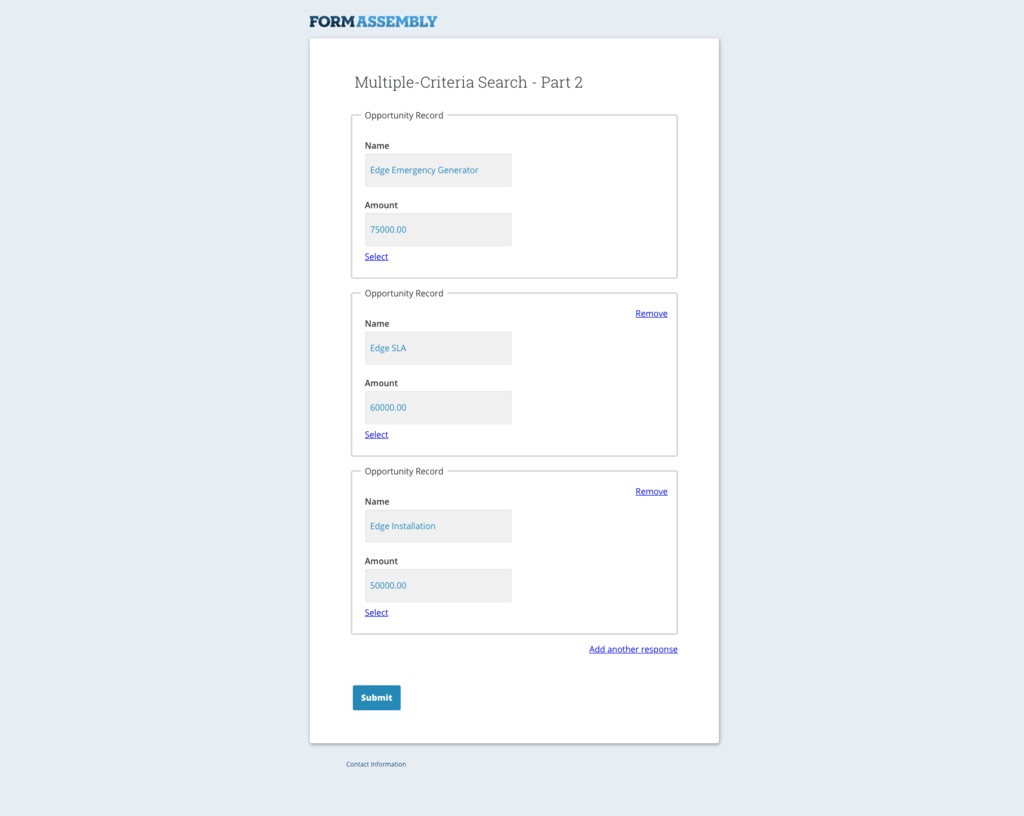
For this form, we need a way to show the results of our search. We’ll do that by creating a repeatable fieldset with the records we get from Salesforce.
The first step is to create a new fieldset and make it repeatable. Recreate the following:
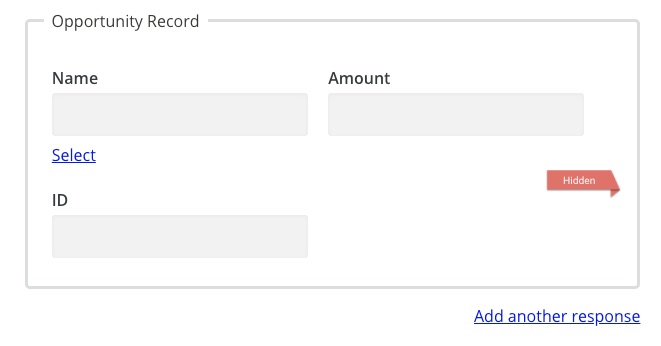
To create the “Select” hyperlink, follow these steps:
1. Add a new Text element on the page
2. Click on HTML in the menu above the new Text element:

3. Paste the following into the pop-up:
<a class=”htmlContent” href=”LINK”>Select</a>
4. Click “Save HTML” and “Done”
Once you are done with the Text field, navigate to Properties -> Custom Code and insert the following:
<script src=”https://code.jquery.com/jquery-3.2.0.min.js” integrity=”sha256-JAW99MJVpJBGcbzEuXk4Az05s/XyDdBomFqNlM3ic+I=” crossorigin=”anonymous”>
</script>
This will give us access to use jQuery framework, which makes manipulating HTML elements a lot easier.
Once we have jQuery available to us, add the following AFTER the previous script. Replace tfa_XXX with the alias of the ID field, YOUR_INSTANCE with your instance name, and THIRD_FORM_URL with the URL of the form we’re about to create!
<script>
$(document).ready(() => {
const htmlArr = $(‘.htmlContent > a’);
const linkArr = $(‘input[id^=tfa_XXX]’);
for (var i=0; i<htmlArr.length; i++) {
htmlArr[i].href = ‘https://YOUR_INSTANCE.tfaforms.net/THIRD_FORM_URL?id=’+linkArr[i].value;
}
});
</script>
This code snippet will modify where each “select” link on the page takes us.
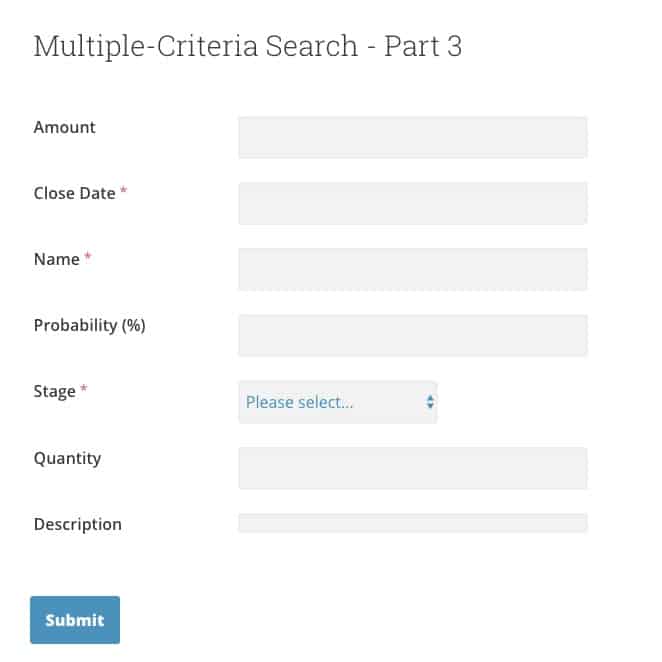
Third form setup
This setup is completely up to you! We’re only using this form to display the Opportunity information that users select in the second form.
Example:
Hint: Use the Salesforce Import Tool to speed up this process and automatically configure the Salesforce Connector.
Setting up connectors
There are no connectors on the first form.
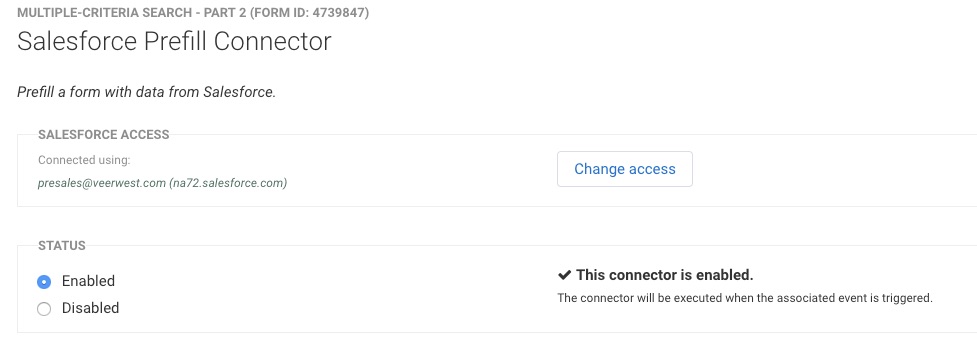
For the second form, we are going to use the Salesforce Prefill Connector. (Learn more about our Salesforce Prefill Connector.) Once the Prefill Connector is created, we need to enable it and set it up.
The setup is very simple! Since we have two search terms, we need to pass them both to the connector.
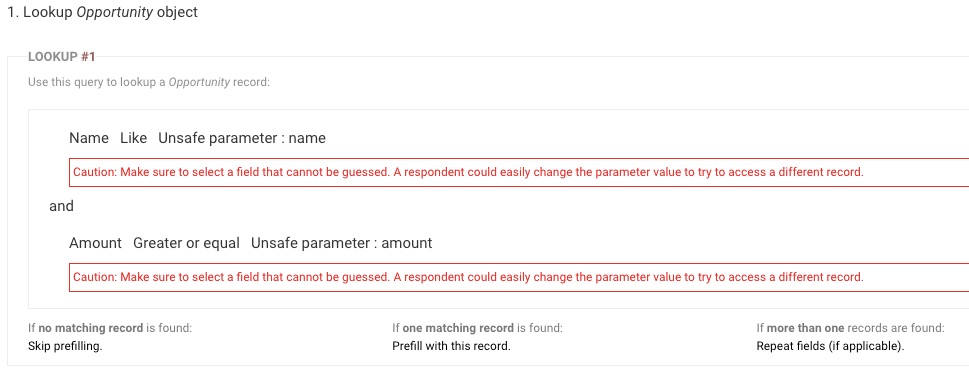
Notice that we are using the LIKE operator for the first parameter and GREATER THAN for the second.
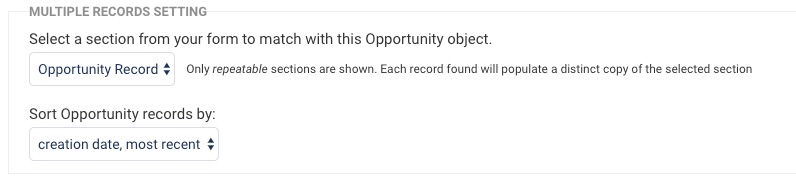
Since we need a way to display multiple Opportunity records in a repeatable section, we need to set up the multiple records setting.
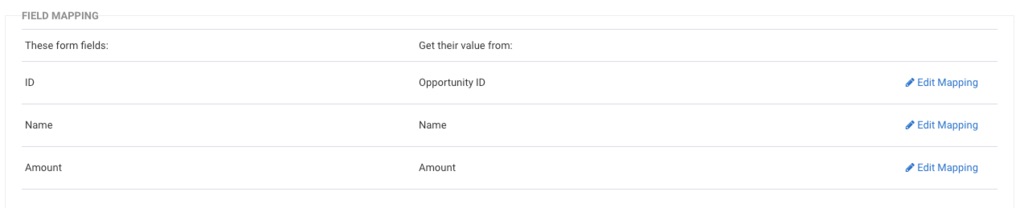
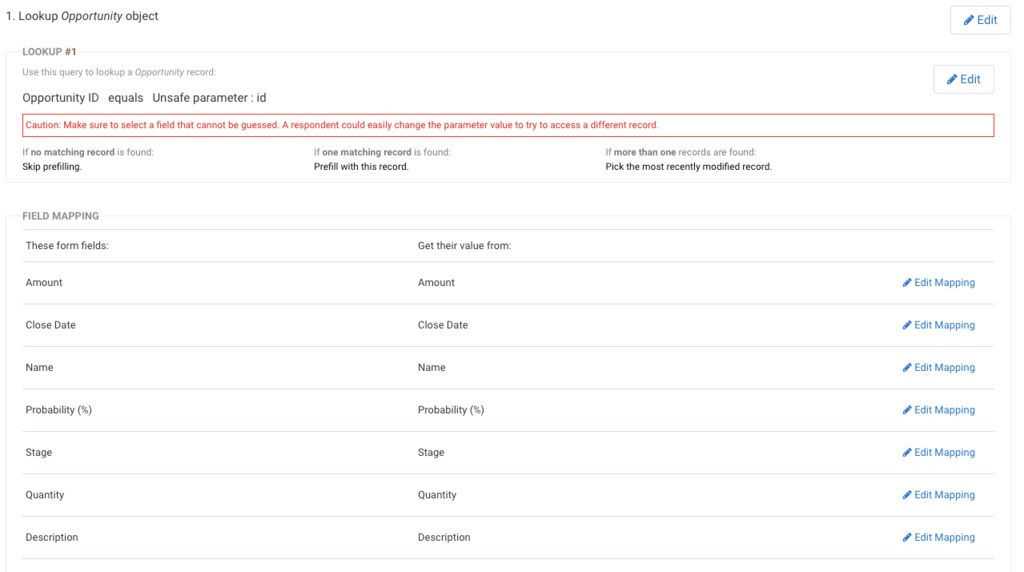
Lastly, we need to map the fields.
The third form will also have a simple Salesforce Prefill Connector. We are going to prefill the form based on the id of the record. Your mappings might vary here.
Passing data between forms
Next, we’ll be using form redirects to pass the search terms from the first form to the second.
1. Go to the Notifications page for our first form.
2. In the second field of the acknowledgment section, put the following:

https://YOUR_INSTANCE.tfaforms.net/SECOND_FORM_ID?name=%25%%tfa_NAME%%%25&amount=%%tfa_AMOUNT%%
3. Replace YOUR_INSTANCE with your instance name, SECOND_FORM_ID with the id of the second form, tfa_NAME with the opportunity name search term field and tfa_AMOUNT with the other field on the first form. Notice that we’re using %25 around the first parameter – that is because the LIKE operator in Salesforce expects % around the term. We need to encode, hence %25 represents %.
4. Click Apply.
The results
Once you’ve completed the setup, you should test your forms. The flow should go like so:
Enter a search term and a “greater than” figure for the amount field.

2. You should see all records that match those search terms displayed on the next form.
3. When you choose a record by clicking on Select, you should be taken to the third form.
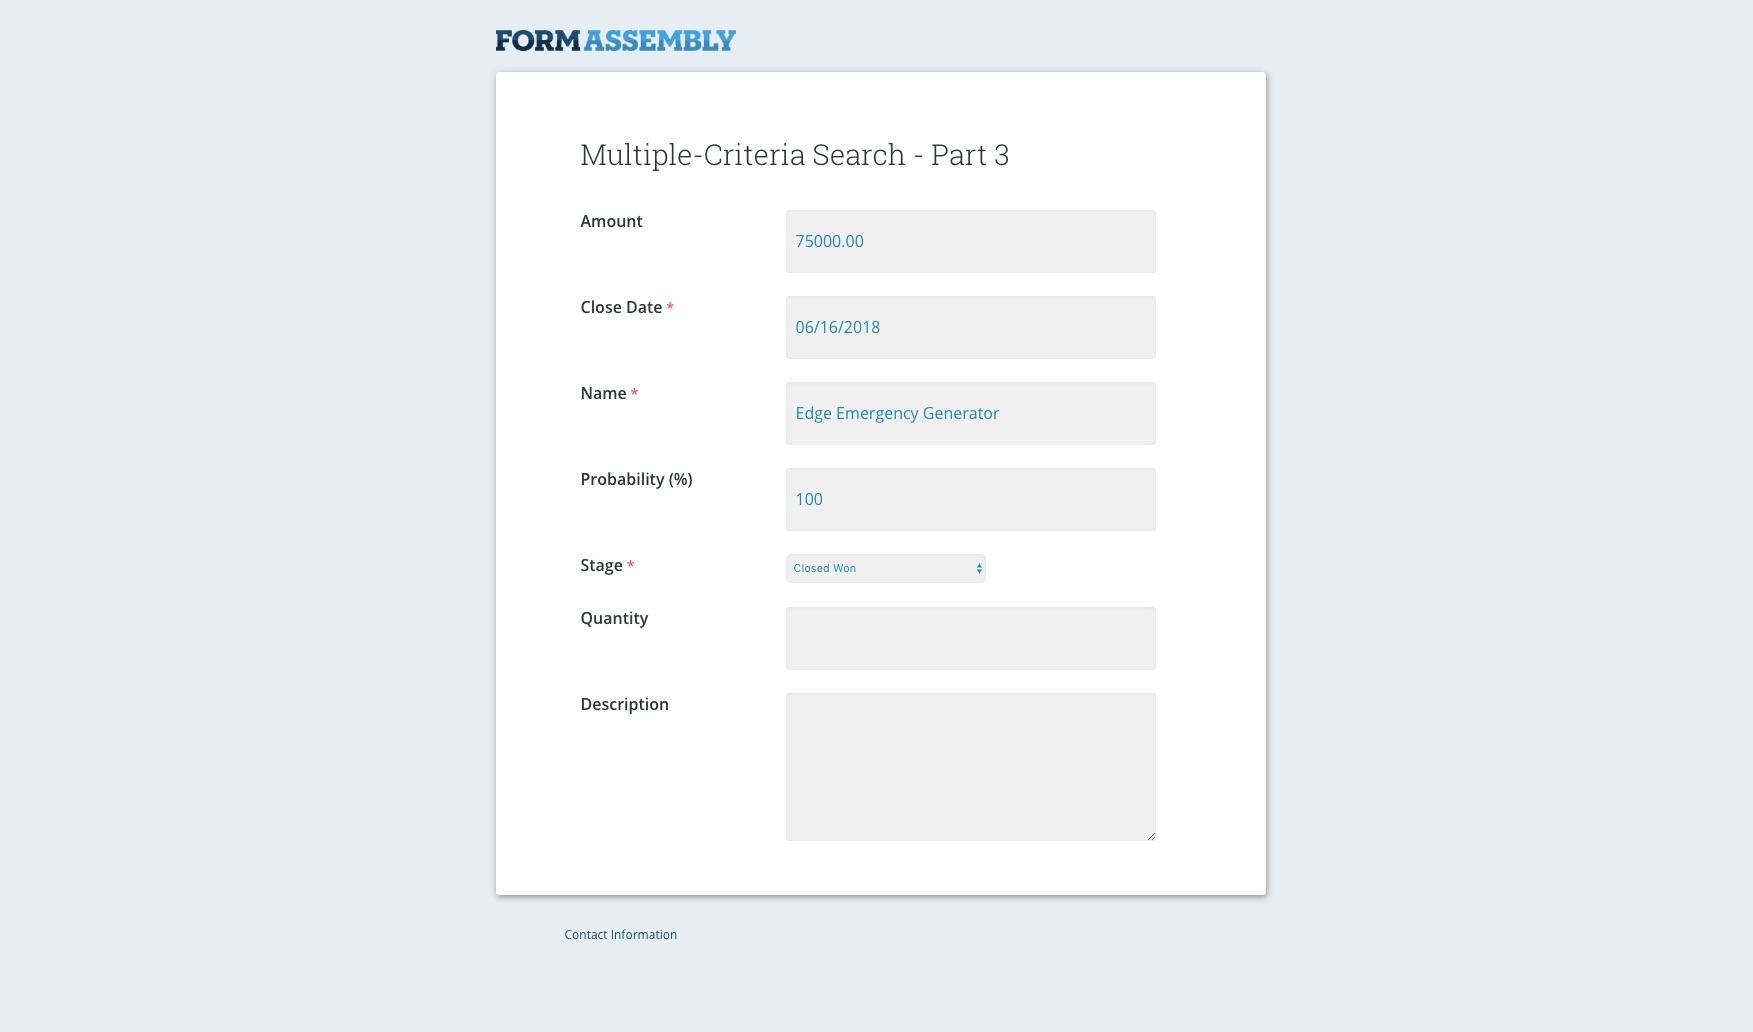
4. The third form will show additional information about the selected opportunity.
If you liked this Salesforce & FormAssembly tutorial, we have plenty more on our blog. Check out this tutorial on updating information in Salesforce without a license.
Don’t have a FormAssembly account? Sign up today!

