If your team is constantly fielding questions like “What’s the status of my application?” or “How do I update my contact info?”, it may be time to introduce a self-service solution. With FormAssembly’s new Salesforce integration, you can create a no-code dashboard that puts users in control of their own information, all while saving your team time and increasing satisfaction.
Why Build a Workflow Dashboard?
A well-designed dashboard centralizes access to information and key actions for users, whether they’re applicants, students, staff, or donors. Instead of submitting support requests, users can check their own status, update data, or complete next steps through a dynamic, personalized interface.
Benefits include:
- Reduced manual data entry and repetitive support tickets
- Faster response times for users
- Clearer communication and improved transparency
- Increased organizational trust
Step-by-Step: How to Build a No-Code Workflow Dashboard
1. Plan Ahead for Workflow Success
Before you build, take time to outline:
- The forms you’ll need
- Workflow steps (e.g., login, view status, submit actions)
- Conditional logic paths for different user types or statuses
Pro Tip: The more detailed your plan, the easier the build.
2. Create Your Landing Page
Start your workflow with a landing page that collects identifying info, such as email address and phone number. This allows the system to locate the user’s record in Salesforce and prefill data into the dashboard.
3. Build the Dashboard Form
This central form shows the user’s status and available actions (e.g., submit a new application, open a case, update contact info). Tailor it to your organization’s use cases.
4. Configure the Salesforce Prefill Connector
Prefill data into the dashboard from Salesforce using lookup steps:
- Lookup #1: Pull contact data
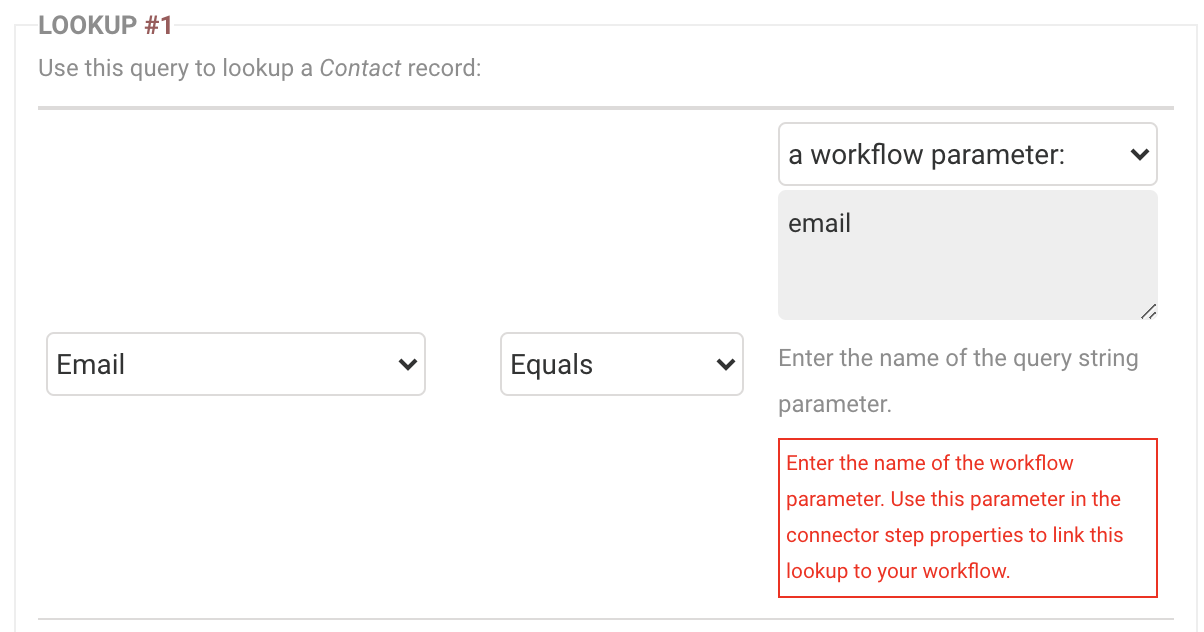
- Lookup #2: Pull related case data
- Lookup #3: Pull related application data
Use “repeat fields” to prefill lists of related records.
5. Add Conditional Workflow Steps
Direct users based on their status or selected actions:
- New user? Create a contact record.
- Existing user? Let them update info, submit a case, or complete another action.
Use a fallback path to send users back to the dashboard if no condition is met.

6. Build and Connect Action Forms
Create dedicated forms for each user action. Configure Salesforce connectors to submit data and use page redirects to return users to the dashboard or landing page.
7. Enable Form-to-Form Prefilling
Set up internal prefill settings on your forms so that values entered in one form pass to the next. This is essential for connector accuracy.
8. Test, Publish, and Share
Use a direct link or iFrame to embed your dashboard on your website. Test every path to ensure a smooth user experience.
Final Thoughts
With FormAssembly’s no-code workflow tools, organizations can build self-service experiences that reduce manual tasks, increase transparency, and empower users to manage their own data – all without writing a single line of code.
Whether you’re creating dashboards to streamline internal operations or improve the user experience for applicants, donors, or students, the combination of visual workflow building, conditional logic, and dynamic Salesforce integration makes it easy to launch flexible, scalable solutions. The result? Happier users, more efficient teams, and faster time to value.
Want to explore more advanced logic and automation? Check out our Knowledge Base or book a demo to see your use case in action.
Need help using FormAssembly?
Our Knowledge Base has step-by-step guides to walk you through the platform.