Need to route uploaded files to cloud storage automatically? With FormAssembly Workflows, you can easily integrate file storage services like Dropbox, Box, Google Drive, or Microsoft SharePoint – no coding required.
In this guide, we’ll walk through how to set up Dropbox and Box connectors, step-by-step.
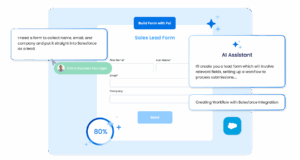
Read on for the overview, or watch the clip below from our annual virtual user conference, FormFest 2025, to take a closer look at how this works.
Start with a Form
Before you build your workflow, it’s best to have your form created and ready to go. In our example, we used a form built for FormFest.
Once your form is ready:
- Go to the Workflows tab.
- Create a new workflow and select the form you’ll be using.
- You can add optional steps here (like a thank-you message or notification email), but for this walkthrough, we’ll focus on connectors.
Step 1: Add a Dropbox Connector
After choosing your form, it’s time to add your first file storage connector.
- Click “Add Connector” and choose “Dropbox.”
- Authenticate the connector by linking it to an active Dropbox account. You’ll be prompted to authorize FormAssembly to access your Dropbox files – just follow the steps and click “Allow.”
- Once connected, go to the “Configuration” tab.
Here, you’ll choose:
- The form field that contains the uploaded file.
- The destination folder in Dropbox where you’d like to store the file.
Pro Tip: Use dynamic folder names to keep your uploads organized. Click the formula icon next to the folder name field and select form aliases (like last name, submission date, etc.) to create personalized subfolders automatically.
After saving your configuration, test your form to ensure the file uploads as expected. You should see a new subfolder and your uploaded file in Dropbox – just like that!
Step 2: Add a Box Connector
Need to send the same file to Box, too? No problem – you can add multiple file storage connectors in the same workflow.
- Under the Dropbox connector, click “Add Connector” and select “Box.”
- Follow the same process to authorize your Box account.
- In the Configuration tab:
- Select the file upload field again.
- Choose a root folder or existing folder as the destination.
Want dynamic folder creation in Box too? You can do that by entering a form alias (like the respondent’s last name) when naming your subfolder.
Once saved, test your form again. You’ll see the file land in the new Box subfolder based on your dynamic naming rule.
Optional: Return Variables
FormAssembly allows you to return useful values from your connectors, like:
- A public or private file URL
- Metadata associated with the file upload
These can be helpful if a teammate or system needs to access the uploaded file directly. While we didn’t use them in this example, they’re a powerful option to explore for more advanced workflows.
File Storage Made Simple
Whether you’re collecting ID documents, signed forms, or event materials, securely storing files in the right place is critical. With FormAssembly’s Workflow connectors, you can streamline your file management using popular platforms like Dropbox, Box, Google Drive, or SharePoint – no manual work or custom code needed.
Ready to build your own file-routing workflow?
Log in to FormAssembly and give it a try or check out our Knowledge Base for more guidance.