Have you ever needed to create a Salesforce-connected form to collect leads or contacts and start using it fast? You’ll be happy to know you can create a form, link it to Salesforce, and have it up and running in under five minutes. You may have noticed an option in the left sidebar of your FormAssembly account called Import > Import from Salesforce. In this tutorial, we’ll show you how to use the Salesforce Import Tool to create a Salesforce form more quickly and easily than you’ve ever done before.
Get Setup
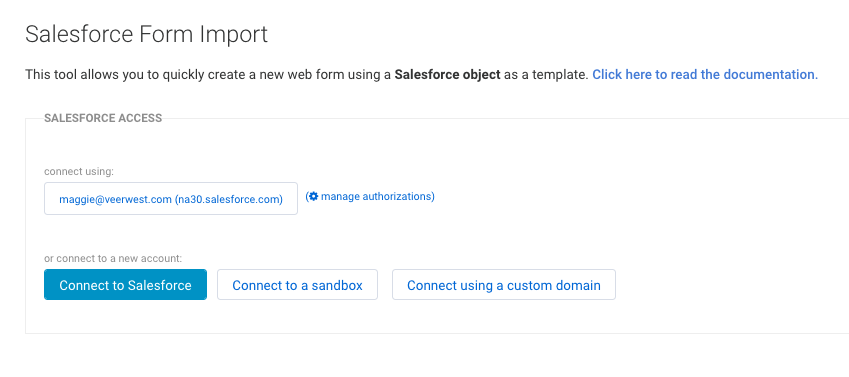
First, log into FormAssembly. On the Form List page, click “Import”, then “Import from Salesforce”.
You’ll be asked to authorize Salesforce access using either an existing authorization or a new account.
Complete Salesforce Import
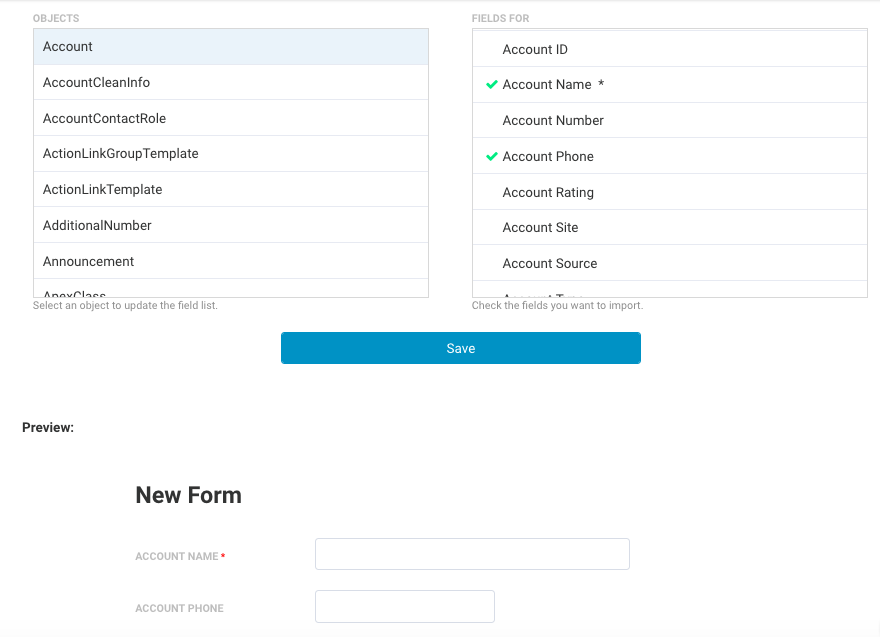
The next screen will contain a list of all the Objects defined in your Salesforce account. Once you’ve selected the object you’d like to update or create with your form, you’ll see a list of the available fields. Click to select the fields you would like your users to complete.
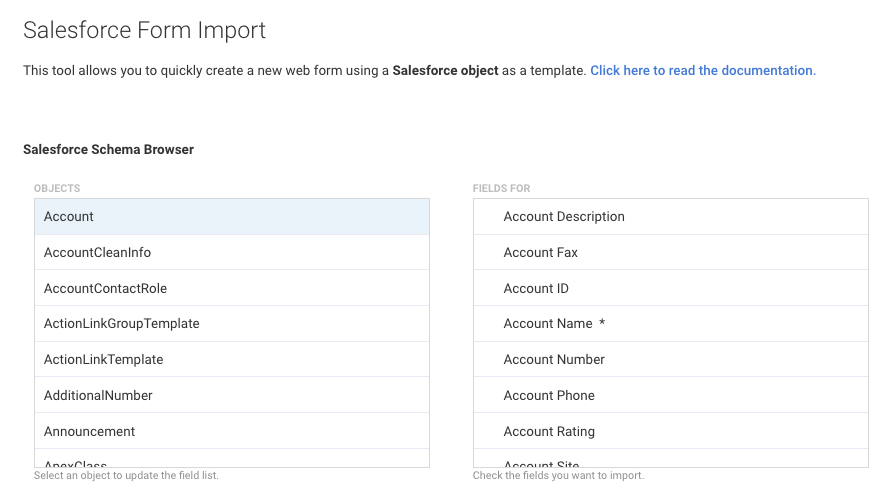
A preview will appear below the lists. Clicking a field a second time will deselect it and remove it from your form.
Just as when you manually map a form to Salesforce, you can use multiple different Object types with the Salesforce Import Tool. If you choose to do this, you will need to go through additional setup steps in Salesforce Connector after setting up the form. This is a best practice measure to review and ensure your objects and fields map according to their relationship in your Salesforce account.

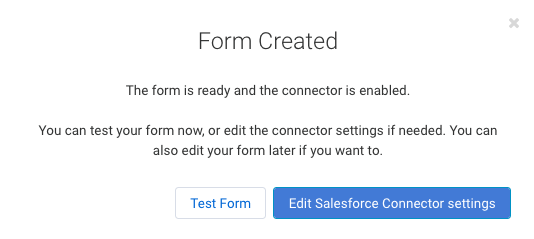
Once you’ve chosen the fields you would like to have on your form, click “Save.” You’ll then have the option to either test the form or edit the connector settings. For this tutorial, we’ll assume you want to adjust the connector settings, so click the “Edit Salesforce connector settings” button.
Edit Salesforce Connector Settings
If you included fields from different objects (such as Contact and Account), you will need to set up that relationship in the Salesforce Connector.
To do that, go to the second and any following objects you’ve created and map a new field for the parent ID (this may be a differently named field depending on the objects you’re using).

After setting up the connector, you may also want to change the form title, which, by default, would be “Imported Form (date time)”, and you can also change the form titles, and other details in the form builder.
Test Form
Once you’re happy with your modifications, save the form and exit the connector set-up. Now you’re ready to send a test submission.
Once you’ve submitted the form, you should immediately see a new record created in Salesforce. If you don’t, go back to Connector page for your form. There, click “Logs” If your form is successfully connected to Salesforce, you’ll see a green entry that says “Created [Object name] record” followed by the record’s ID.

If you get a red entry instead of a green entry in the log, this means an error occurred. If the error persists, open a support request. We’re happy to help!
Let us know on Twitter if you have ideas or a use case of your own like this that you would like to share! Liked this post? Check out another tutorial in the How’d You Do That? Series: “How to Send out a Pre-filled Web Form with Salesforce”